Using Source-Nexus I/O with Logic Pro
This article is part of the Source-Nexus I/O User GuideThis guide shows you how to set up Source-Nexus I/O with Logic Pro for seamless audio streaming and remote recording sessions. Logic Pro's flexible routing capabilities make it ideal for integrating with Source-Nexus I/O.
Considerations
Make sure you check the "Audio Unit" version of the Source-Nexus I/O plugin when installing the Source-Nexus Suite. You can find step-by-step instructions here.
Also, keep in mind that Logic requires that Software Monitoring be enabled and "Only load plug-ins needed for project playback" be turned OFF. Both of these are critical — without them, the plugin won't pass audio. You can find those in:
- Software Monitoring: Logic Pro Settings > Audio > Devices tab
- Only load plug-ins: Logic Pro Settings > Audio > General tab
Setting up Source-Nexus I/O on an Aux Channel
One of the most common use cases for Source-Nexus I/O is to record your talent from Source-Connect, Source-Nexus Gateway, or any other similar application into your DAW.
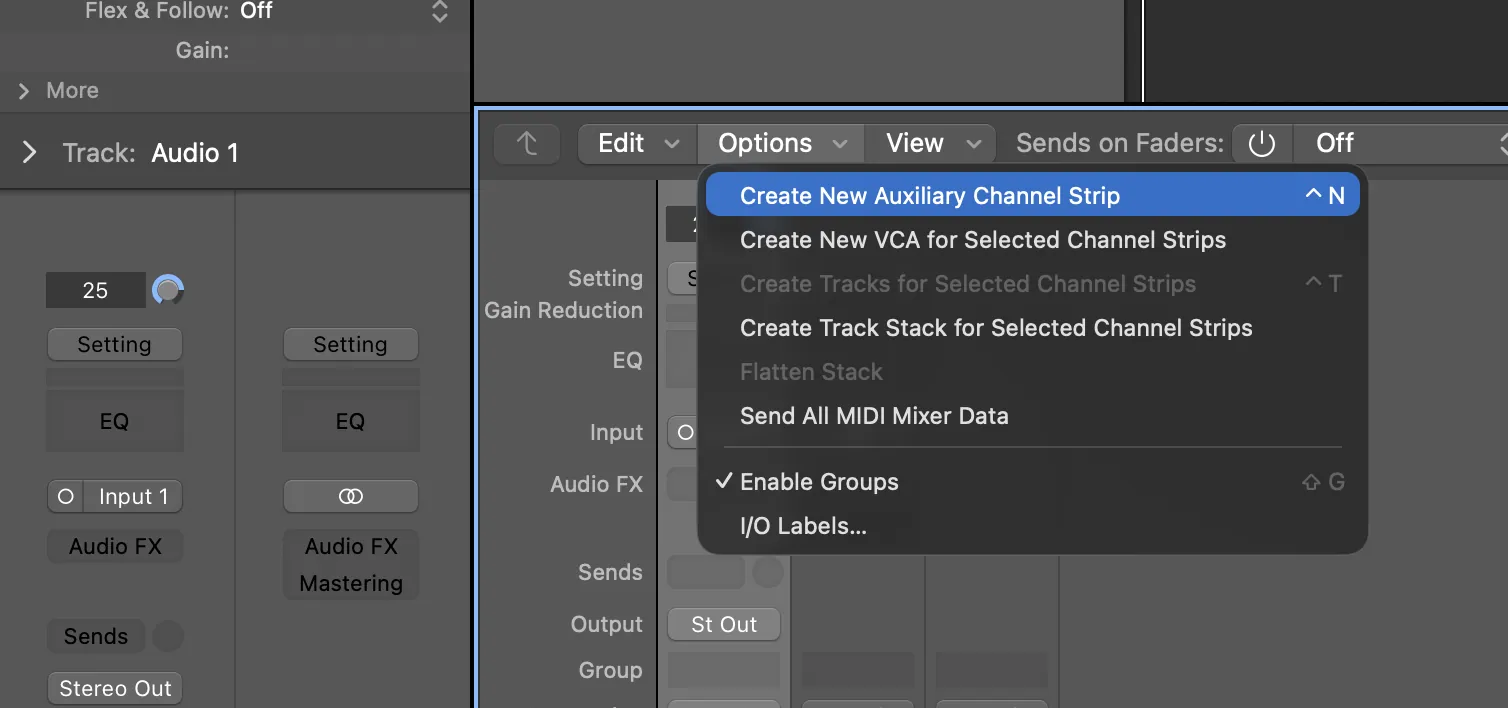
- Add a new aux track in Logic Pro. You can do so by typing "x" to show the mixer, then click Options > Create New Auxiliary Channel Strip
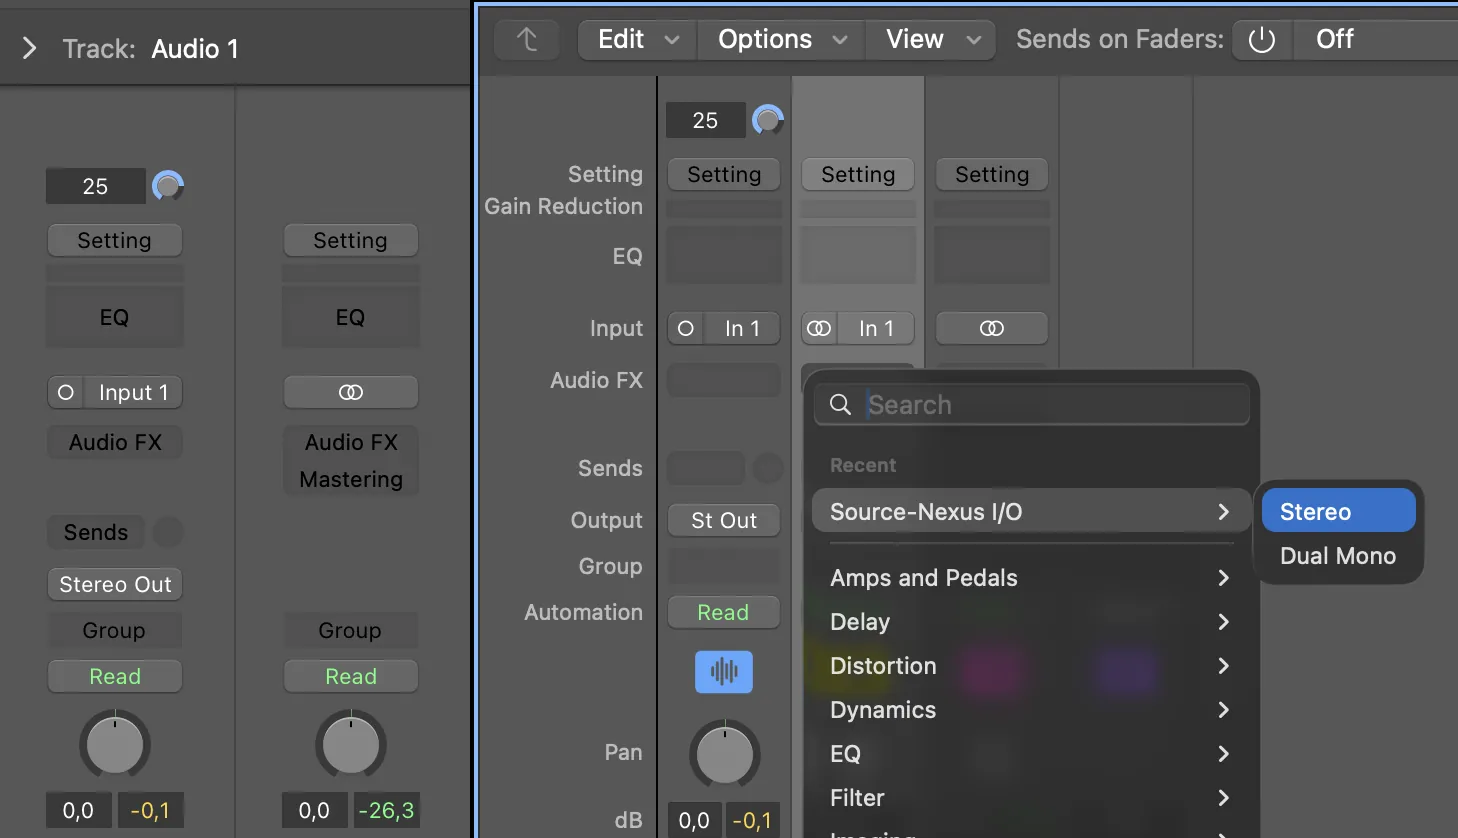
- Place the Source-Nexus I/O plugin on that track. By default, the plugin will be set to "Source-Nexus A" (send) and Source-Nexus B (receive). For a quick setup, do not modify those - you can create custom devices in the Source-Nexus Control Panel.
- In the external app (Zoom, browser, another DAW, etc.), set the audio output to Source-Nexus B. Make sure you don't route the signal into itself — you must not set both the input and output of your application to the same driver.
Configuring Bus Routing
For more advanced setups where you want to route audio through Logic Pro's internal buses, you can configure Source-Nexus I/O to work with Logic's bus system. This approach provides greater flexibility for complex mixing scenarios and allows you to easily route multiple sources through the same Source-Nexus I/O instance.
Bus routing is particularly useful when:
- You want to send multiple tracks to the same remote destination.
- You need to process audio before sending it out.
- You want to create a dedicated monitoring mix for remote participants.
- You need to separate your local monitoring from what's being sent remotely.
Input Configuration
To route incoming audio from Source-Nexus I/O through a bus:
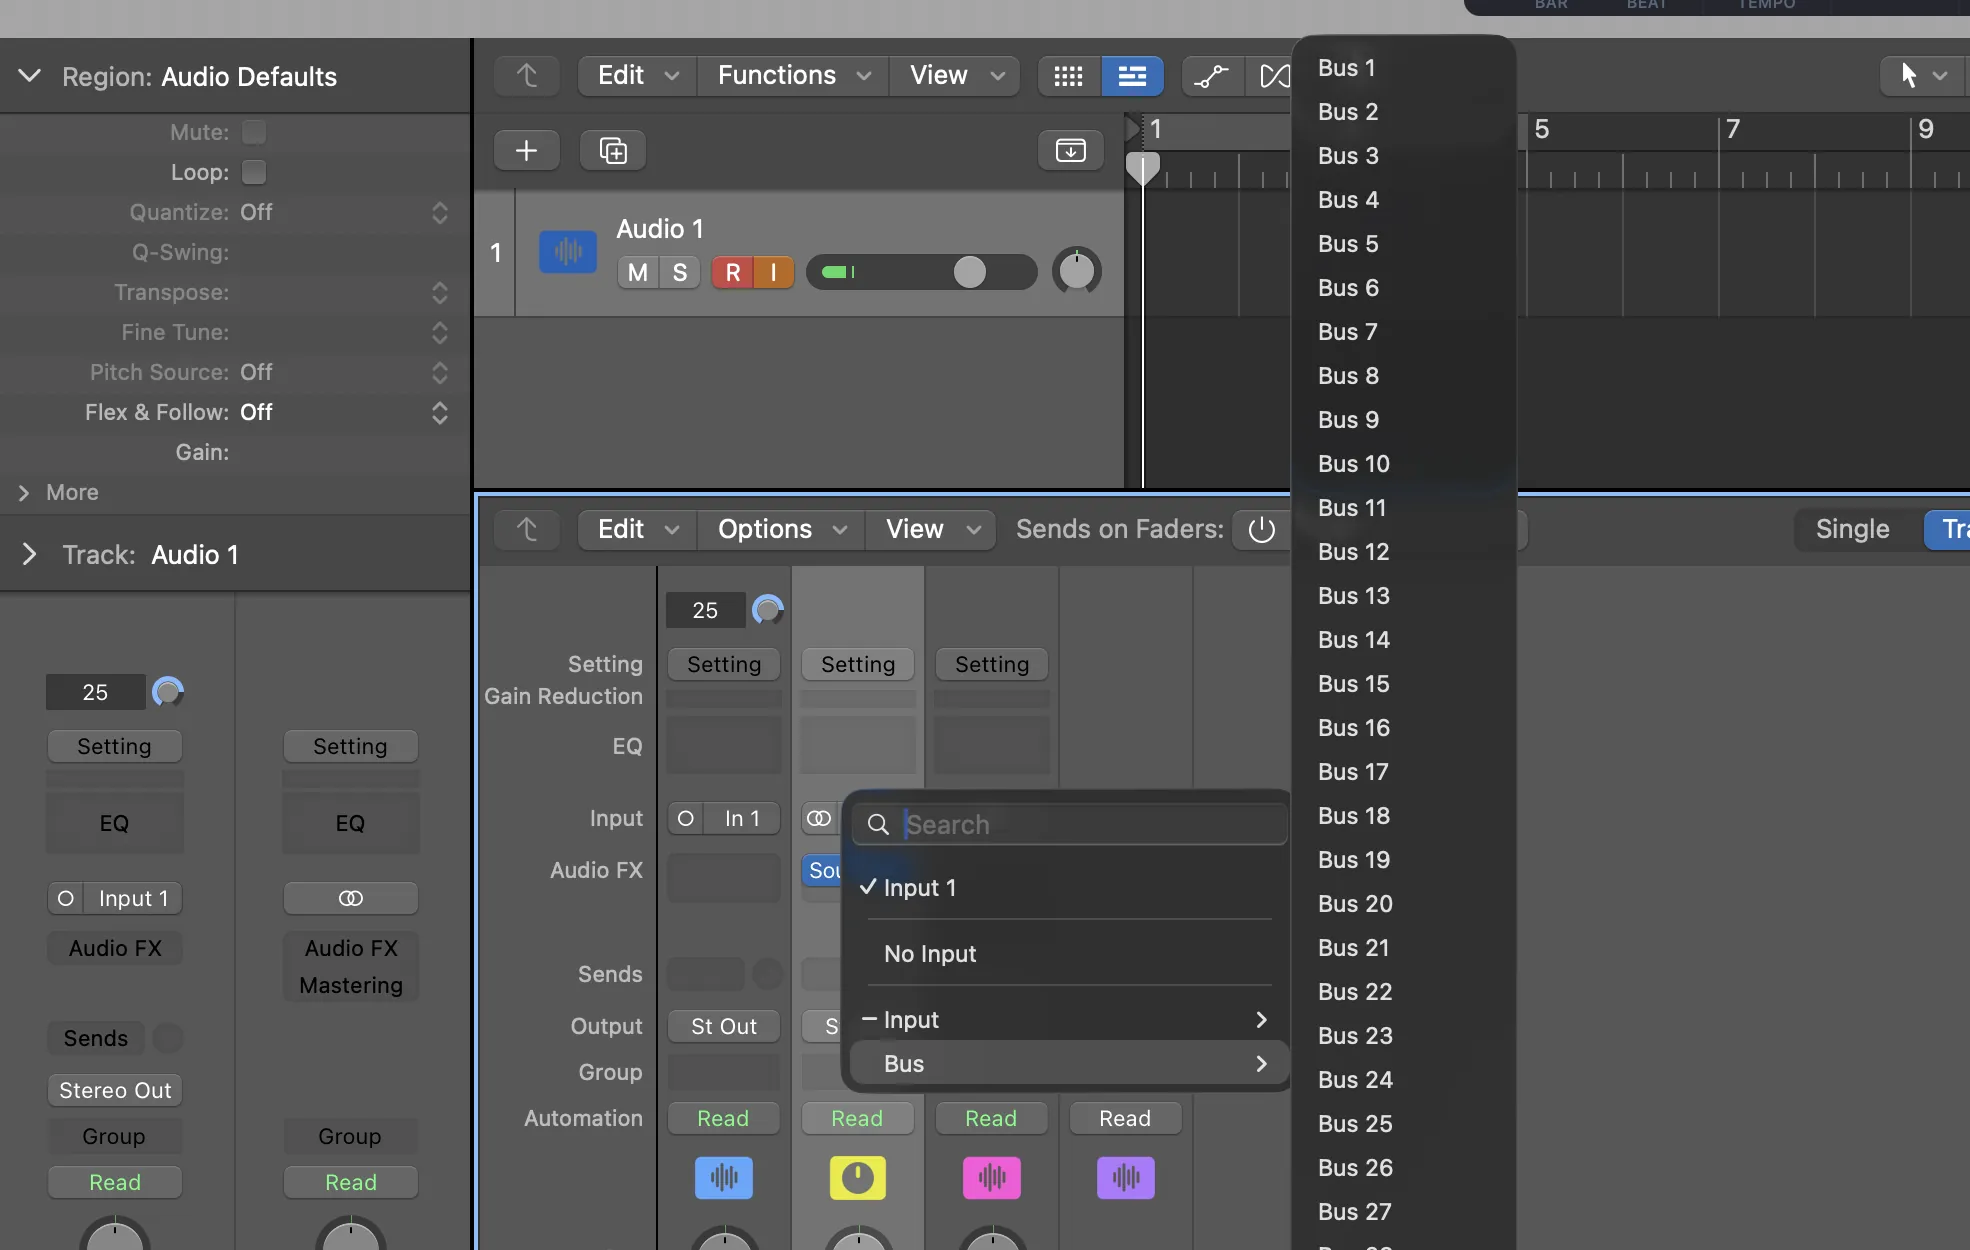
- Create an Auxiliary channel in Logic Pro (Track > New Auxiliary Channel Strip).
- Add the Source-Nexus I/O plugin to this aux channel.
- Set the aux channel's Input to Bus 1 (or any available bus of your choice).
- In the Source-Nexus I/O plugin, configure the Receive settings to receive audio from your remote source.
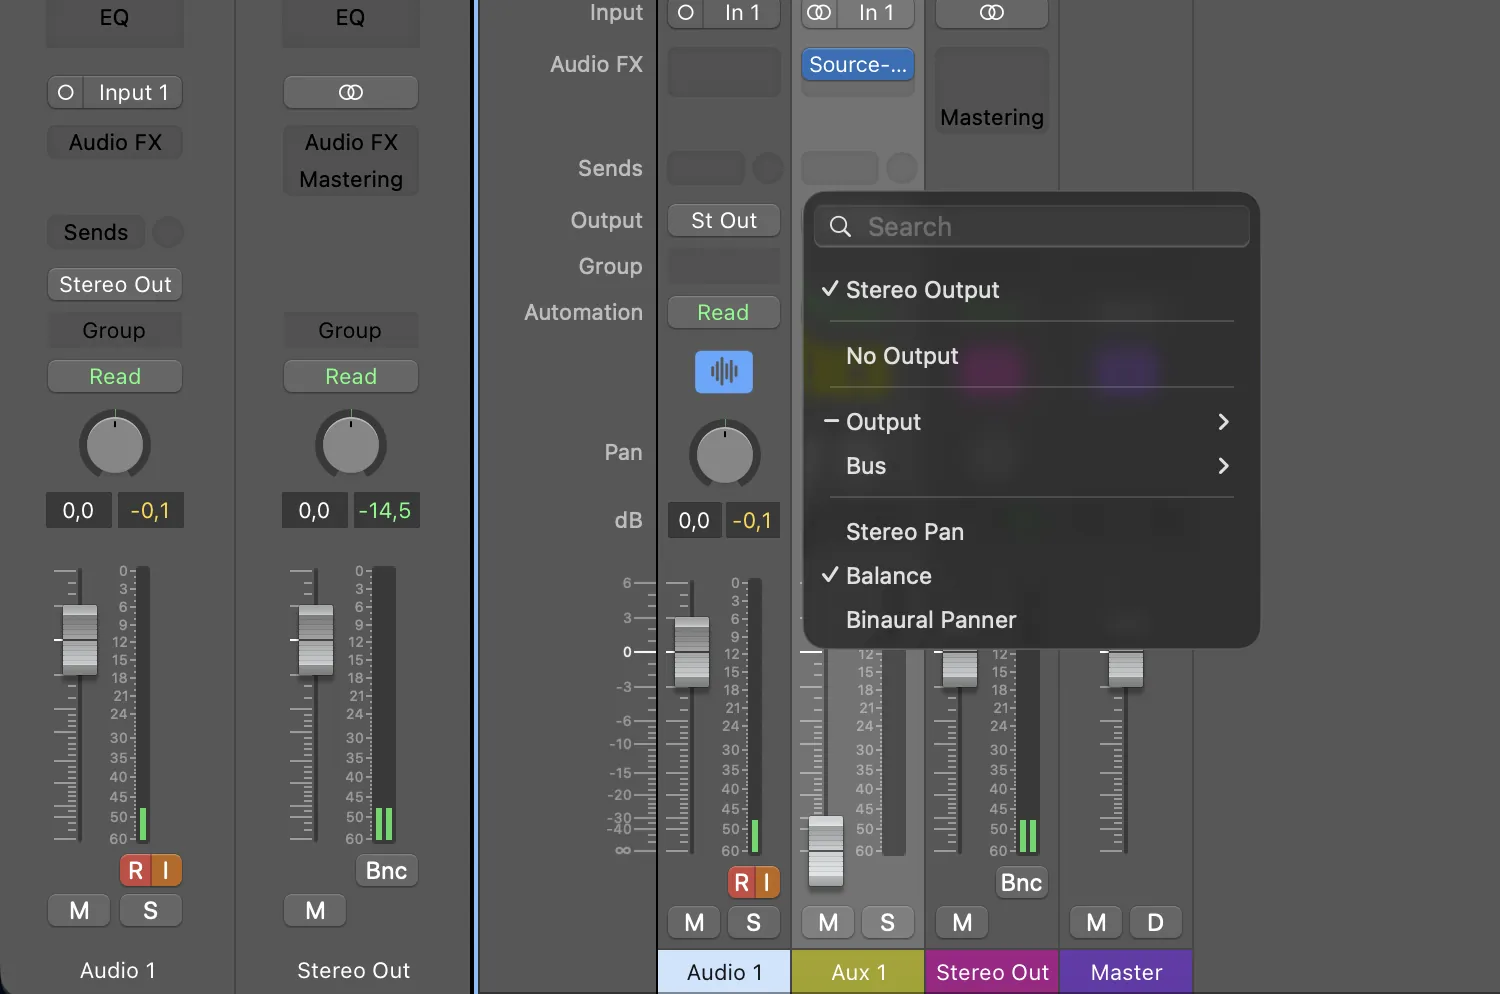
- Set the aux channel's Output to Stereo Out (or another bus if you want further routing).
Pro Tip: Using Bus 1 as your input allows other tracks to easily send to this same bus, creating a consolidated input point for Source-Nexus I/O.
Output Configuration
To send audio out through Source-Nexus I/O using buses:
- Set the aux channel's Output to Bus 2 (or any available bus different from your input bus).
- In the Source-Nexus I/O plugin, configure the Send settings to transmit audio to your remote destination.
- The plugin will now receive audio from Bus 1 and send it out via Source-Nexus I/O.
Sending Audio from Tracks
Once you have Source-Nexus I/O configured on an aux channel with bus routing, you can send audio from any track in your Logic Pro project to the remote destination. This is done using Logic's send system to route audio to the bus that feeds your Source-Nexus I/O plugin.
Setting Up Sends
- Select the audio track that contains the audio you want to send remotely.
- In the track's channel strip, locate the Send section.
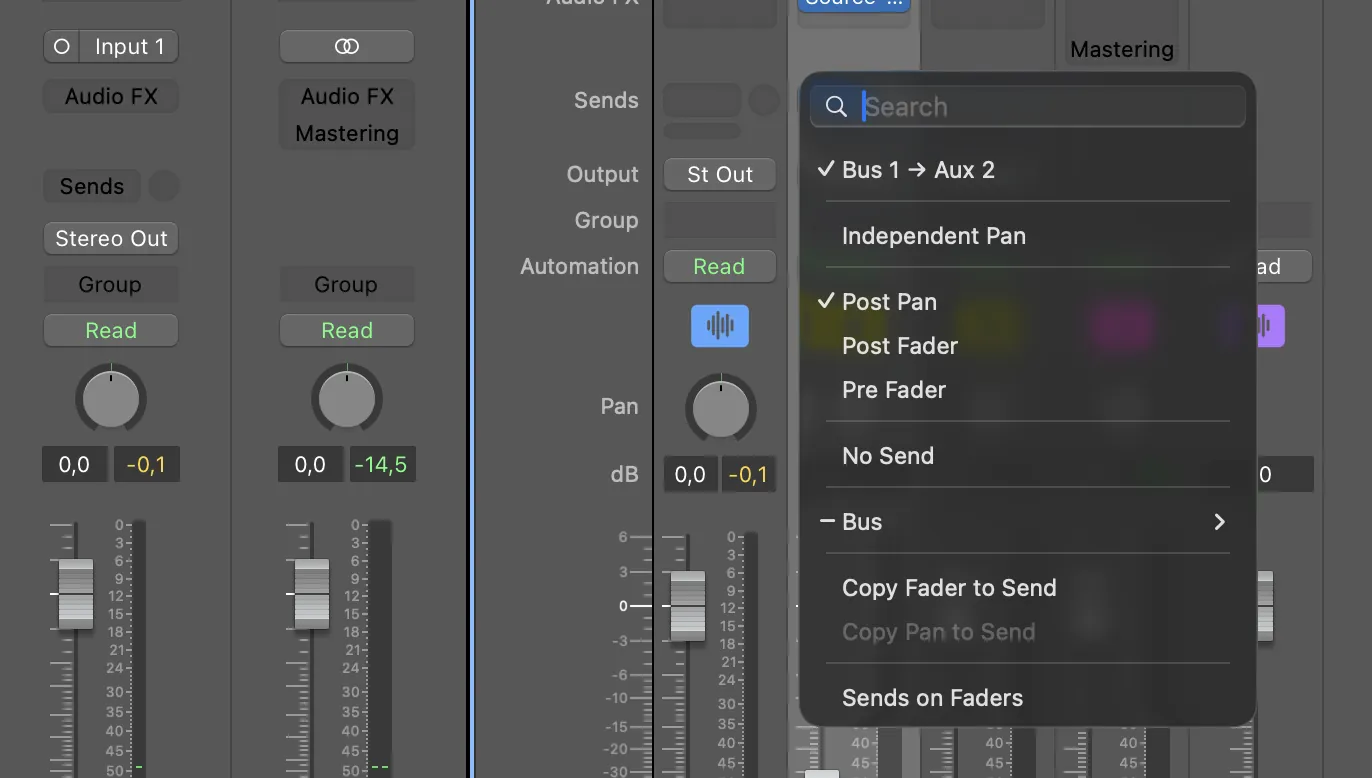
- Click on the first available send slot and select Bus 1 (or whichever bus you configured for Source-Nexus I/O input).
- Adjust the send level to control how much of that track's signal goes to the remote destination.
- The send can be set to Pre-Fader or Post-Fader depending on your needs:
- Pre-Fader: Send level is independent of the track's main fader.
- Post-Fader: Send level follows the track's main fader movements.
Multiple Track Sends
You can send multiple tracks simultaneously:
- Add Bus 1 sends to as many tracks as needed.
- Each track's send level can be controlled independently.
- This creates a custom mix that's sent to your remote destination.
- Your local monitoring mix can be completely different from what's being sent remotely.
Recording Incoming Audio
To record the audio coming back from your remote source through Source-Nexus I/O, you'll set up an audio track that receives from the bus where Source-Nexus I/O outputs its received audio.
Basic Recording Setup
- Create a new audio track in Logic Pro (Track > New > Audio Track)
- Set the track's Input to Bus 2 (or whichever bus you configured for Source-Nexus I/O output)
- Enable Input Monitoring on the track to hear the incoming audio
- Arm the track for recording by clicking the Record Enable button (red circle)
- Press Record in Logic Pro's transport to start capturing the incoming audio
Monitoring Considerations
When recording incoming audio, be aware of these monitoring settings:
- Software Monitoring: Must be enabled in Logic Pro Settings > Audio > Devices
- Low Latency Mode: Consider enabling during recording to reduce delay
- Input Monitoring: Turn off after recording to prevent feedback loops
Recording Multiple Sources
If you're receiving multiple channels from Source-Nexus I/O:
- Create multiple audio tracks, one for each channel you want to record
- Set each track's input to the corresponding bus (Bus 2, Bus 3, etc.)
- Arm all tracks for recording simultaneously
- This allows you to record separate tracks for each remote participant or source