Comprehensive Q Manager Guide for Source-Connect Standard 3.9
This article provides a complete overview on using Source-Connect 3.9 with Auto-Restore. With Source-Connect 3.2 and up, a new version of the Q Manager provides easier and faster Restore and Replace operations, plus additional back-up options.
The online Q Manager Help guide is also available directly as a link from the Q Manager setup panel and will take you to the comprehensive Q Manager guide online. You can refer to this guide whenever needed for quick help, or feel free to contact support for an overview and demo session.
If you have any questions on working with the Q Manager and Auto-Restore and AutoReplace please contact Support.
What is the Q Manager?
With traditional long-distance recording, whether with Source-Connect, ISDN or any network-based transmission, the send signal is subject to various issues which may cause dropped packets and therefore ‘glitches’ in your recorded audio. Previously the only method to ensure a fully complete recording was to ensure your connection partner was also recording locally, so you could transfer this audio after your session and manually replace it in your edit. Source-Connect with Q is the only available automated method to ensure that your recordings are perfect every time, with our Auto-Restore functionality.
What is Auto-Restore and how does it work?
First, an overview of how audio is transferred and recorded over packet-based transmission lines. 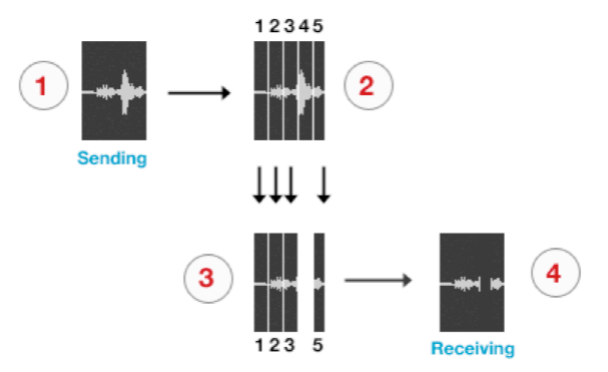
- The audio signal is sent through Source-Connect, and is split into packets.
- These packets are sent sequentially to your connected partner over the internet.
- If a network error occurs, a packet may not arrive in time.
- If this occurs you will hear a minor glitch in the received audio signal.
- The audio file is scanned when recording completes.
- If any missing packets are detected they are requested from your connected partner, who has stored them during the connection.
- Your file is restored and is now available for flawless playback.
Source-Connect has built-in error correction modes to try and resolve these dropped packet issues in real time, however under certain circumstances a packet may not be retrieved in time to recover the signal before it is recorded.
Auto-Restore resolves this problem by working in the background in non-realtime and restoring your recorded audio files.
Lifecycle of a recording with the Q Manager
This section is a step-by-step guide to why you would want to use Source-Connect with AutoRestore. It shows how the Q Manager works by describing the ‘lifecycle’ of a file recorded in Pro Tools and the subsequent restore and final replace process.
1. Request a Source-Connect session
When you request a Source-Connect session with a Source-Connect Pro user, you will be shown a dialog indicating that you are requested to send Restore data. 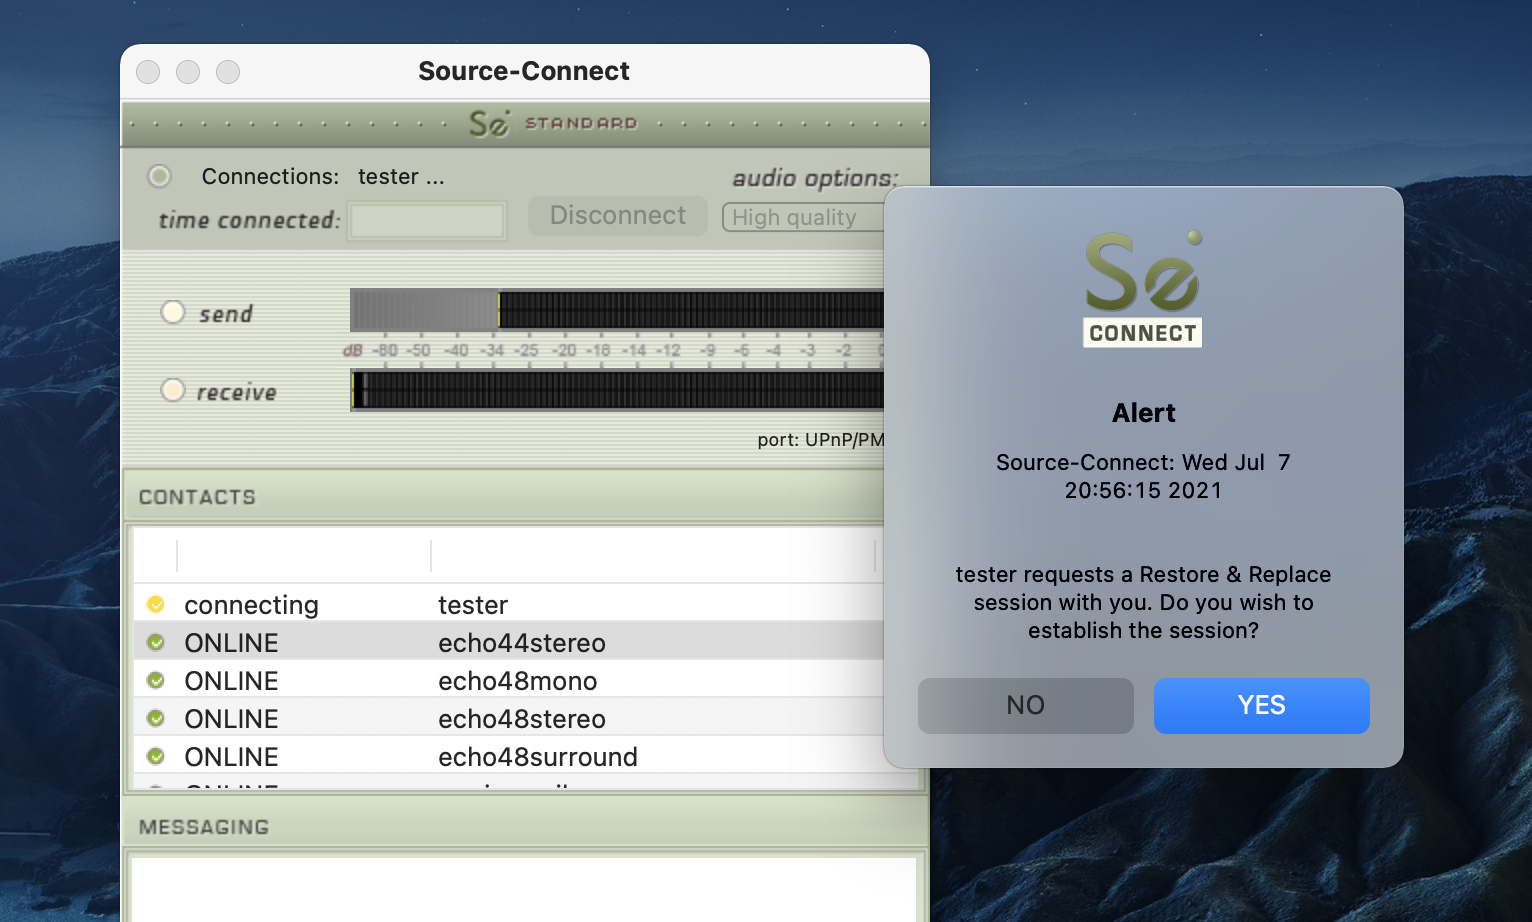
2. Ready to record
Once you accept you have now established a Source-Connect session with Restore enabled. You should now see a Q icon to the left of the Send meter, indicating that you can send Restore data. 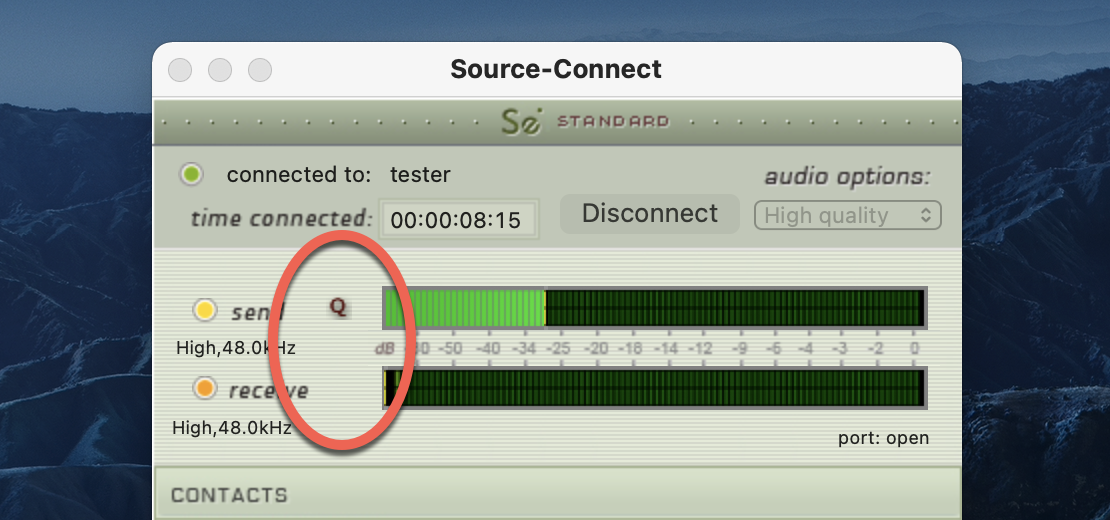
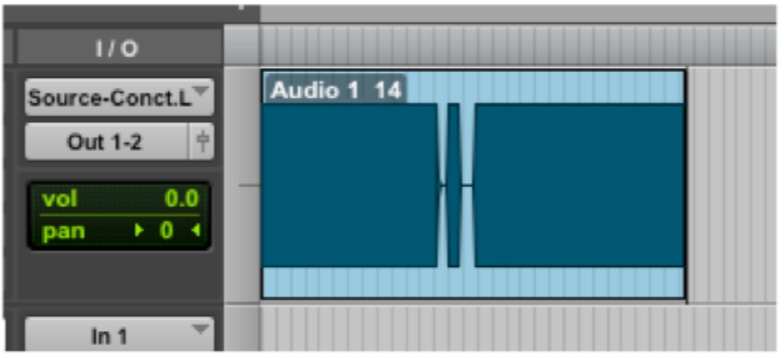
3. Recording an audio file
In this example we are sending a sine-tone signal via the Signal Generator plug-in to be recorded, and for the purpose of demonstration we are causing a significant number of dropped packets. You can see on the waveform in the timeline when the recording is significantly degraded: this is the audio received by your connection, and the drop-outs are caused by an unstable internet connection.
What your connection partner sees when recording a drop - out:
IMPORTANT: If your connection partner is not sure on how to record with Restore enabled, please refer them to the Source-Connect Pro documentation or contact Support for a demonstration. It is recommended that all Source-Connect Pro user enable Auto-Restore to ensure perfect recordings, every time.
4. Restoring the audio file in the background
Once you stop recording the Q Manager on the other side will start the restore process if required. Your connection partner can continue recording multiple files as the restore process does not interrupt your session in any way.
5. Taking a look at the restored file
Since we have recorded a sine-tone signal, it is simple to see visually how the restore process works. If your connection partner selects the filename in the Pro Tools bin and chooses ‘Recalculate waveform overviews’ they can now compare the files before and after the restore process visually:
Before and after the restore process:
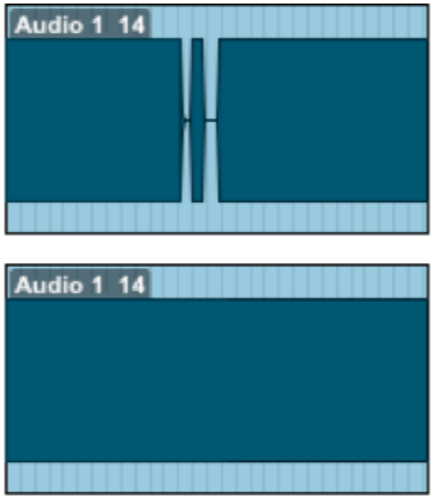
They can now see (and hear on playback) that they have a completely restored audio file with perfect playback.
How to open the Q Manager
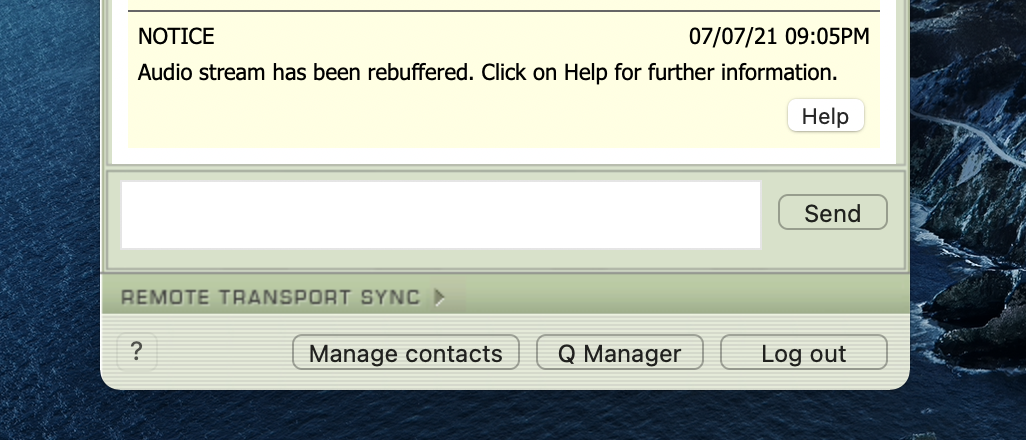
When you launch Source-Connect and login, open the Q Manager via the ‘Q Manager’ button at the very bottom. The Q Manager will open, and automatically login to your Source Elements account. You can then establish a connection with your Source-Connect partner.
Comprehensive Q Manager interface overview
This section is a complete overview of all available options in the "Settings" menu of the Q Manager and what you can do with each setting.
Settings panel
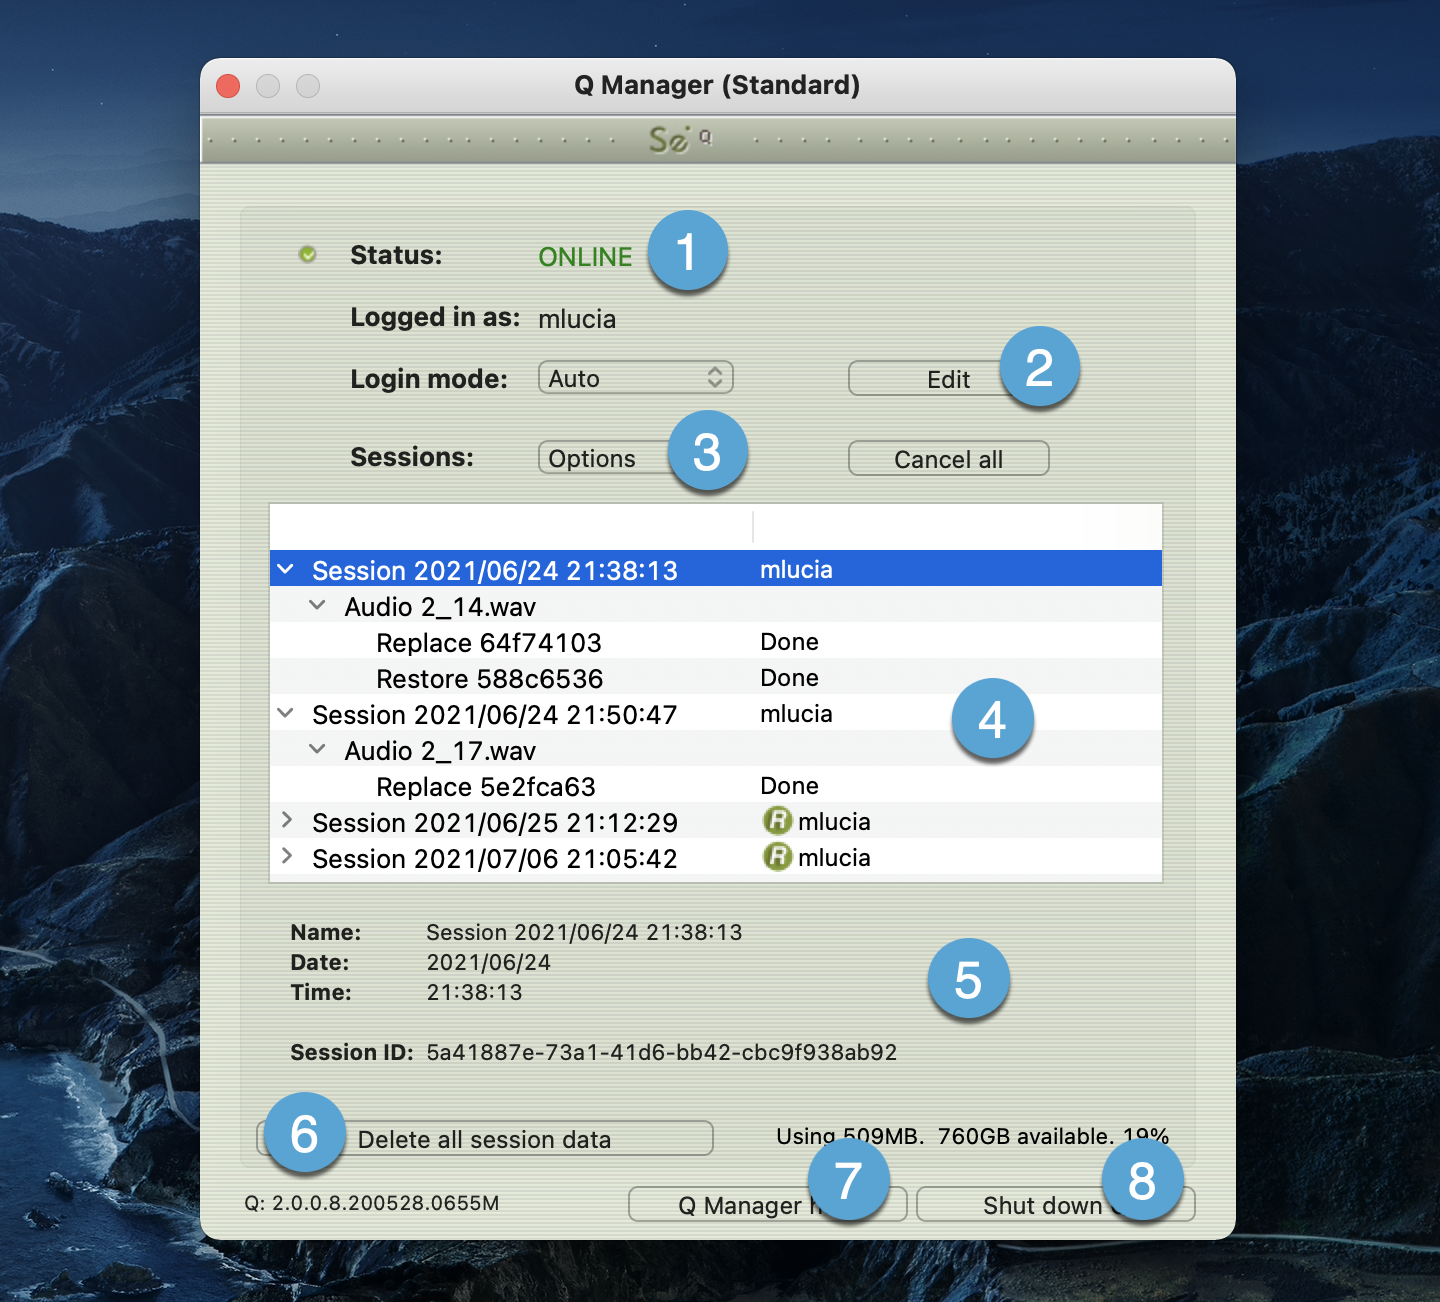
1. Login status
Verify that your account is logged in. If you have a login error, check your internet settings or contact support.
2. Login mode
In most cases you will leave Login mode on Auto. If your system is used by other users, you may wish to set a Manual login mode so that a single Source Elements account is used for all Q processes. This means that if another Source-Connect user was using your system for a session, previous session data will still be able to be accessed by their connection partners after you have logged in to Source-Connect.
3. Options
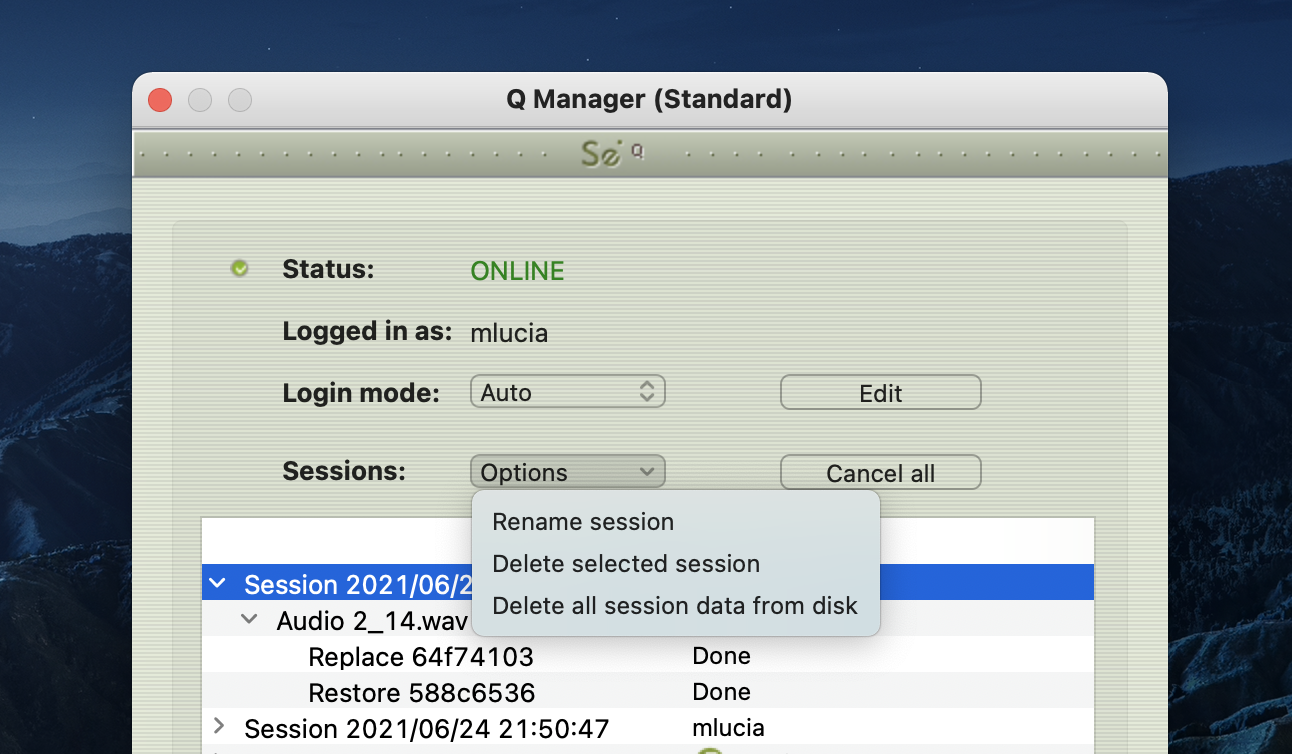
The options menu applies to the Session and Files that have accumulated as your connection partner on Source-Connect Pro is recording you.
Rename Session
The default session name is the date and time it was created. Rename it here. 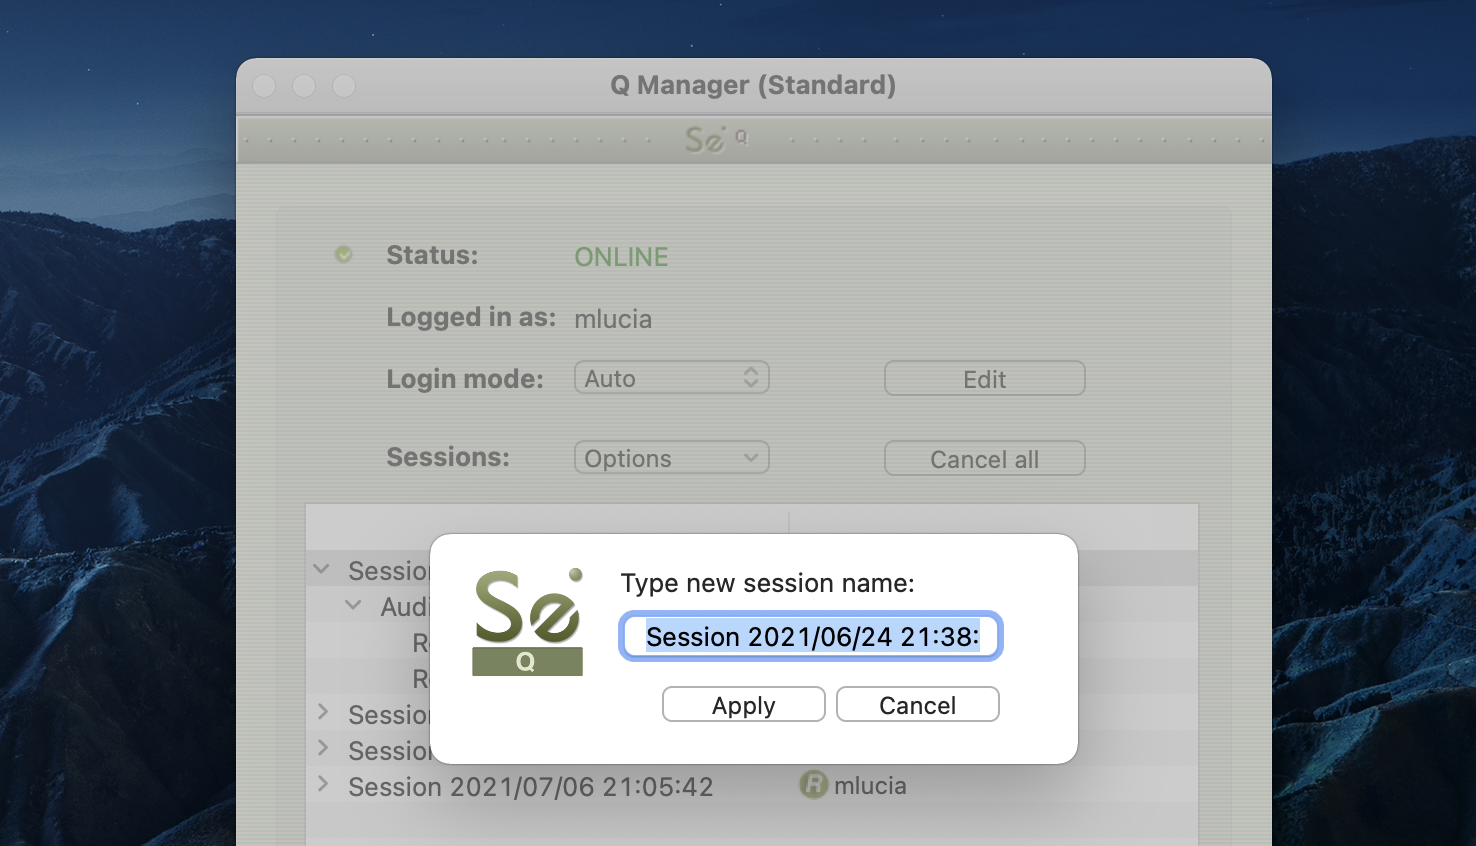
Delete selected session
This removes the session from the disk – once it has been removed your connection partner can no longer request Restore data for this session. Useful for freeing up disk space if required, without deleting newer sessions. 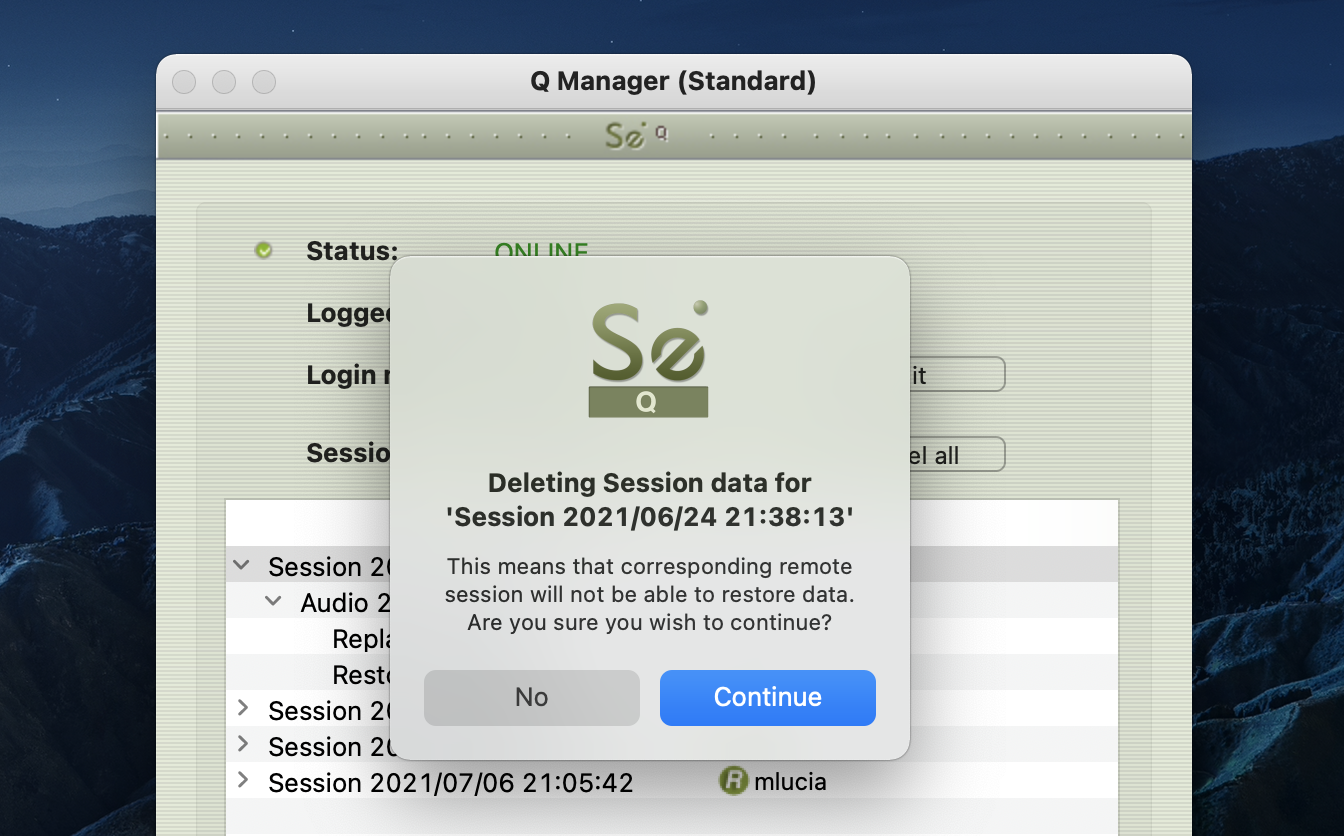
Delete all session data from disk
Same as the Delete all Session Data button on the lower section of the panel. This option is not available when you are currently connected with Source-Connect. 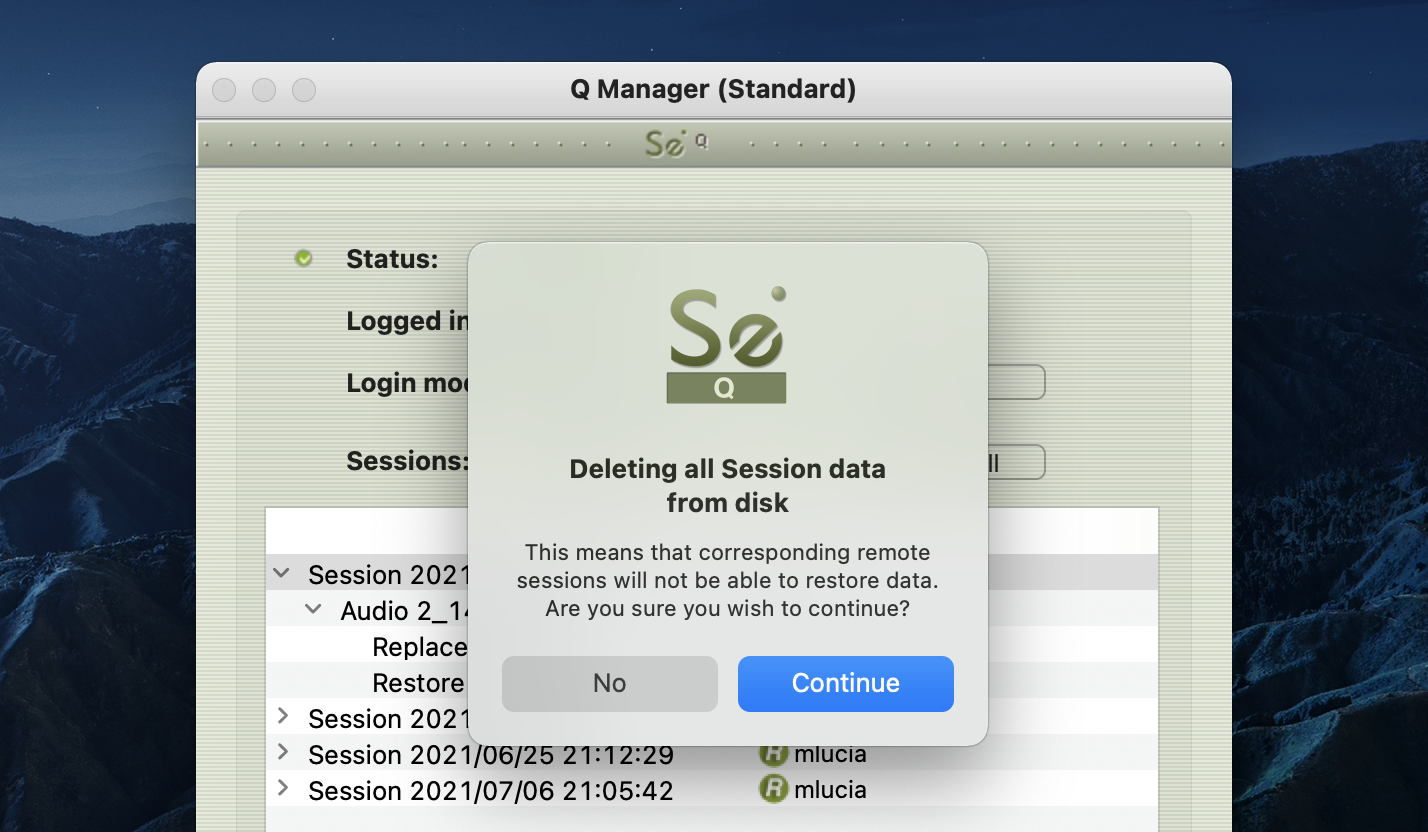
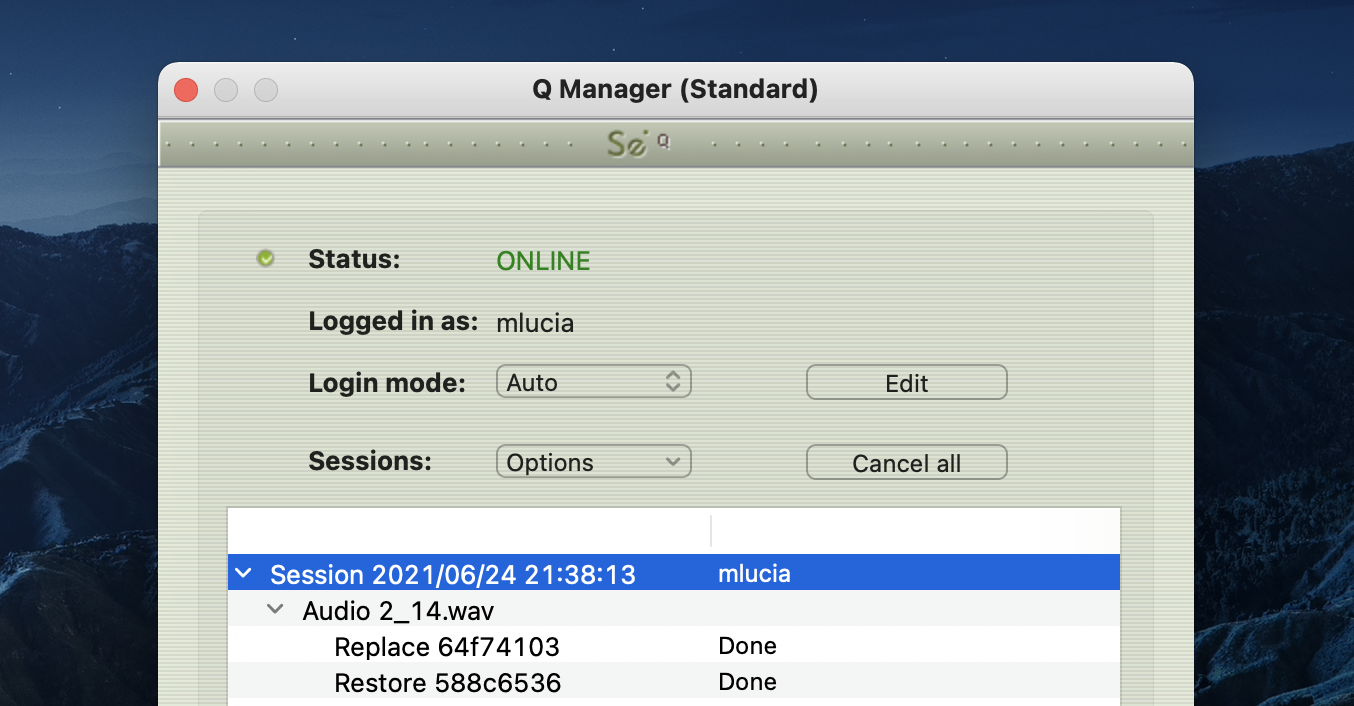
4. Session and file history
Each time you establish a connection with Source-Connect a new session is created in the Q manager. If Restore data is requested, that session becomes visible so you can verify the status of the request. If any network issues are encountered you will be given an error. For support with any errors encountered please contact support.
Each upload process will show a progress bar and the current status. The currently active session will be displayed in blue lettering, for easy viewing. When the upload is completed successfully the status will be ‘Done’.
The current disk usage is displayed to help you know when you may need to allocate additional resources, or delete the session data from disk (see further in this section).
5. File and session info
Detailed information about the session, who it was with, time information and length of session. Useful if you are looking for a particular session to get its status.
6. Delete all upload session data
Each time that you establish a session where your connection partner has selected Restore and/or Replace, Source-Connect will immediately begin storing all session data in compressed form. This could fill a hard drive: at the rate of 56MB per hour.
The Q Manager helps you keep track of your hard drive availability by letting you know when you have less than 20% available.
You can choose to delete this stored upload data at any time, and once you have deleted this data your connection partner will not be able to request any Restore or Replace processes. Please ensure that your connection partner has received everything they need before you delete this data.
If you choose to delete your session data while connected, your current session will not be deleted. This can be useful if you find you are running out of drive space and cannot reestablish the session.
7. Q Manager version and Help
This shows your installed version of the Q Manager. Source Elements periodically releases updates, so if you are having any issues please contact Support with this information.
To get more online help about the Q Manager, click on the Help button to open the specific support site for Source-Connect Standard and the Q Manager.
8. Shut down Q
Press this to shut down the Q Manager. You can also Quit via the icon on the Dock, or use the File menu.
Once the Q Manager is shut down, any requests made to you from your connection partner will not be communicated and they will receive a process error.
Ultra Quick Start Guide
This section is provided for the most common case uses when your connection partner is using Source-Connect Pro. The Q Manager will not be functional if both sides are using Source-Connect Standard.
- Launch Source-Connect Standard
- The Q manager will login automatically.
- Connect to a Source-Connect Pro user. Check that you have a Q icon on the Send status, next to the blinking Send light.
- Have your connection partner record a test file – it should show up immediately in their Q Requests. In most cases the file will appear on the status of your connection partner’s Activity panel” ‘Restore not required’, meaning that your connection is stable.
In cases where your connection is not the most stable, or you are recording very long files where the chance of a drop-out is more possible, your connection partner’s status should come back saying Restored, and you’re good to go!
Activity: Cancel All
If a transfer is in process and you need to conserve bandwidth or no longer wish for the process to continue, the Cancel All button will pause all transfers currently in process.
Your connection partner can request to resume any transfers again at any time, however transfers will be reset so any data that has been uploaded or downloaded will begin again.
Q Menu Bar options
The Q Manager has several functions available to you via the Menubar and also provides a quick glance at what processes are active.
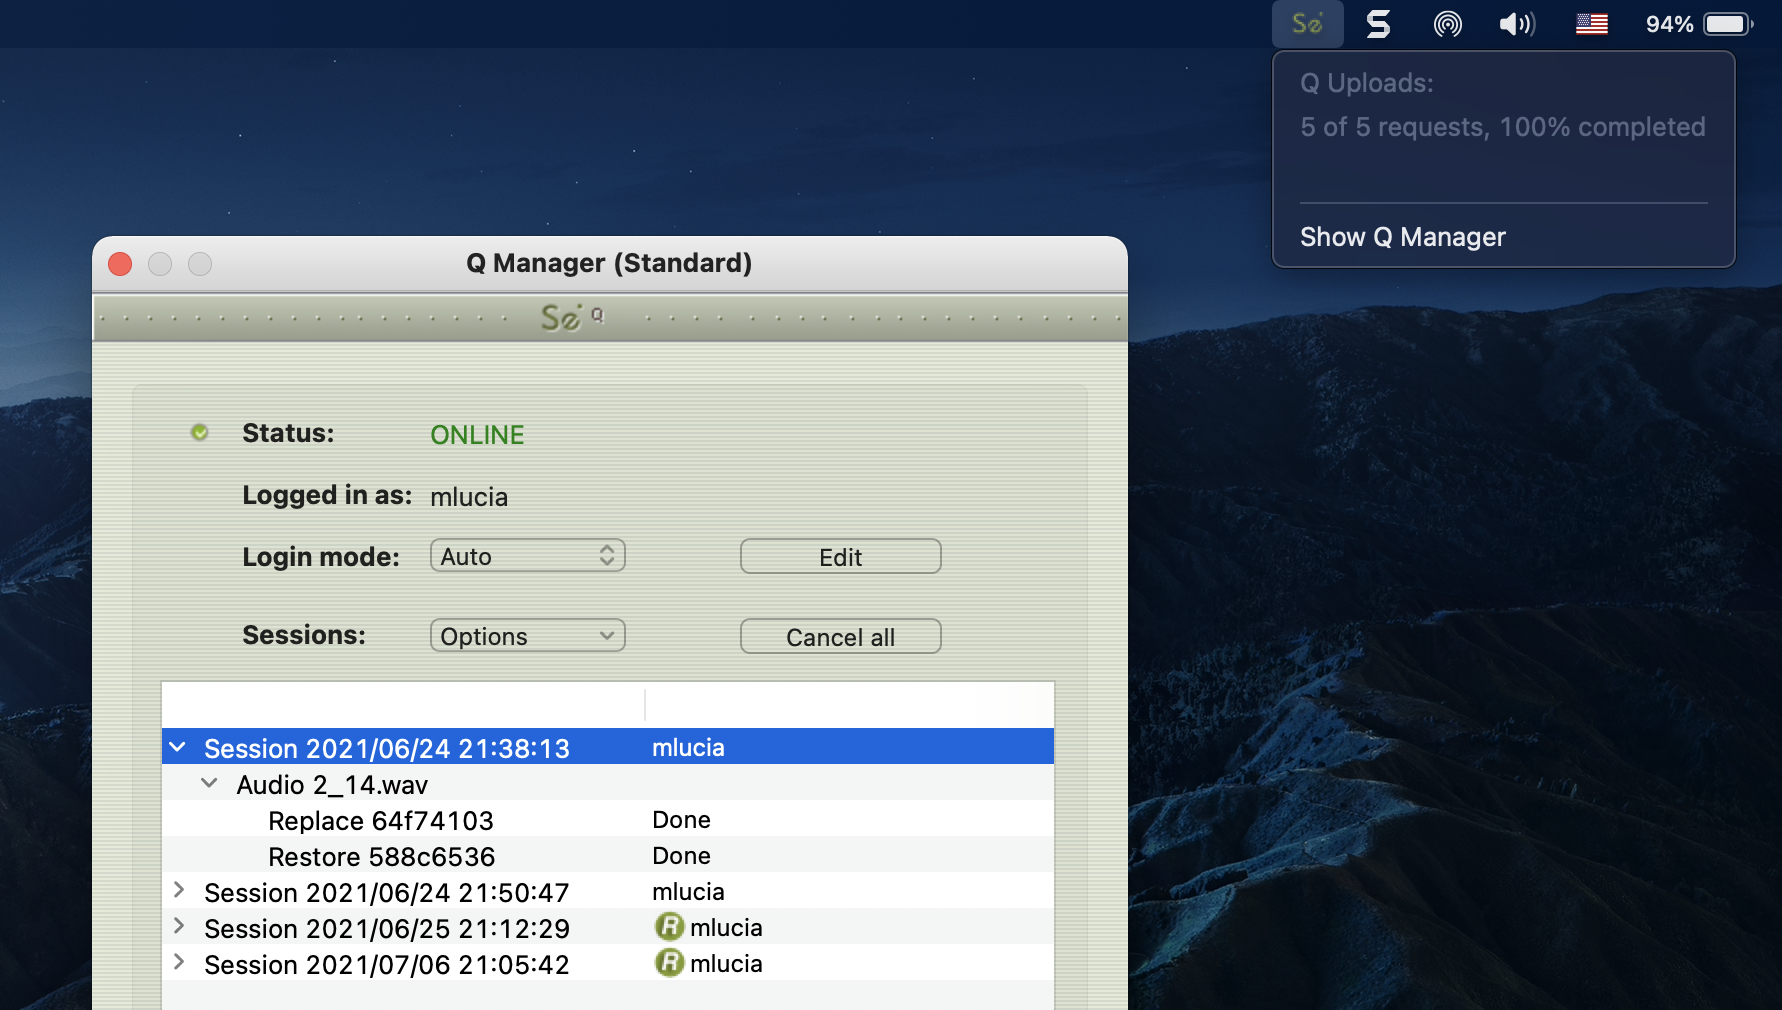
Q Uploads processes / status
Requests statistics
Show Q Manager
Opens the Q Manager window.
Troubleshooting the Q Manager
For each file and process there is a status. For successful files the status will be ‘Done’. If you see that the status for a file, or files, is ‘Failed’ it means that either you or your connection partner has invalid settings or a component is not properly installed or configured. There are various reasons as to why a file may fail to replace or restore. Usually the issue is due to incorrect Network settings on your connection partner’s end – have them verify their FTP settings or contact Support.
Q Manager errors are rare, and generally mean that the other side is offline, or has moved or deleted the Q data. Contact support with any specific questions, we will be able to provide detailed information on a case-by-case basis.
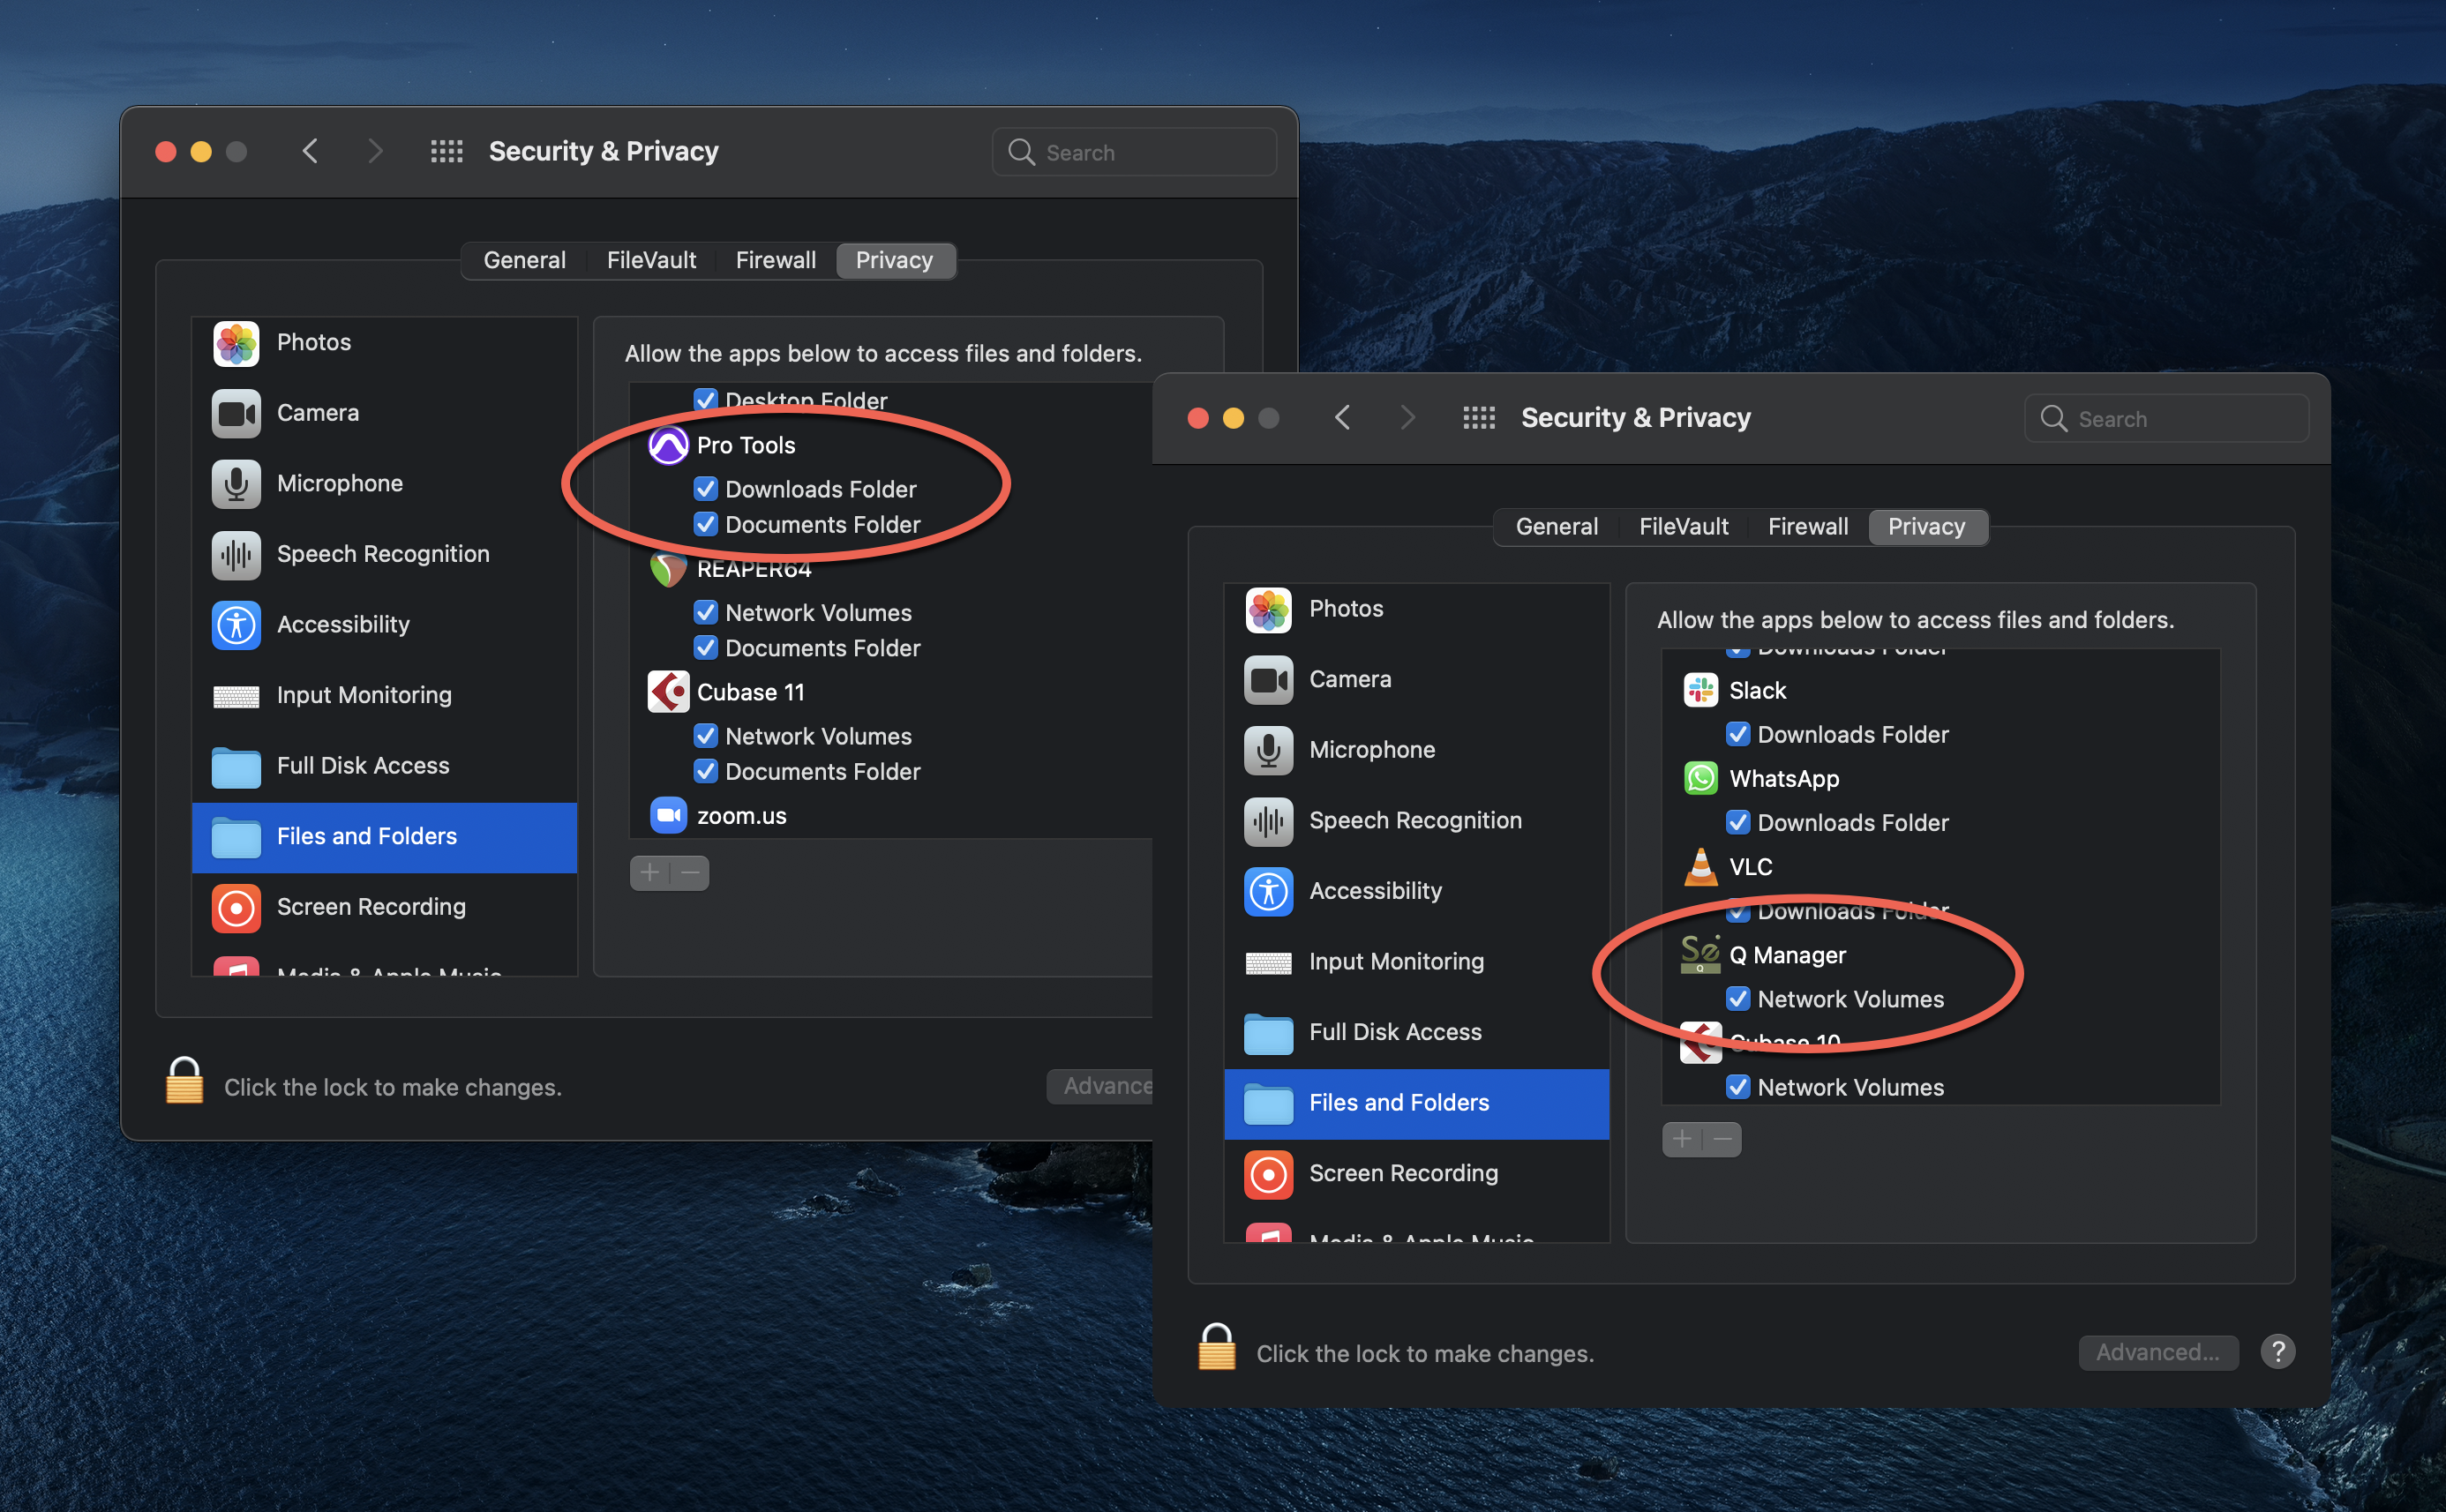
Network Volume Permissions
If files are not showing up on Q Manager after recording a session on your DAW (for example, Pro Tools, Logic Pro or Cubase/Nuendo), it might be related to any of the applications not having access to the music files from your recording. In order to attempt to solve this, check the following:
- Open the Security & Privacy menu.
- Go to "Privacy".
- Scroll down to "Files and Folders".
- Make sure that both Q Manager and your DAW have access to "Network Volumes".
Common Q Manager issues
The following are common reasons why Auto-Restore may fail.
- Check that Q is enabled. You should have a Q icon to the left of your Source-Connect receiving meter if you are the recording end, and on the Sending meter if you are the sending end. Verify that the Restore and/or Replace checkboxes are checked in the Source-Connect Pro Settings panel before establishing a connection.
- It is important that your connection partner using Source-Connect Pro properly understands how to use the Auto-Restore feature with their recording host.
- Q Manager should be launched: make sure you can view the Q Manager via the MenuBar icon and see the Q Manager window when the Q Manager is the front-most facing application.
- Files should be recorded while Source-Connect session was established. Files recorded when Source-Connect is not established will not appear for processing in your connection partner’s Q Manager.
- Sample-rate converting is not supported. Verify your connection is not sample-rate converting.
- Post-processed audio files will not be restore or replace compatible. It is strongly recommended that you avoid post-processing any files recorded by SourceConnect until you have fully restored or replaced the files you need. This also means not modifying the level of the track with the Link plugin whose output is routed to your record track.
Table of Contents