Advanced Audio Properties for Source-Live Pro LL
This article is part of the Source-Live Pro LL User GuideThe advanced audio properties are key for anyone working with professional microphones, since they allow you to choose tweak configurations such as delays, balance, volume, or even track numbers. Click the gears icon next to Audio to access the menu.

Using this, you can configure, among other things, volume, balance, delays and tracks.
Volume
Increase or decrease the loudness of your input. Keep in mind that 0dB does not mean mute, but rather the maximum volume; higher dBs might result in a discernible audible distortion. You can test Source-Live by clicking the “Go to Gateway” button or by going to the iOS application. This setting will be displayed in the Source-Live main screen, in the “Micro” widget.
Mono
By checking this option, you will be sending out one channel of audio.
Balance
Drag the slider to the left to adjust the volume of the left sound channel, or to the right to adjust the volume of the right sound channel.It is recommended to keep the sliders to the middle to balance audio output from the left and right.
Sync Offset
This setting is one of the most critical and may require some time and effort to achieve the desired result. If necessary, you can use a negative number, in case your audio source has a higher latency than your video source. The aim is to have the video and audio streams in perfect sync with each other, even though they come from different sources. For example, you may use the ScreenCapture method for video and the Source-Nexus I/O method for audio. Or, you may use an HD video card for video input and audio input from your digital I/O. Regardless, you will always need to adjust and prepare for the audio delay.
Audio Monitoring
You can use this option to monitor where you can hear the audio; for example, on another system such as a laptop or iOS device, or on your main system if you have system monitoring enabled.
Note: if you are having any quality issues with your stream, you can avoid monitoring your video output and save resources.
- Monitor off: no monitoring will be done (output or input).
- Monitor only (mute output): mute the output of the track in case you only want to monitor your broadcast stream.
- Monitor and Output: any incoming signals will be output to your audio input device. This is especially useful if you want to make sure you can hear anything you want to hear in your headphones.
Audio Channels
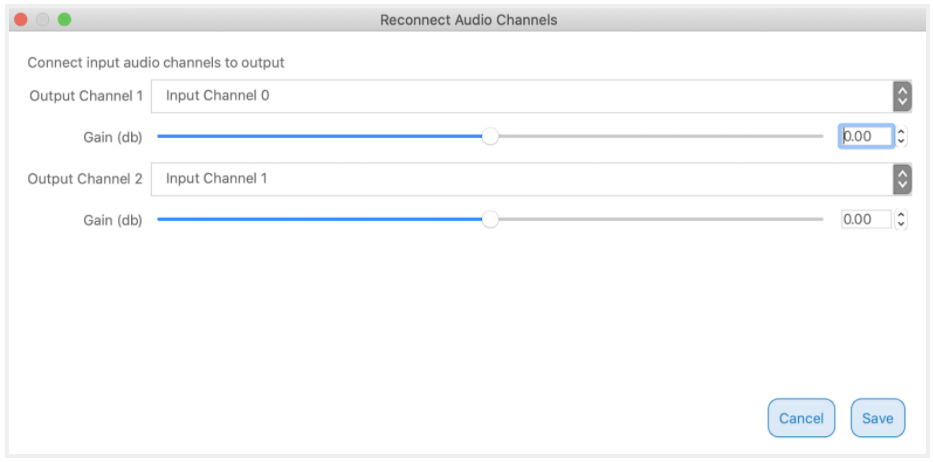
Click the icon next to CHANNELS in order to connect input audio channels to output if you have more than one.

- Gain (db): the loudness increase that the device can generate. Note that you can include negative numbers for losses.
Tracks
Use this configuration option if you want to broadcast multiple tracks (the maximum allowed is 6 tracks). You can select which audio device should be saved on each specific track by unchecking or checking it:

The example above shows "Desktop Audio", "Micro" and "Micro A":
- "Desktop Audio" and "Micro" is being used by the voice-over talent.
- "Micro A" is being used by the talent, who will be commenting on the quality of the audio if necessary.
All audio devices are going into track 4; this track, at the same time, can also be used for streaming Source-Live. "Desktop Audio" and "Micro A" go into track 1 and 2, only "Micro A" goes into track 3, and so on. If the session was recorded on disk, the talent might want to go over Track 3 to look for their specific comments; Source-Live therefore allows you to separate the desktop audio from the microphone audio in case you want to review the content later.
Table of Contents
