
How to use Source-Share for remote support
Source-Share lets a support technician securely view your screen and, if you approve it, control your mouse and keyboard during a support session. This article will walk you through the full process from download to ending the session.
Step 1: Download the correct installer
Go to the Source-Share download portal. The page recommends the correct download for your operating system, with separate options for macOS and Windows.
- Visit share.source-elements.com.
- Select the installer shown for your device. On Mac, the page is labeled for Apple Silicon and Intel. On Windows, download the 64-bit version.
The download portal recommends the correct installer for your operating system.
Step 2: Install and open Source-Share
After downloading, install the app and launch it.
- Mac: Open the downloaded disk image, then drag Source-Share into the Applications folder.
- Windows: Run the installer, complete setup, then open the app.
Installing Source-Share on macOS
Drag the Source-Share app into the Applications folder. You may see a message that Source-Share was downloaded from the internet - this is expected.
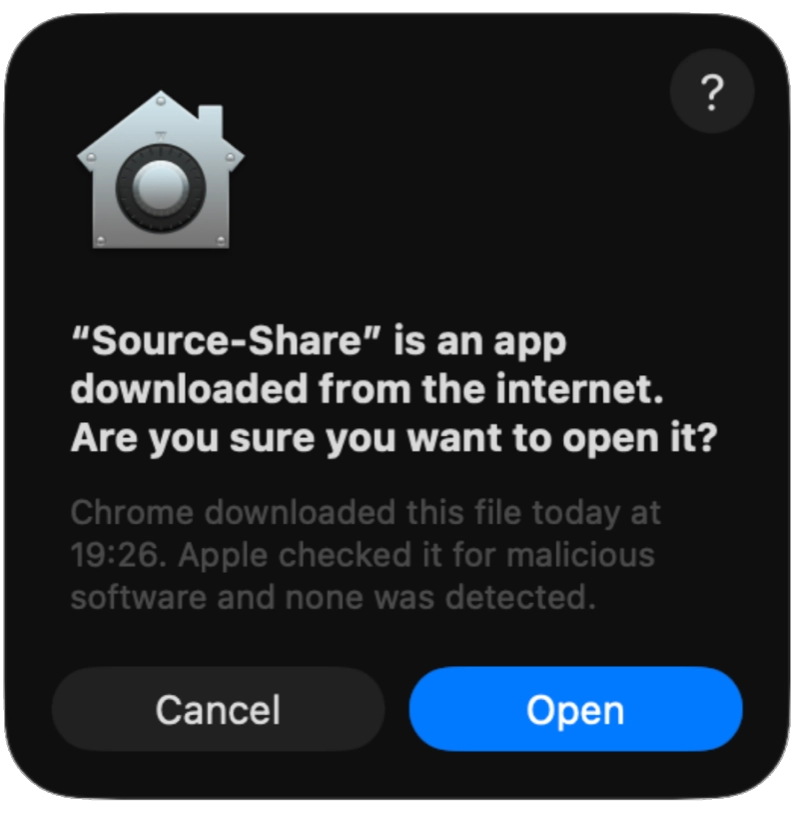
Click Open to continue.
Installing Source-Share on Windows
You can download the executable file for Windows from https://share.source-elements.com/. You will see the following warning on your browser's downloads folder:
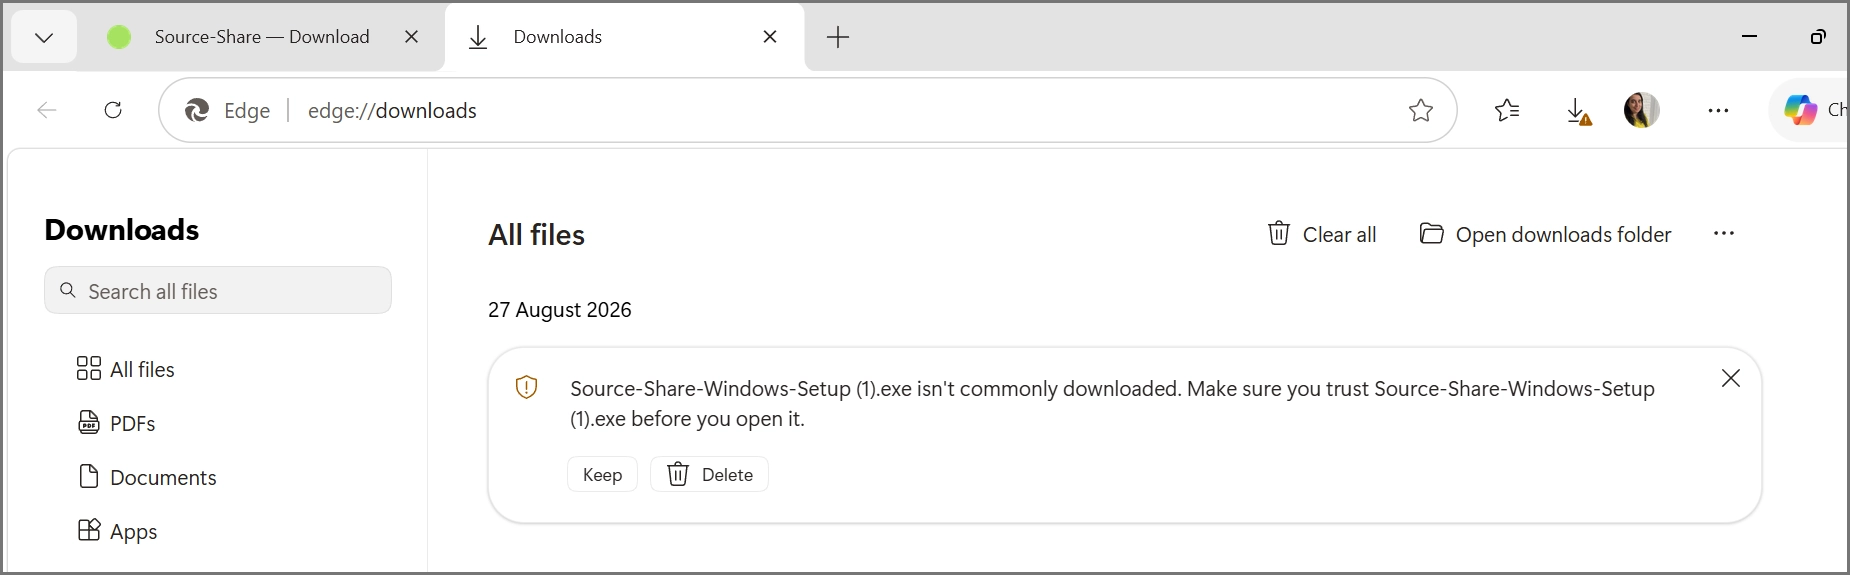
Click the "Keep" button (the name of the button might change depending on your browser). Then, open up the installer and accept the end user license agreement - for more information on our privacy policy, please visit https://www.iubenda.com/privacy-policy/76528671.
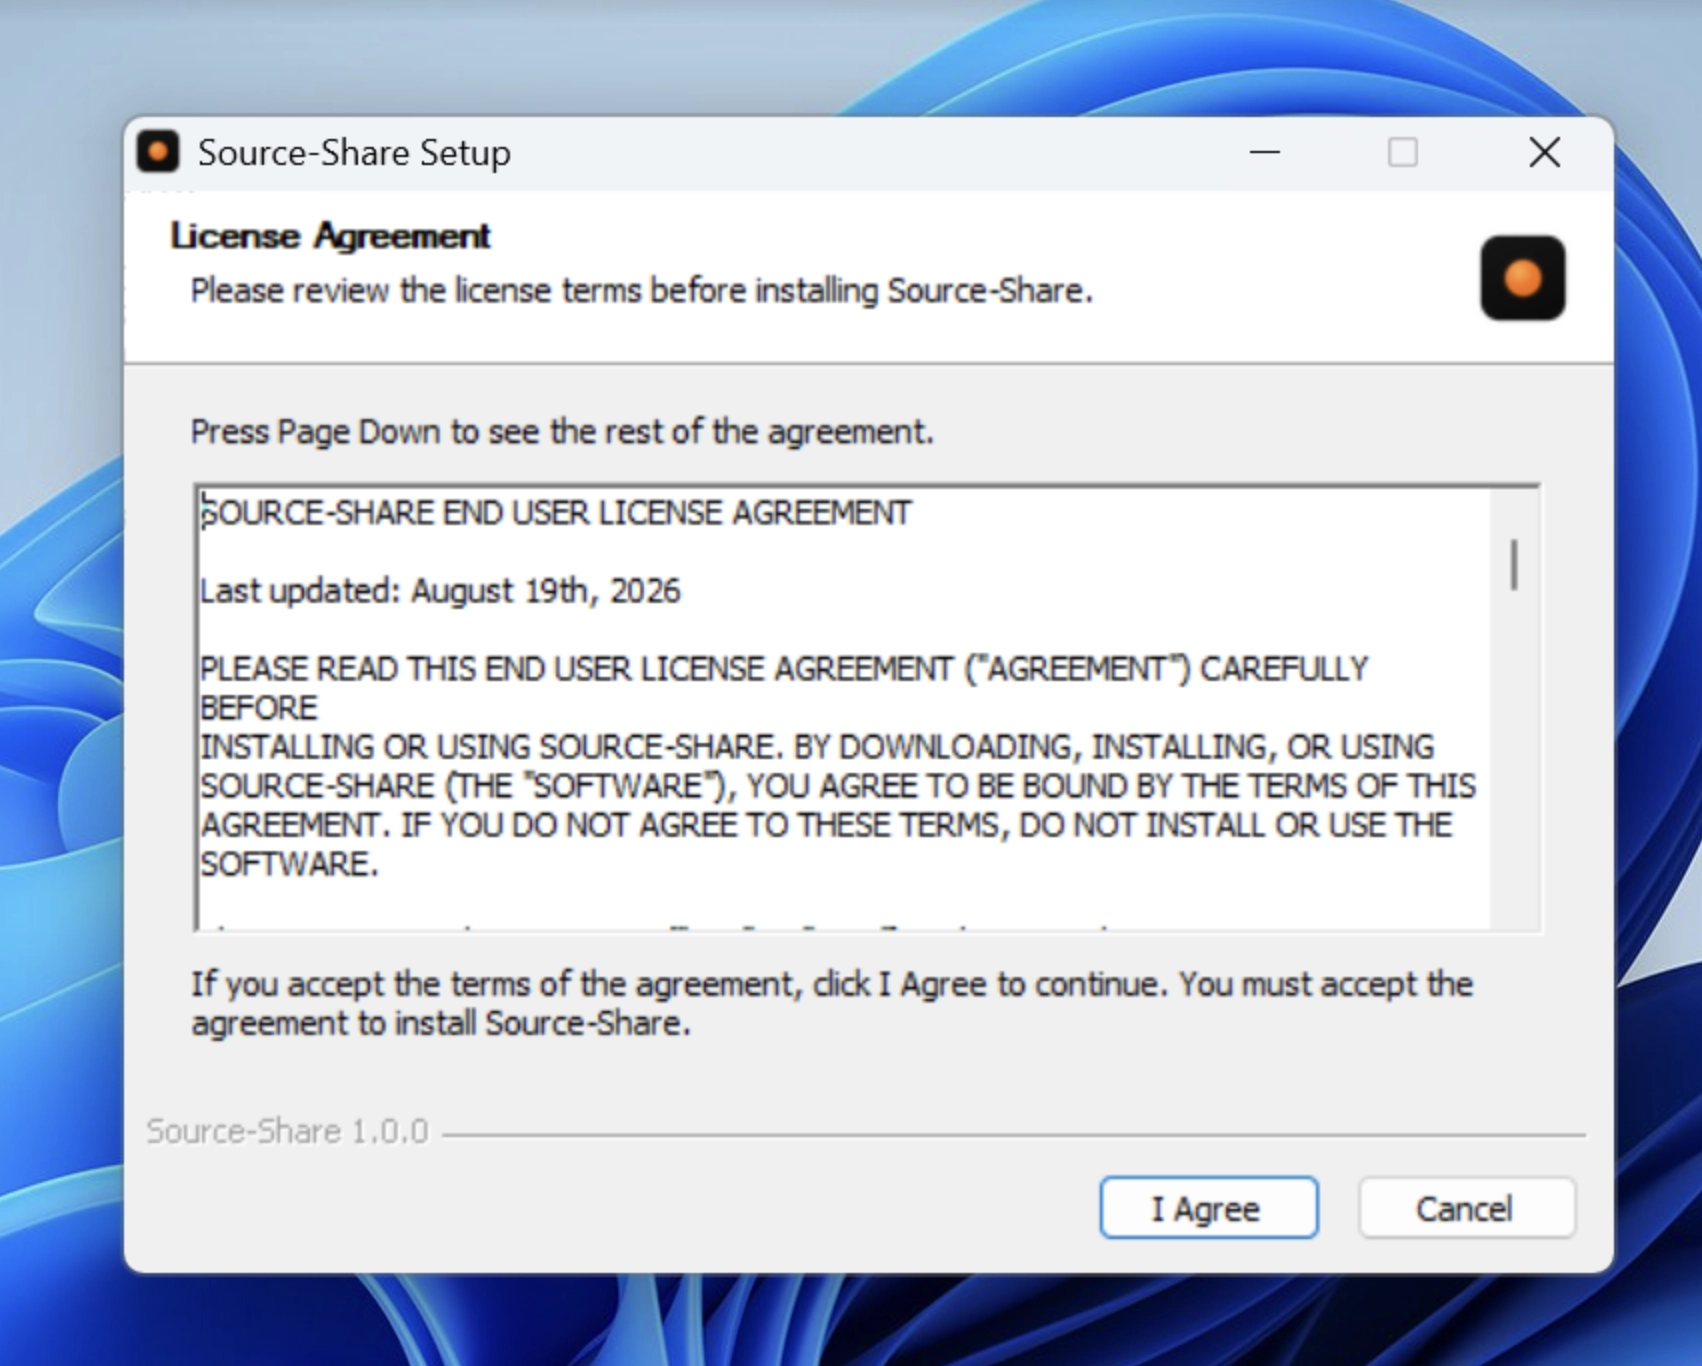
After selecting the Windows user you want to install the application for, Windows will display a security prompt:
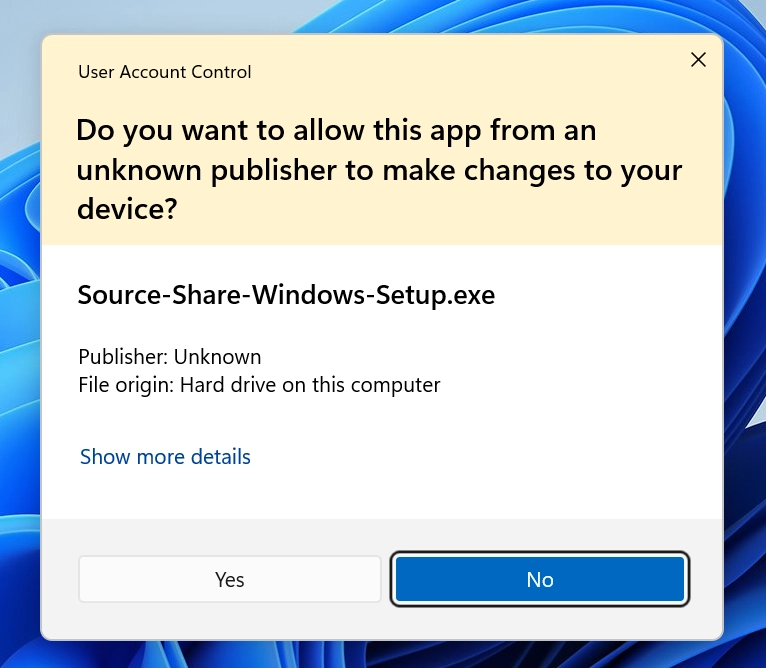
Please note that clicking "No" will prevent you from completing the installation.
Finally, complete the installation steps by selecting a folder and waiting for the application to fully install.
Step 3: Accept the license agreement
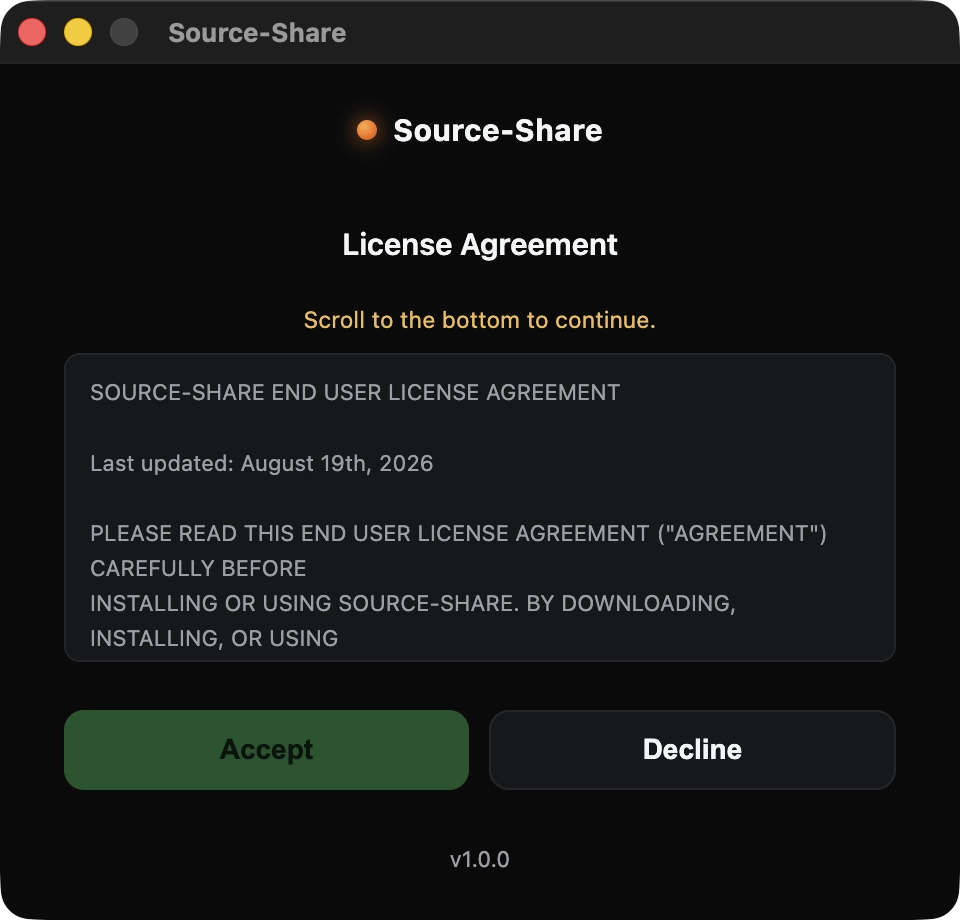
When the app opens, scroll to the bottom of the license agreement to enable the button, then click Accept.
Step 4: macOS Permission Prompts
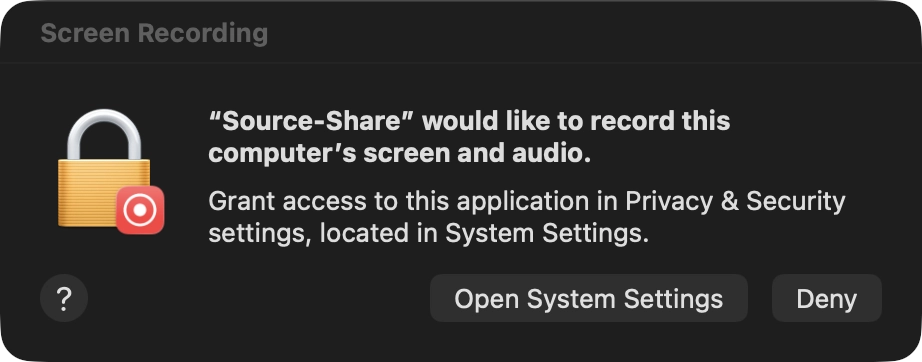
Source-Share may need permission to record your screen before sharing can begin. This is handled through System Settings.
- When the prompt appears, click Open System Settings.
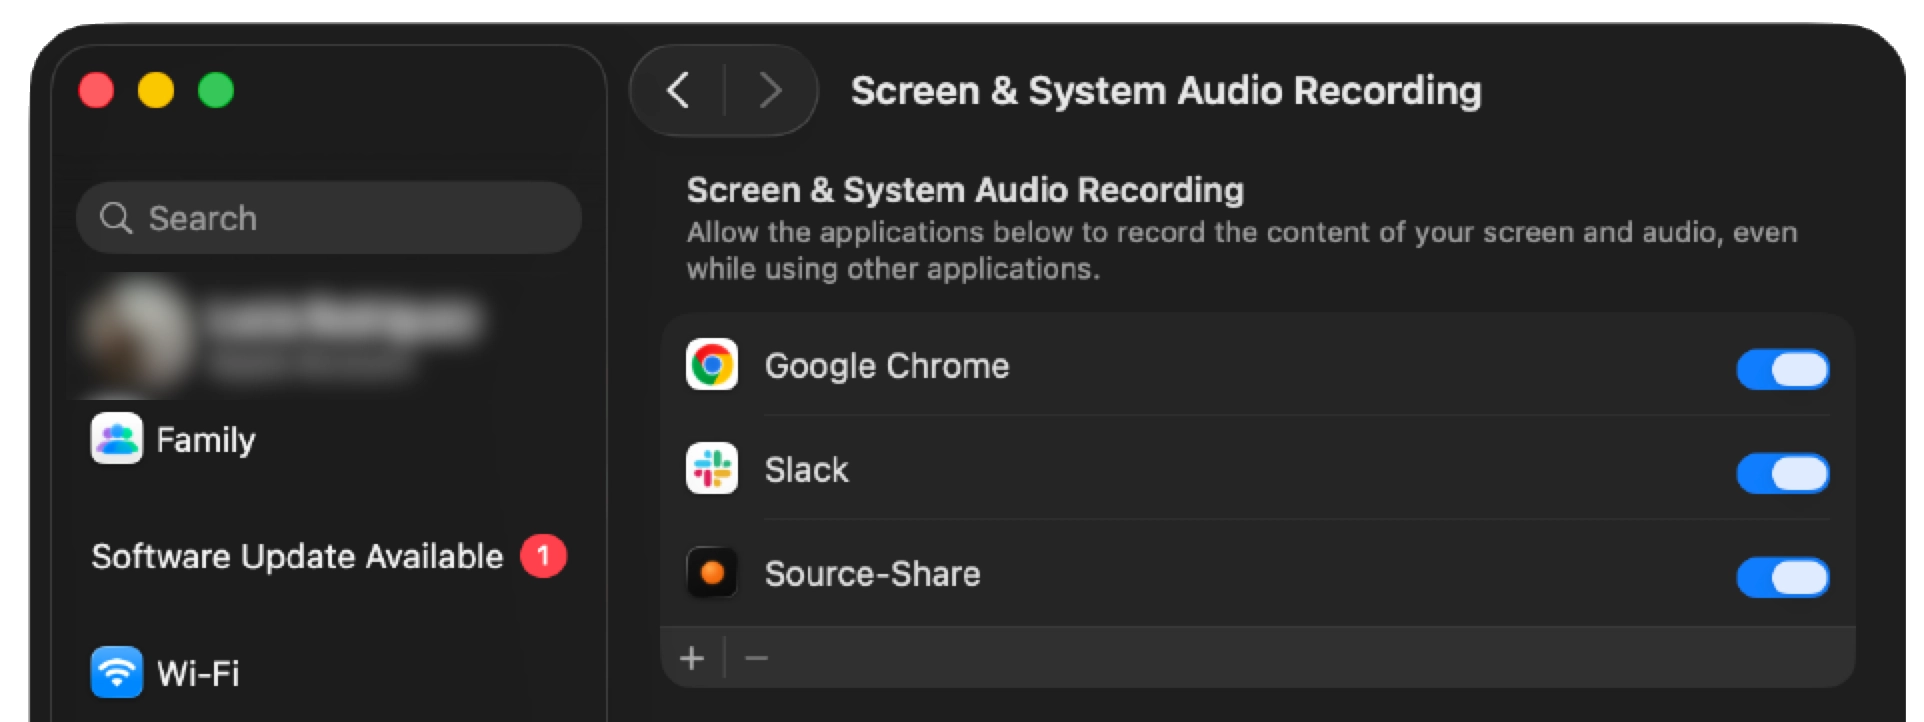
- Go to Privacy & Security and turn on Source-Share under Screen & System Audio Recording.
- In the displayed pop-up screen, click "Quit & Re-open".
Step 4: Enter your 9-digit support code
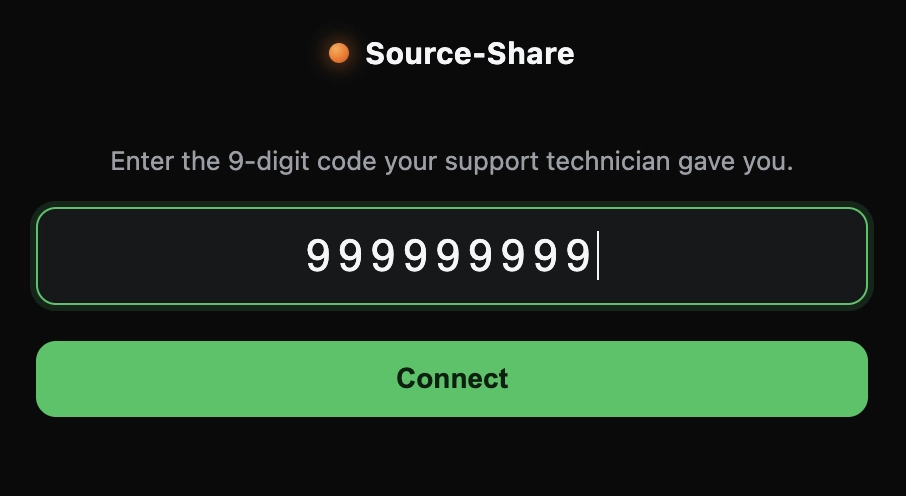
Your support technician will give you a single-use 9-digit code. Type it into the app, then click Connect.
- Enter all 9 digits exactly as provided.
- Click Connect to send the request to your technician.
Step 5: Approve screen sharing
When the technician requests access, Source-Share asks whether you want to allow them to view your screen.
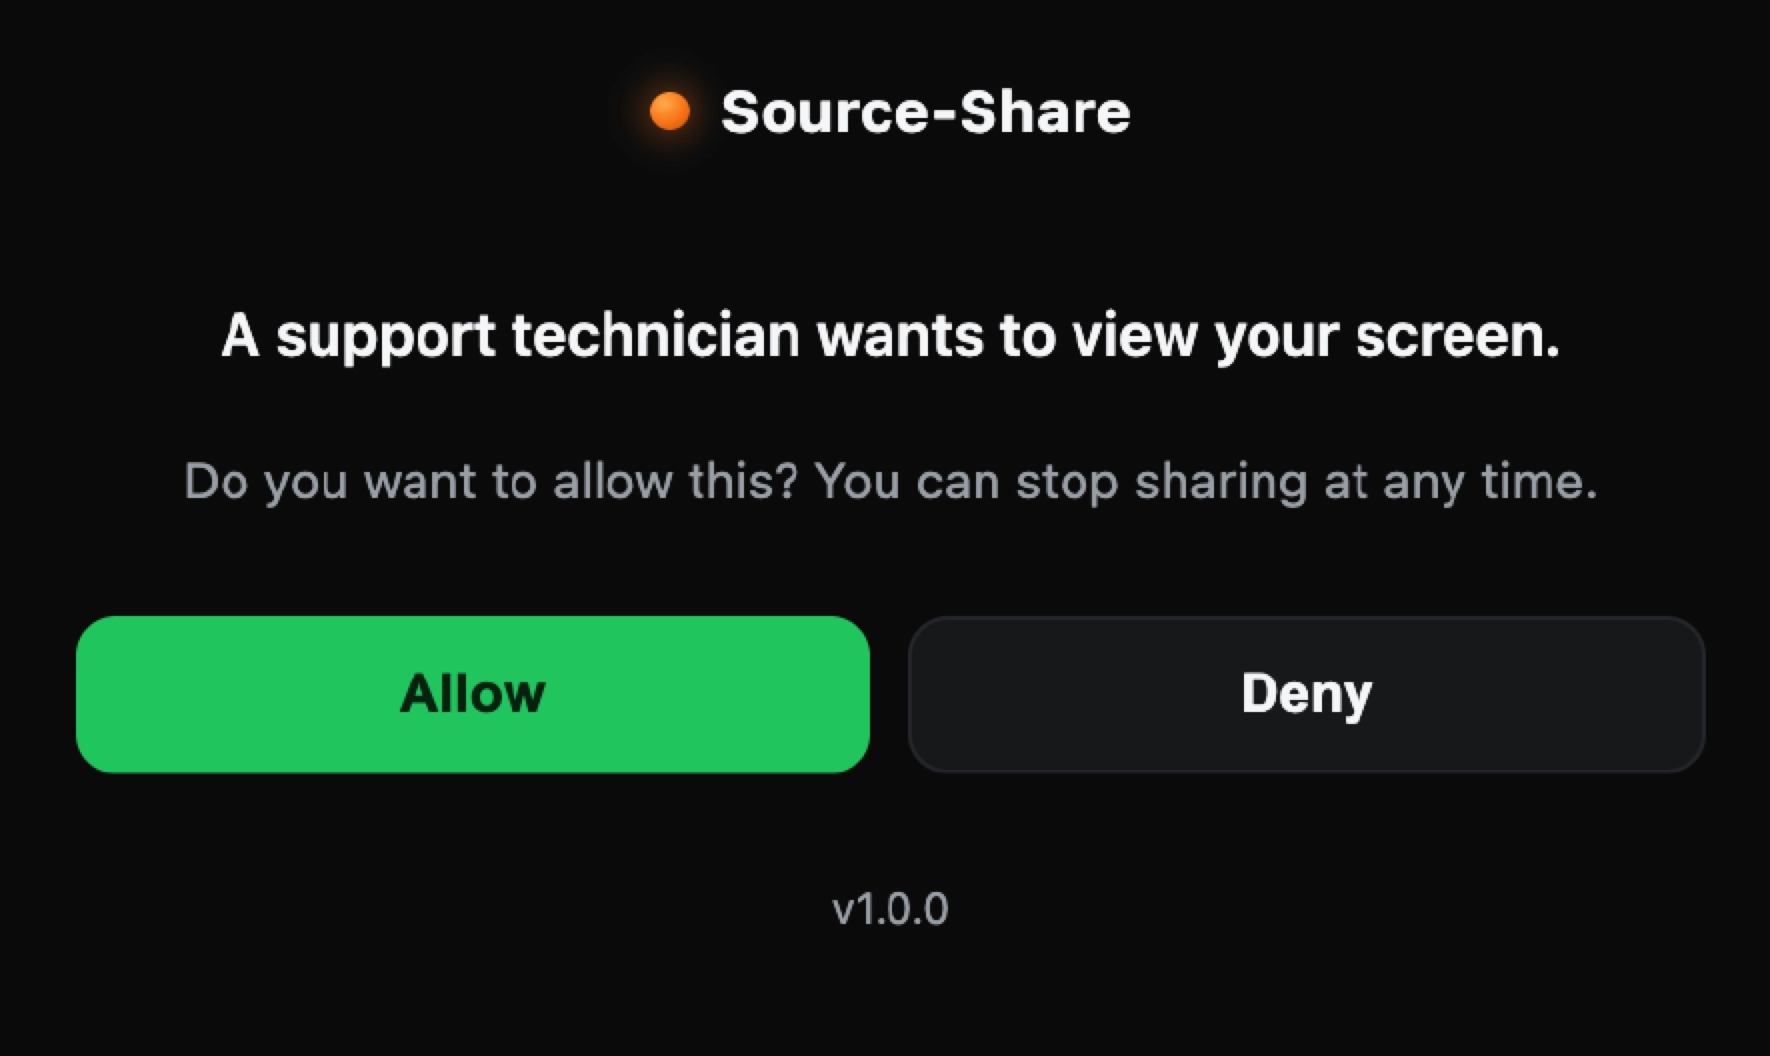
- Click Allow to begin screen sharing.
- Click Deny if you do not want to start the session.
- You can stop sharing later without uninstalling the app.
You must explicitly approve screen sharing before the technician can see your screen.
Mouse and keyboard control
Viewing your screen and controlling your device are separate permissions. If the technician wants to control your mouse and keyboard, Source-Share will ask you again.
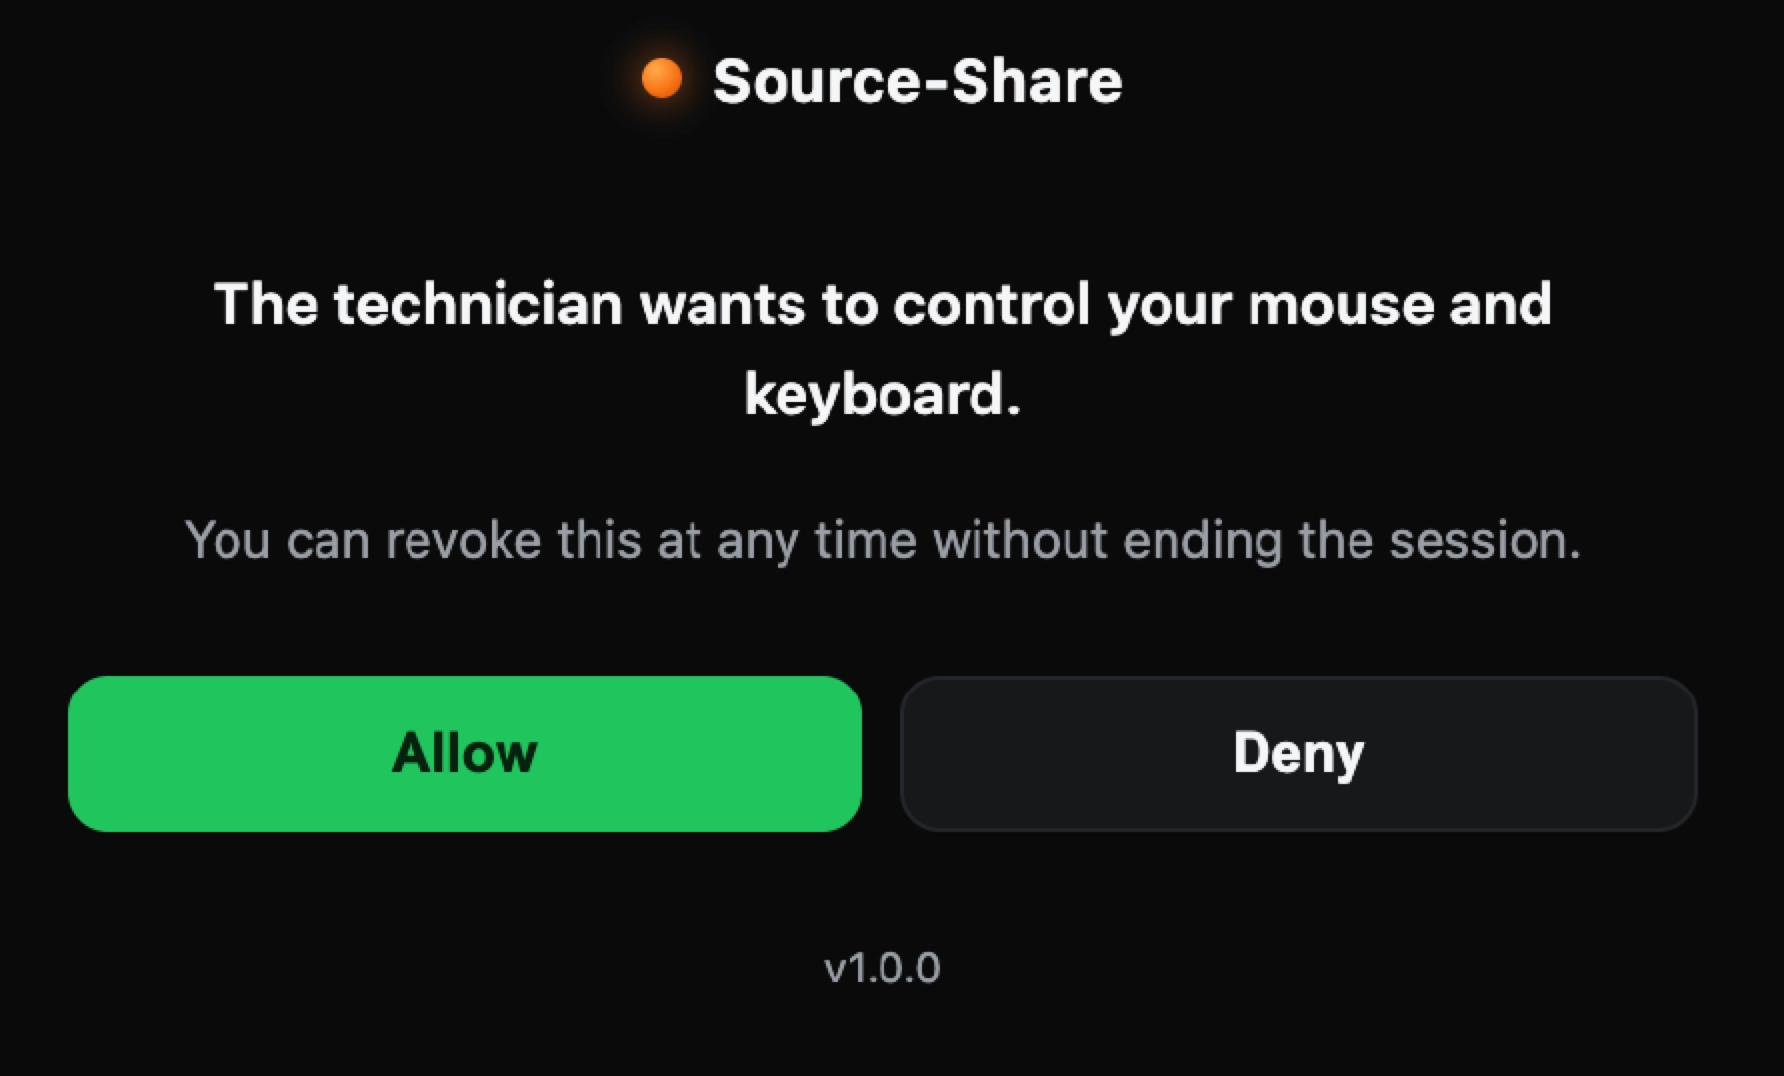
- Click Allow only if you want the technician to control your computer.
- Click Deny to keep the session view-only.
- You can revoke control later without ending the entire session.
Remote control requires a separate approval from you.
Using chat and clipboard sharing
Once your session is active, Source-Share can show a small support bar with tools for communicating with the technician.
- Chat: Open the chat panel to send text messages directly to your technician during the session.
- Clipboard: Use the clipboard button to send the current contents of your clipboard to the technician. If the technician wants to send something back, you may see a prompt asking whether to replace your clipboard.
- Stop Sharing: Use the stop button at any time to end screen sharing immediately.
Security and Privacy
All screen sharing, keystroke sharing, and clipboard sharing is fully encrypted. The connection is direct peer-to-peer, and nothing is recorded or stored, including video recordings.
For more information, please review the Source Elements Privacy Policy.
Troubleshooting
Windows: the app cannot connect
Check whether Windows Defender Firewall is blocking the app.
- Open the Start menu and search for Windows Defender Firewall.
- Click Allow an app or feature through Windows Defender Firewall.
- Find Source-Share in the list.
- Make sure both Private and Public are checked.
- Click OK.
macOS: screen sharing does not start
Open System Settings -> Privacy & Security -> Screen & System Audio Recording and make sure Source-Share is enabled.
The app will not continue past the agreement screen
Scroll all the way to the bottom of the license agreement first, then click Accept.
Screen Sharing Permission
If permission was not granted the first time, Source-Share shows a reminder with a shortcut back to System Settings.
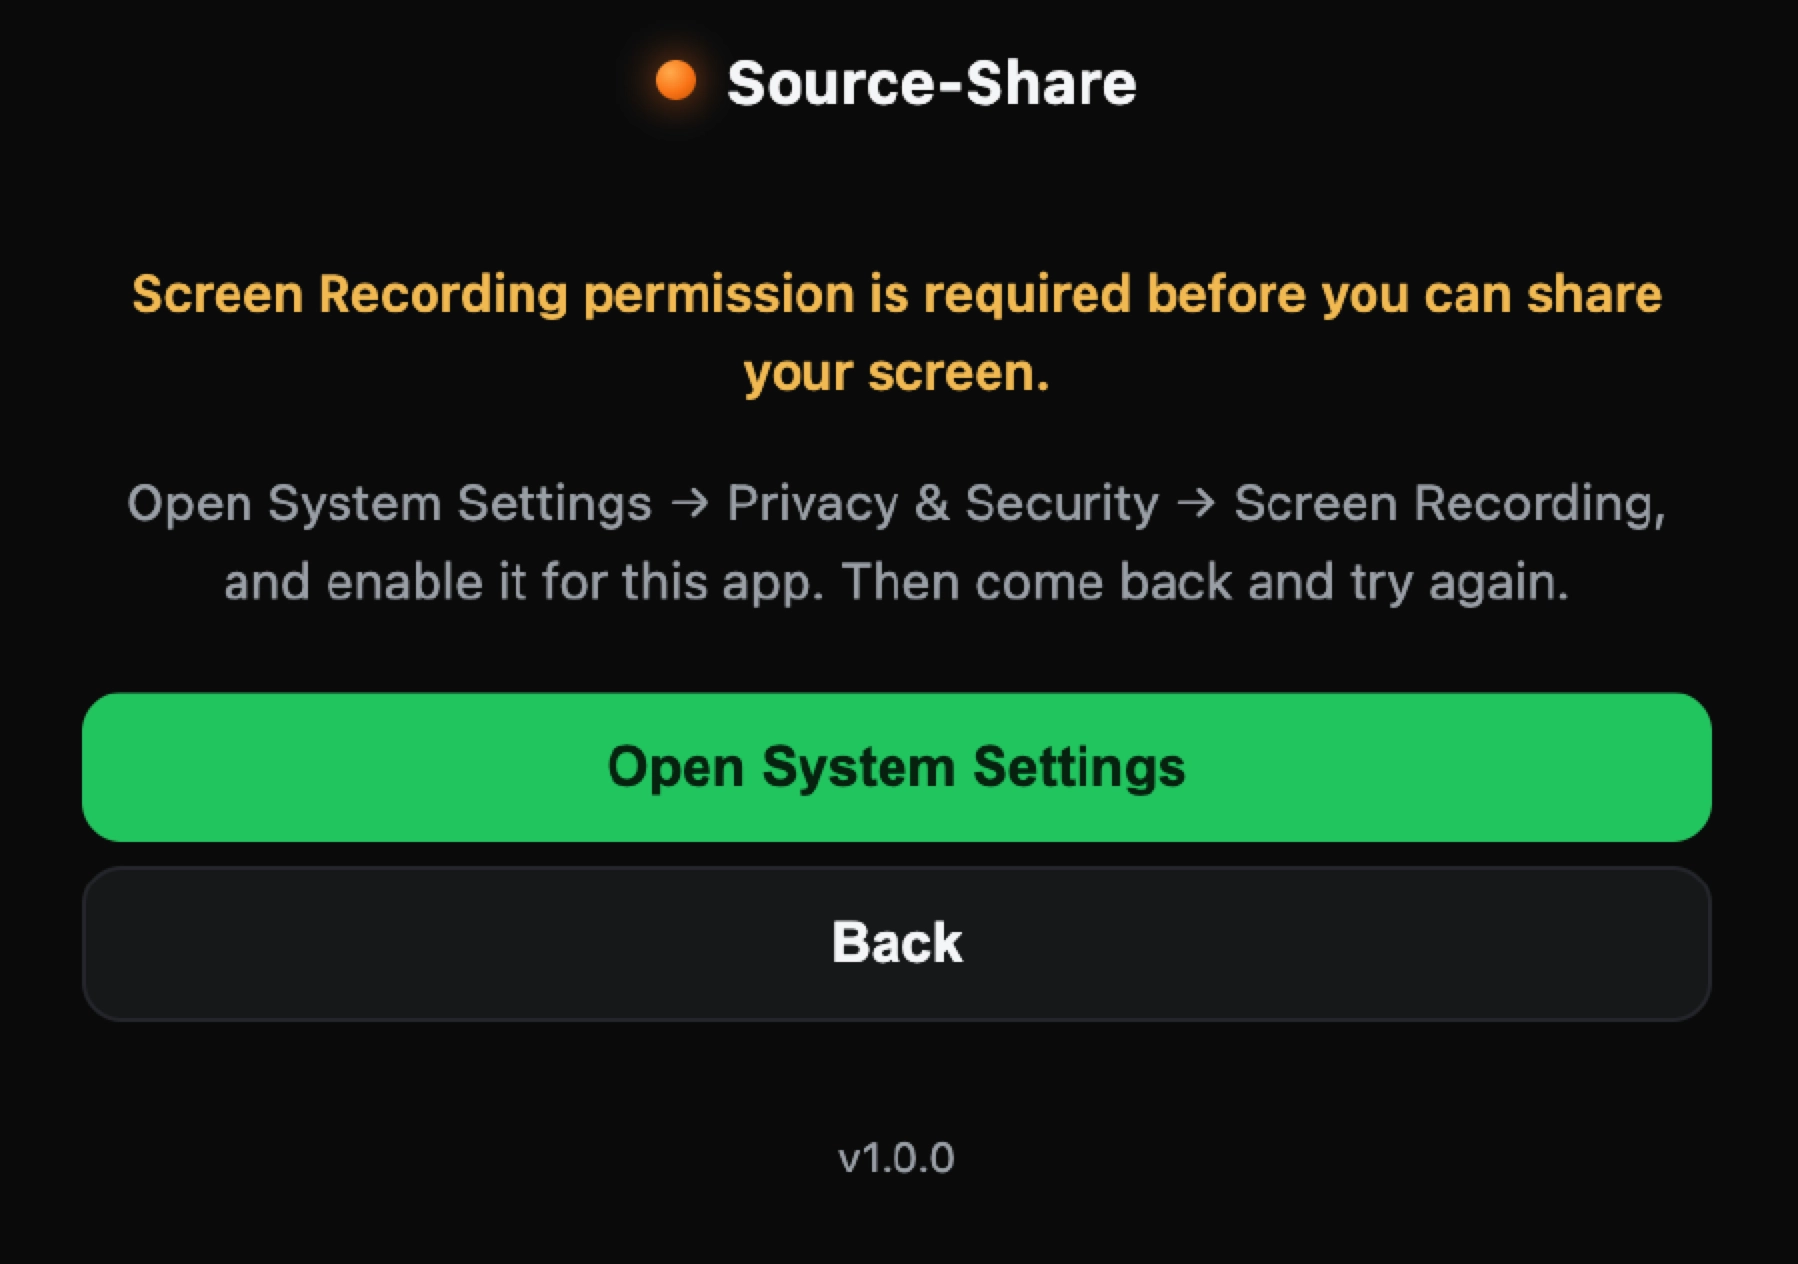
Table of Contents