Step-by-Step Port Forwarding Guide
Here is a step-by-step guide to set up port forwarding in your router in order to use Source-Connect. For information on what a port is, what port forwarding is, and why you need it, please refer to these articles instead:
Working with your Router
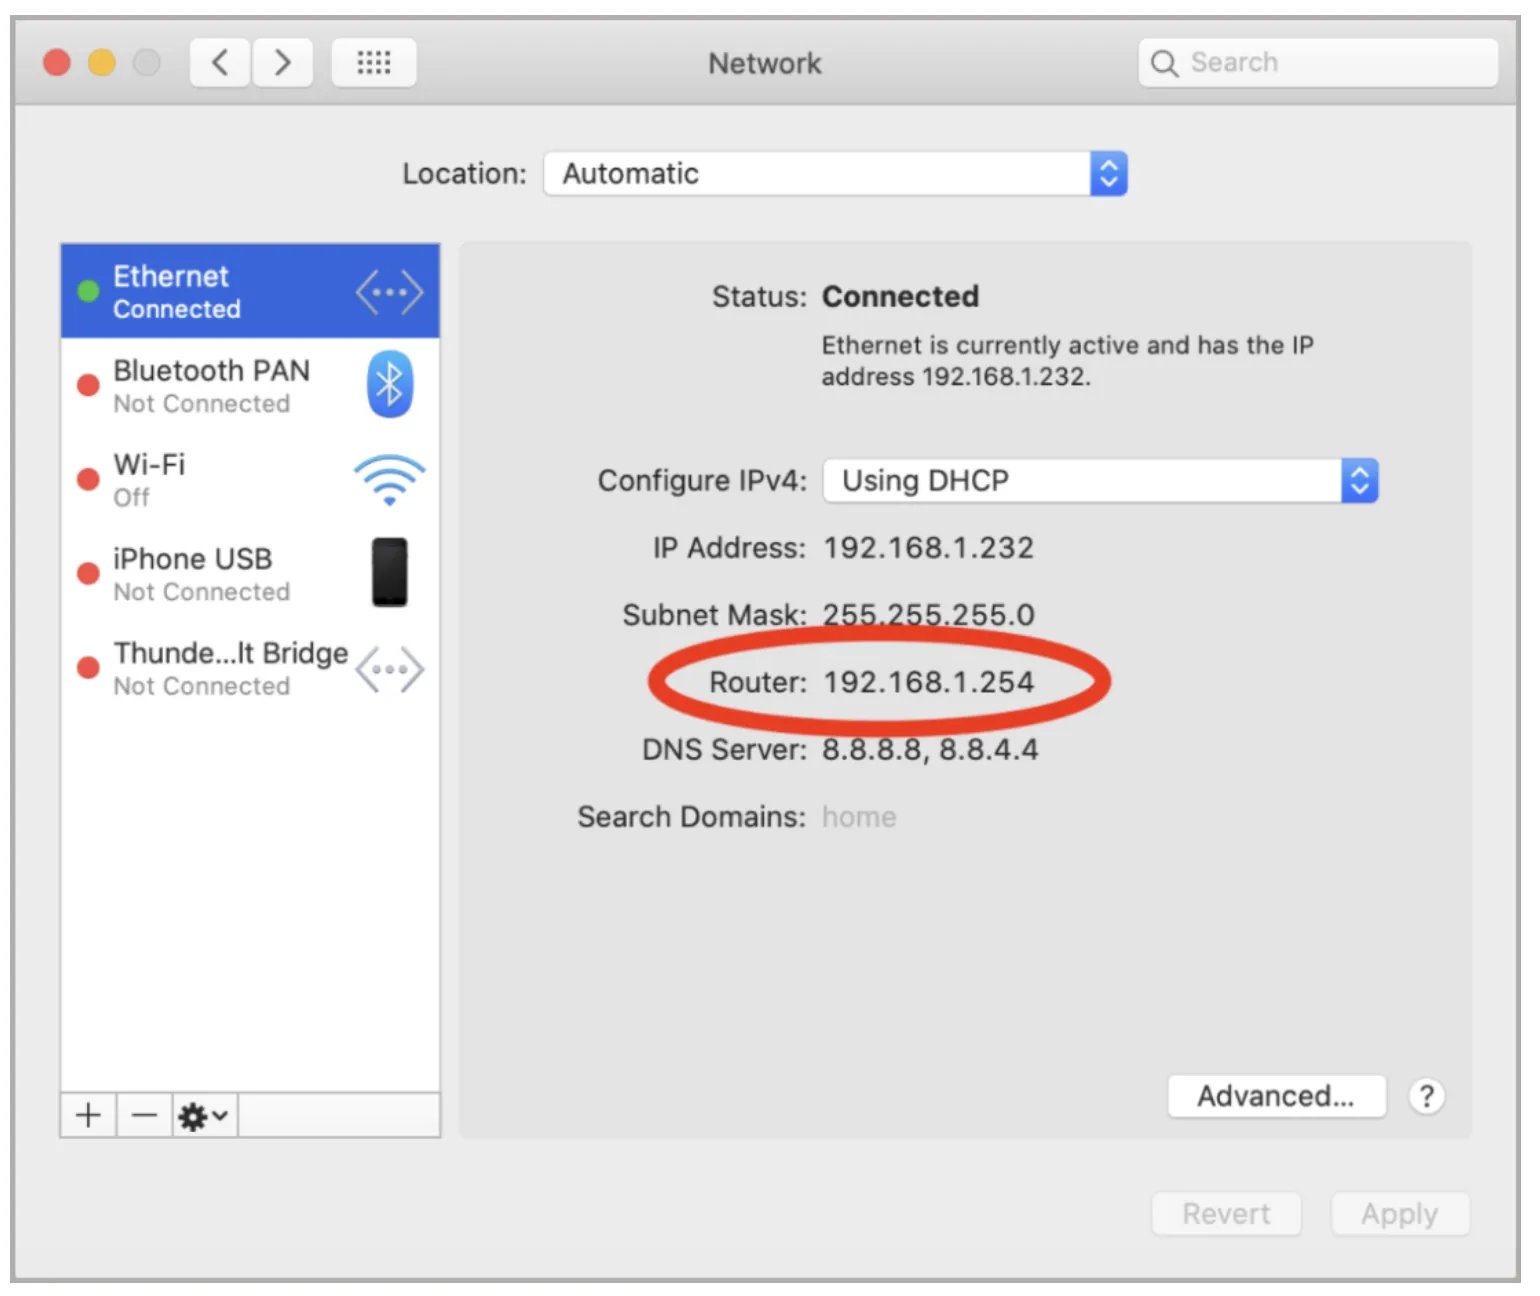
- Go to System Preferences > Network to find the IP address of your router.
To find the IP address of your router on Windows, open the “Command Prompt” and type in ipconfig. Your router's IP address will be the Default Gateway: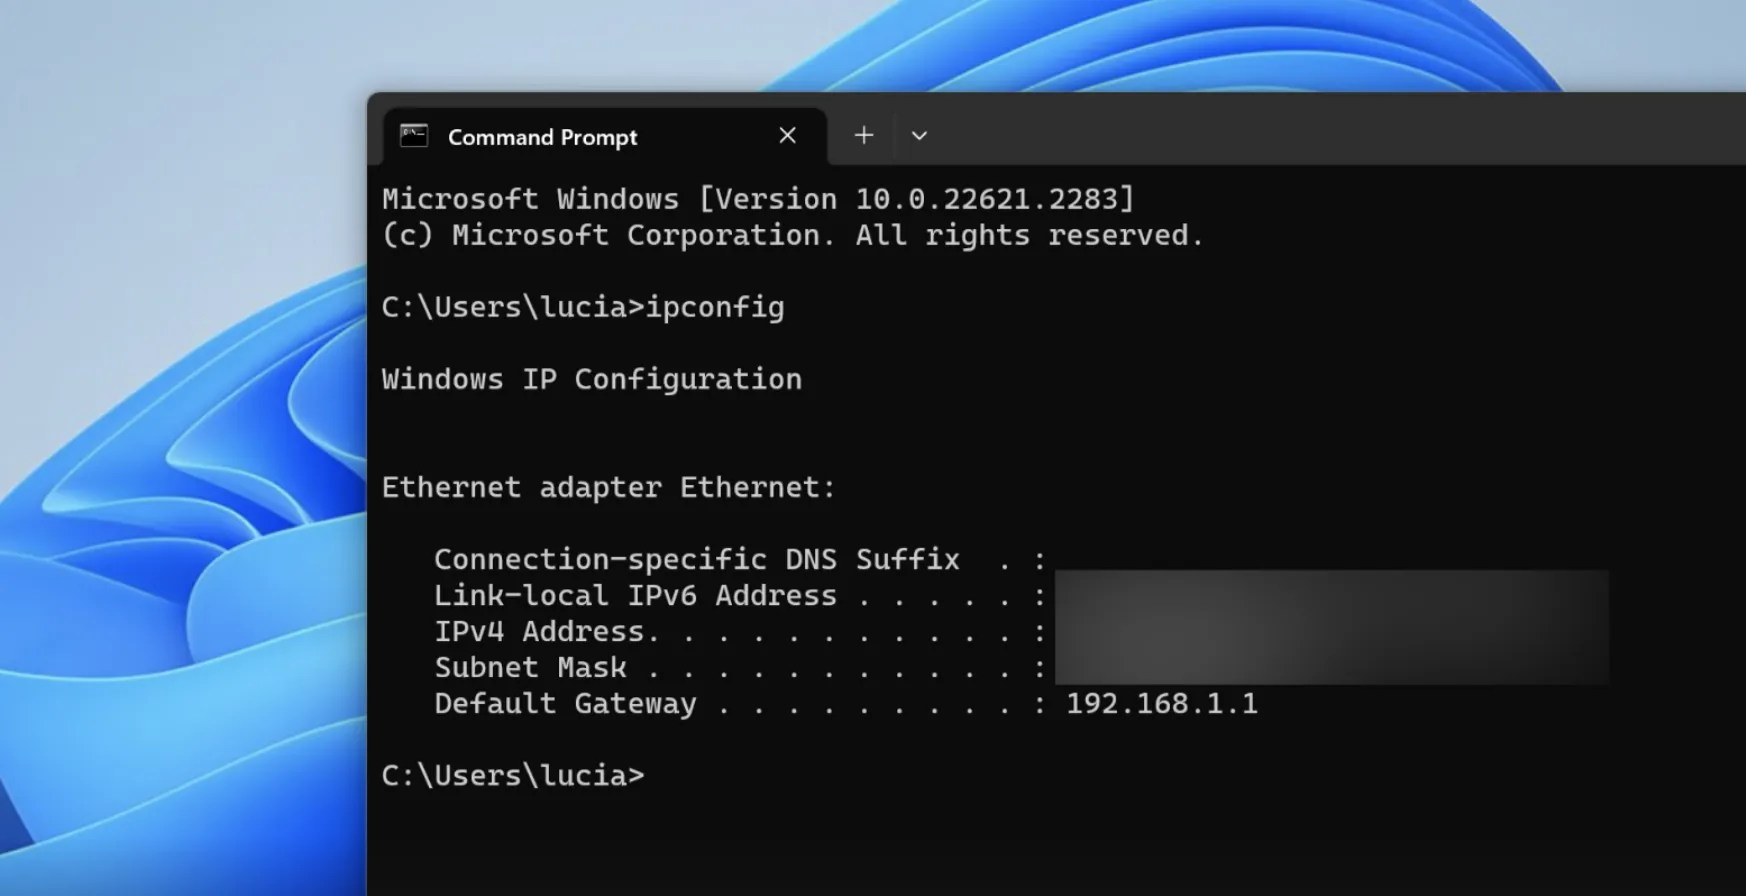
Please note that, as mentioned in this article, IPv6 is not supported on Source-Connect. - Copy the IP address and paste it into a browser window. This should take you to your router’s user interface. Log in to your router if prompted, using the administrative password (often found on a sticker on the router). Some popular routers will direct you to a website or phone app to manage your router. Follow the instructions provided if prompted.
- Navigate to the Port Forwarding section of your router's interface. On some routers, this is known as Port Mapping, Virtual Server, or Application access. Port Triggering is NOT the same as port forwarding, so be sure to avoid the port triggering function in your router.
- Some routers will ask you to select the device you want to port forward to. This usually means the router will save the IP address and you will not need to worry about setting up a static IP, also known as DHCP reservation.
-
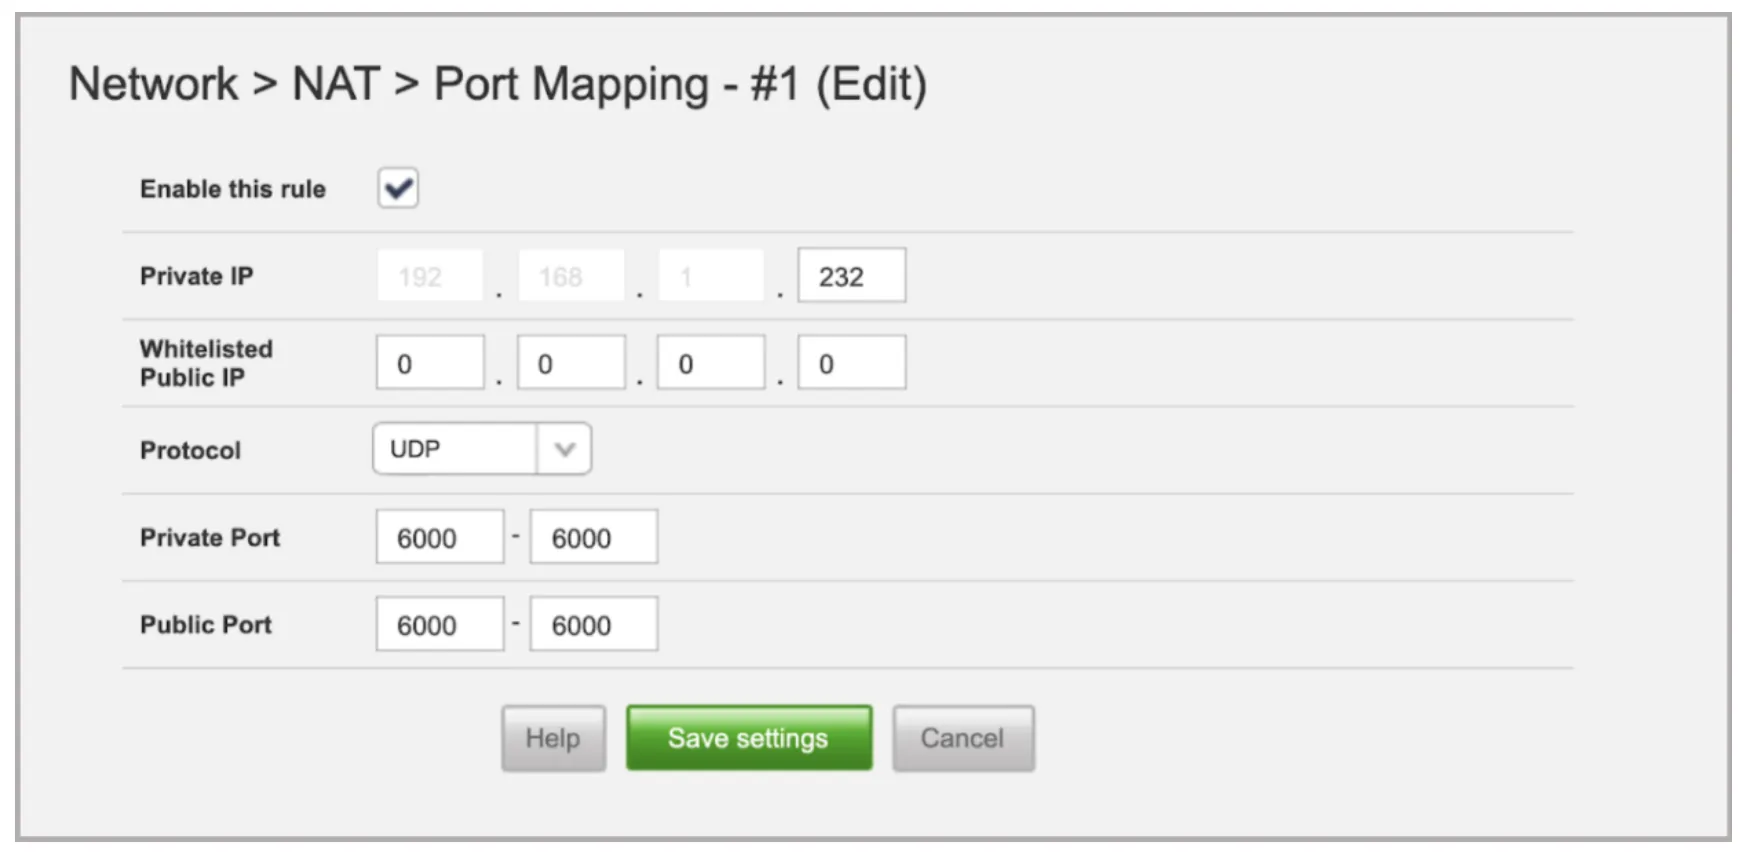
Select the Device you want to port forward to, then choose ‘Add port forward rule’. Enter
6000 for the port number or port range, and UDP for the Protocol. Some routers will ask for an internal
and external port. You can enter the same port for both. Some routers will ask for an external or public
IP, you can usually leave this blank.
-
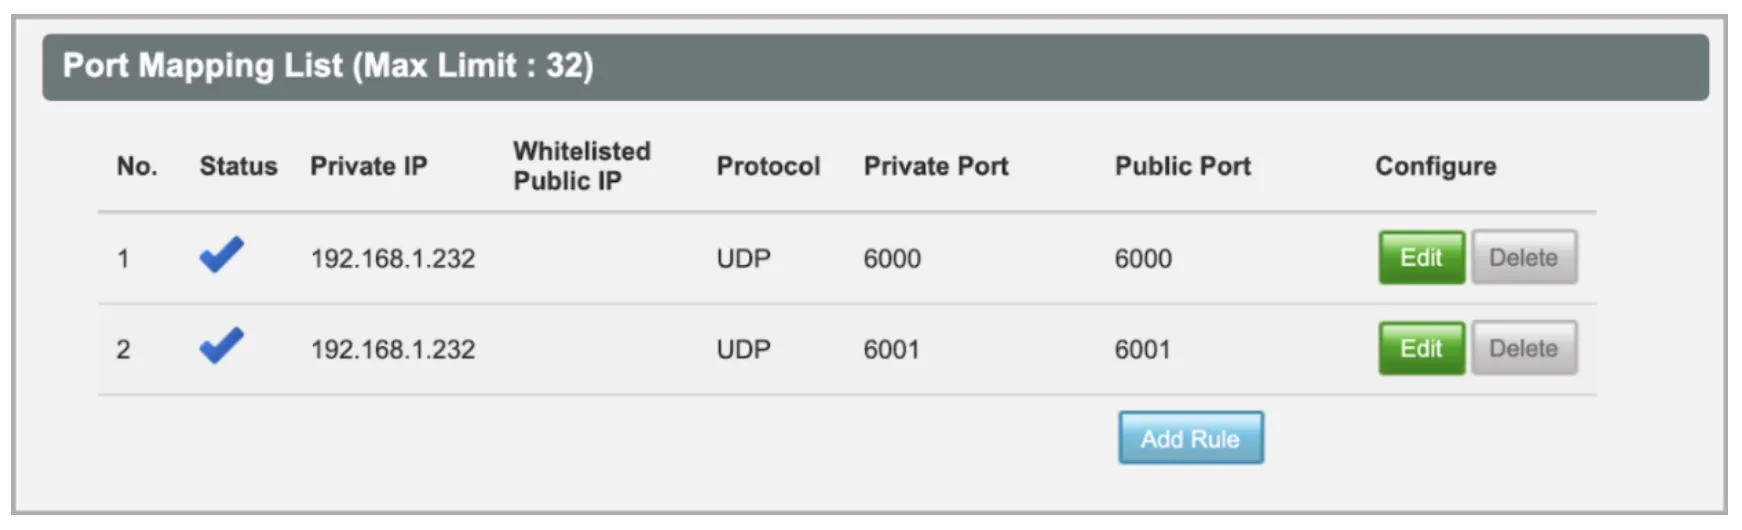
Select the Device again and add another port forward rule, this time for UDP port 6001.
Because there are such a wide variety of routers, and it is impossible to cover them all, we recommend looking at your router’s manual for help with navigating the router’s menus to find the correct sections. Internet Service Providers who support port forwarding often provide instructions for the specific routers they supply.
DHCP reservation and Static IP
In a router that does not let you choose your computer from a list of devices, you will likely need to reserve the IP address manually.
As well as an IP address, your computer's internet connection will have a MAC address. IP addresses can
be reused and recycled amongst devices, but MAC addresses are unique and permanent. We will tell your
router to always keep the same IP address assigned to your computer's MAC address.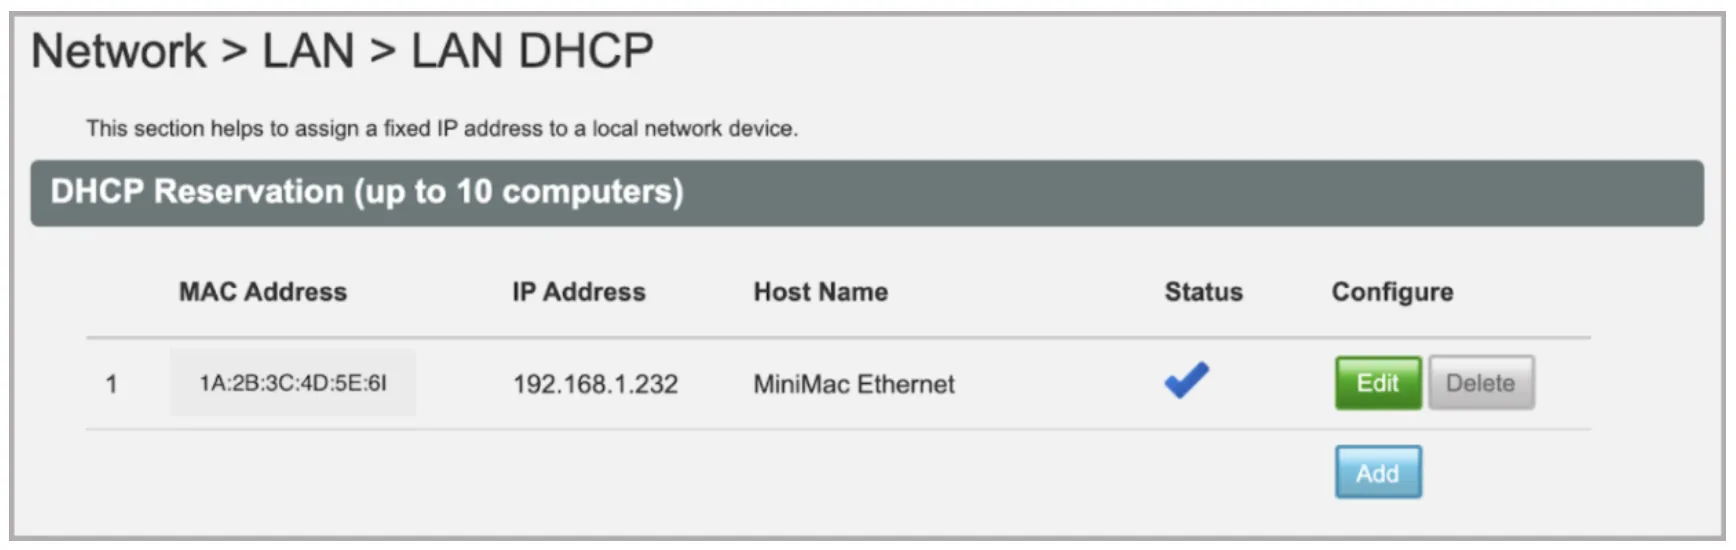
Finding your computer's IP and MAC address on Mac
To find your computer’s IP address and MAC address, go to System Preferences > Network.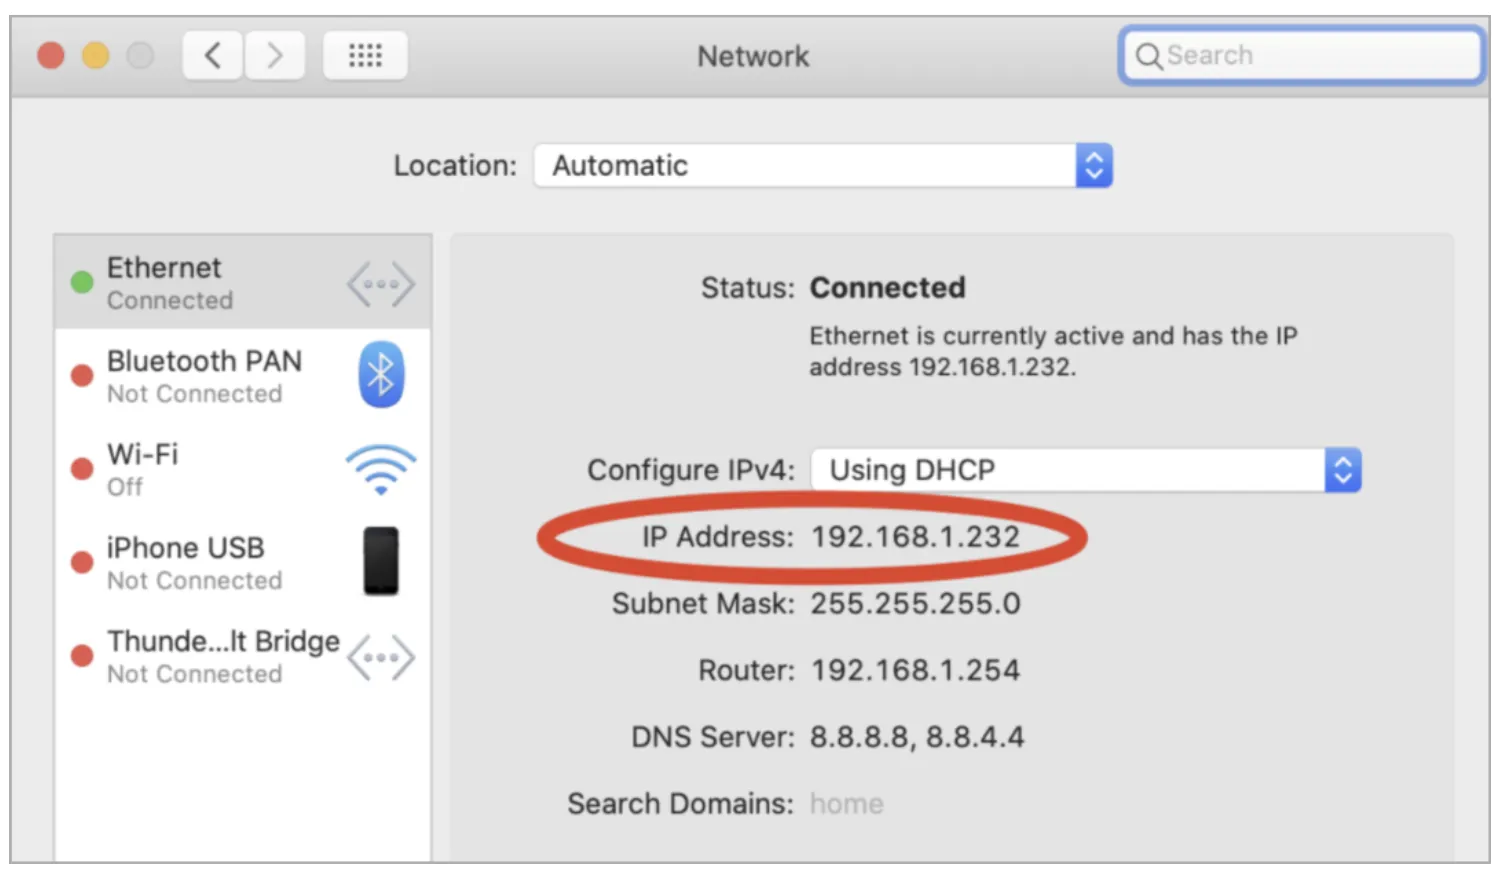
The IP address is displayed when the computer is connected to the network.
Click the ‘Advanced’ button in the bottom right corner, then navigate to the ‘Hardware’ tab in order to
view your computer’s MAC address.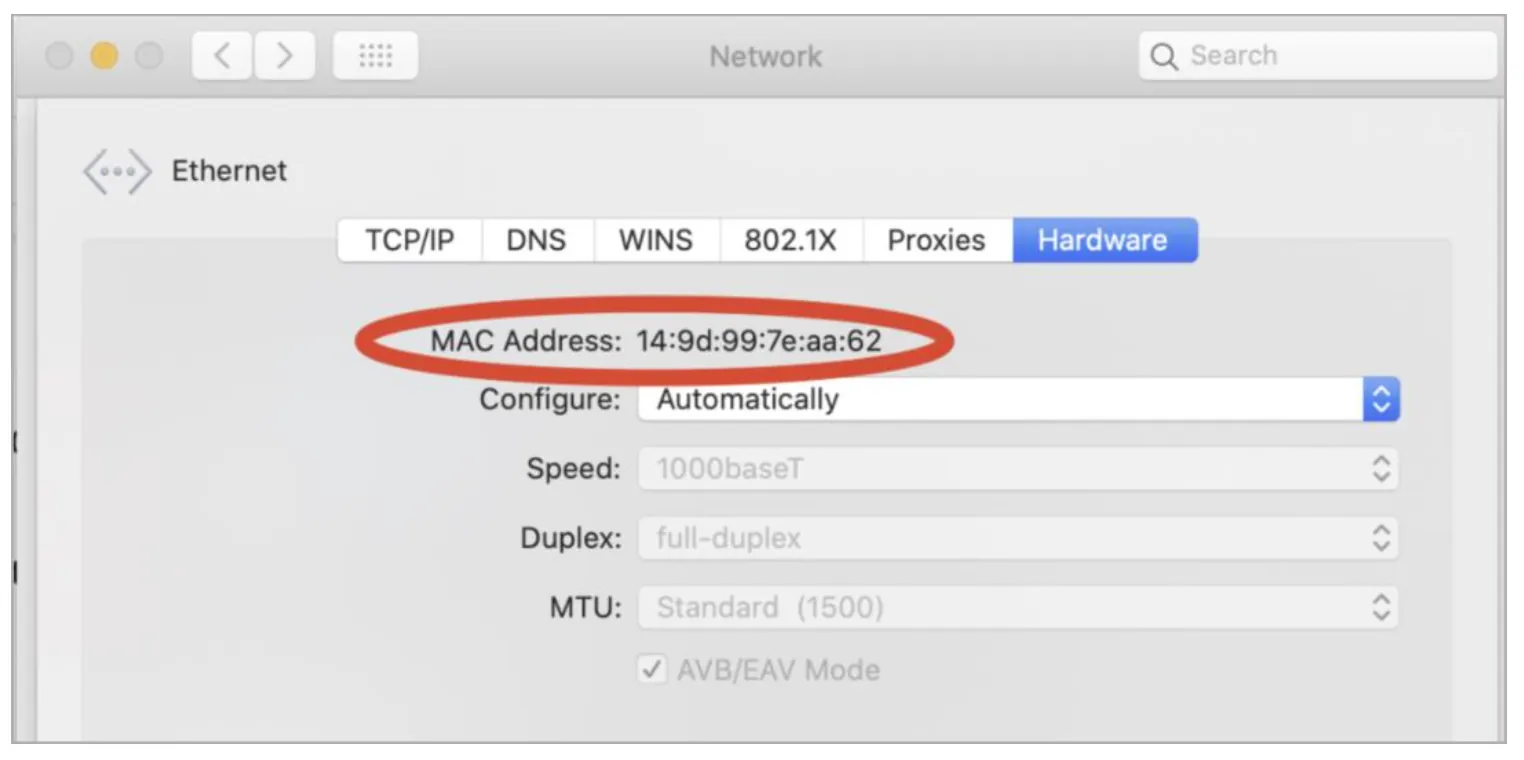
Finding your computer's IP and MAC address on Windows
As mentioned above, to find your computer's IP address, open the Command Prompt and type in
ipconfig. Your router's IP address
will be the Default Gateway: 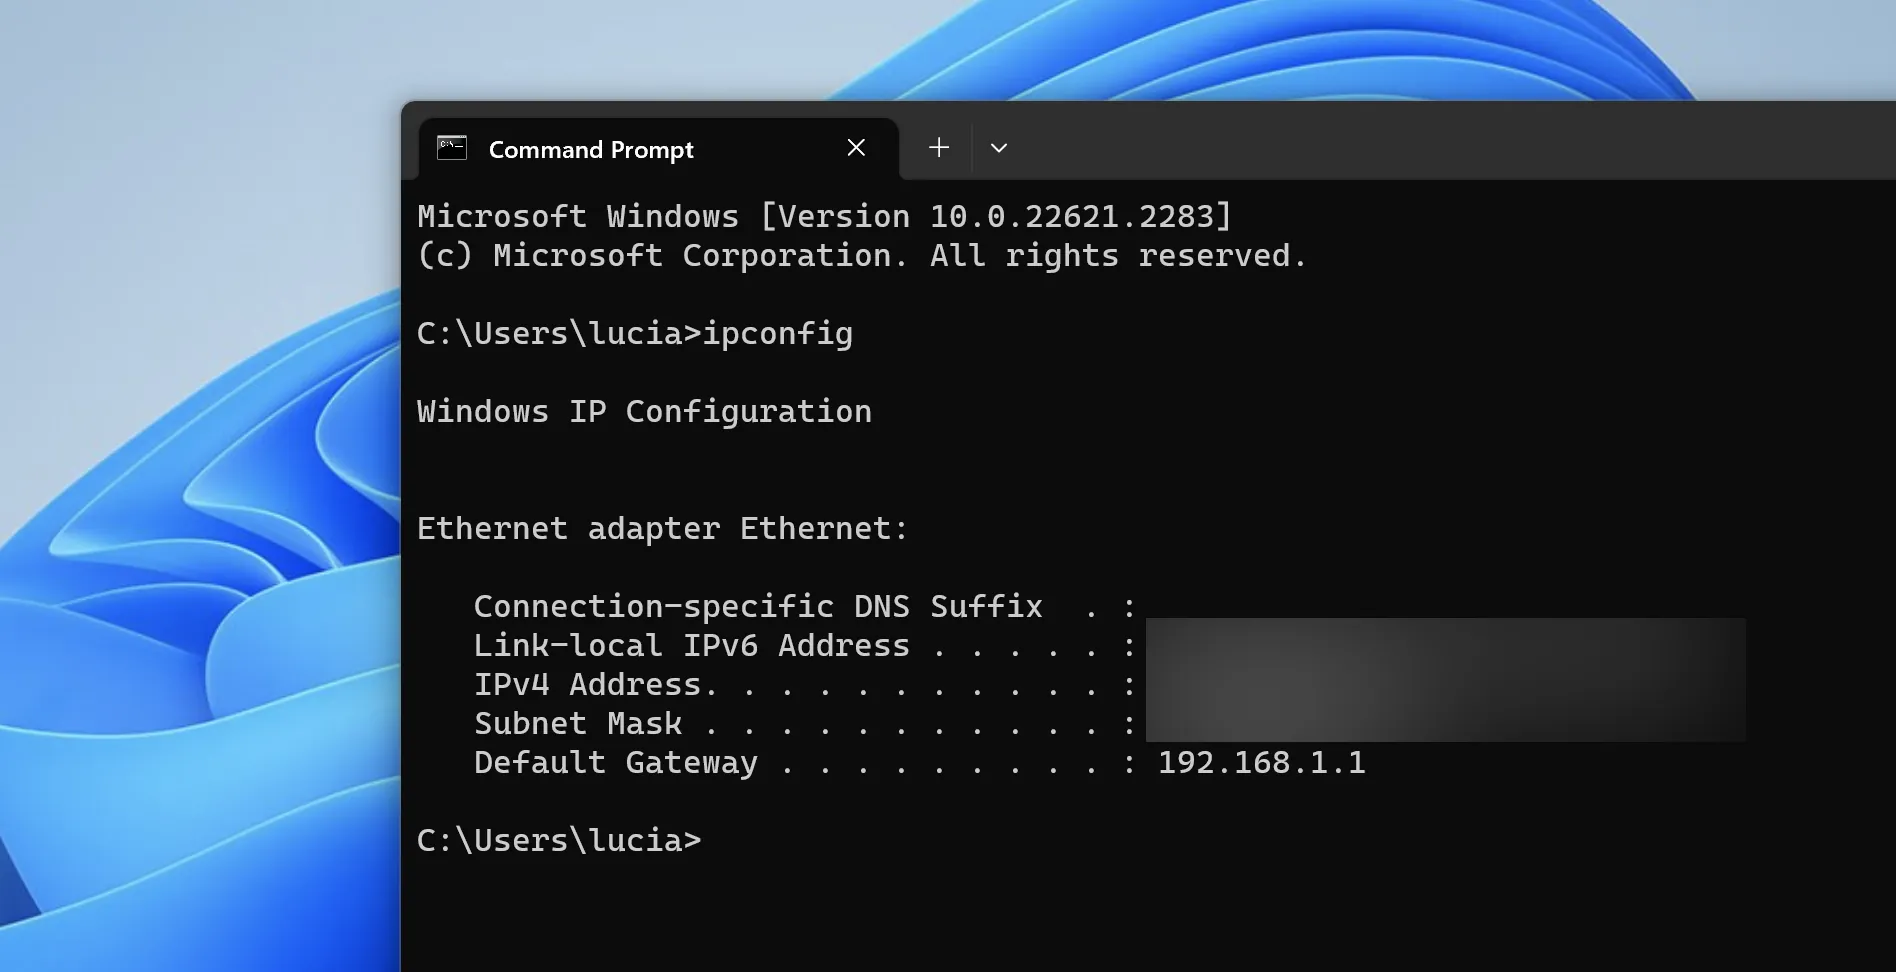
To find your MAC address, type in ipconfig /all on you command prompt. The “Physical Address” is your MAC address:
