How to use Source-Connect and Reaper to record on Windows for Studios
With Source-Connect and Reaper combined, it is possible to record yourself and your talent, to send background music though, and to playback while on a session. In order to do so:
-
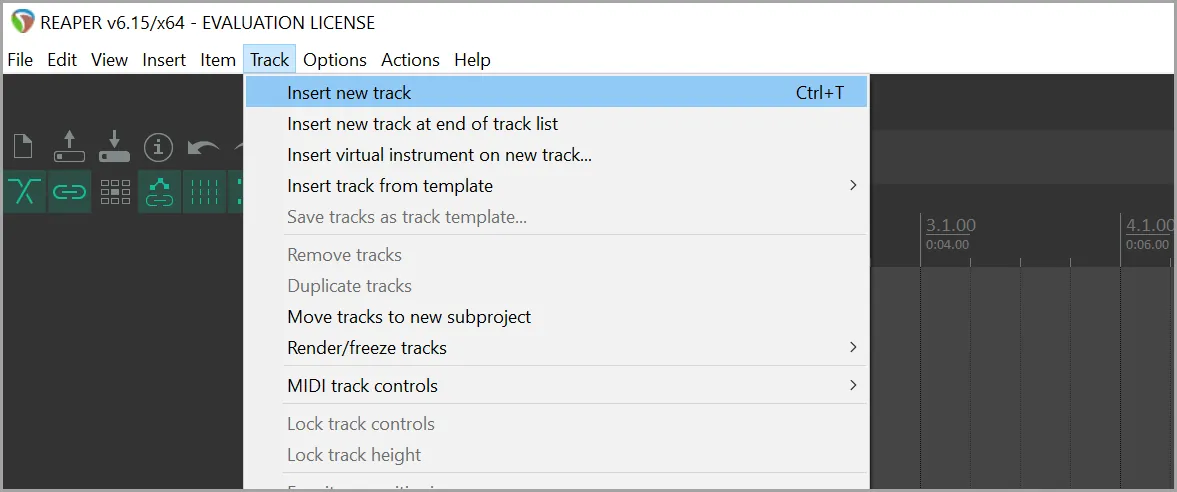
Create four new tracks in Reaper. You can do so by going to Track > Insert new
track.
-
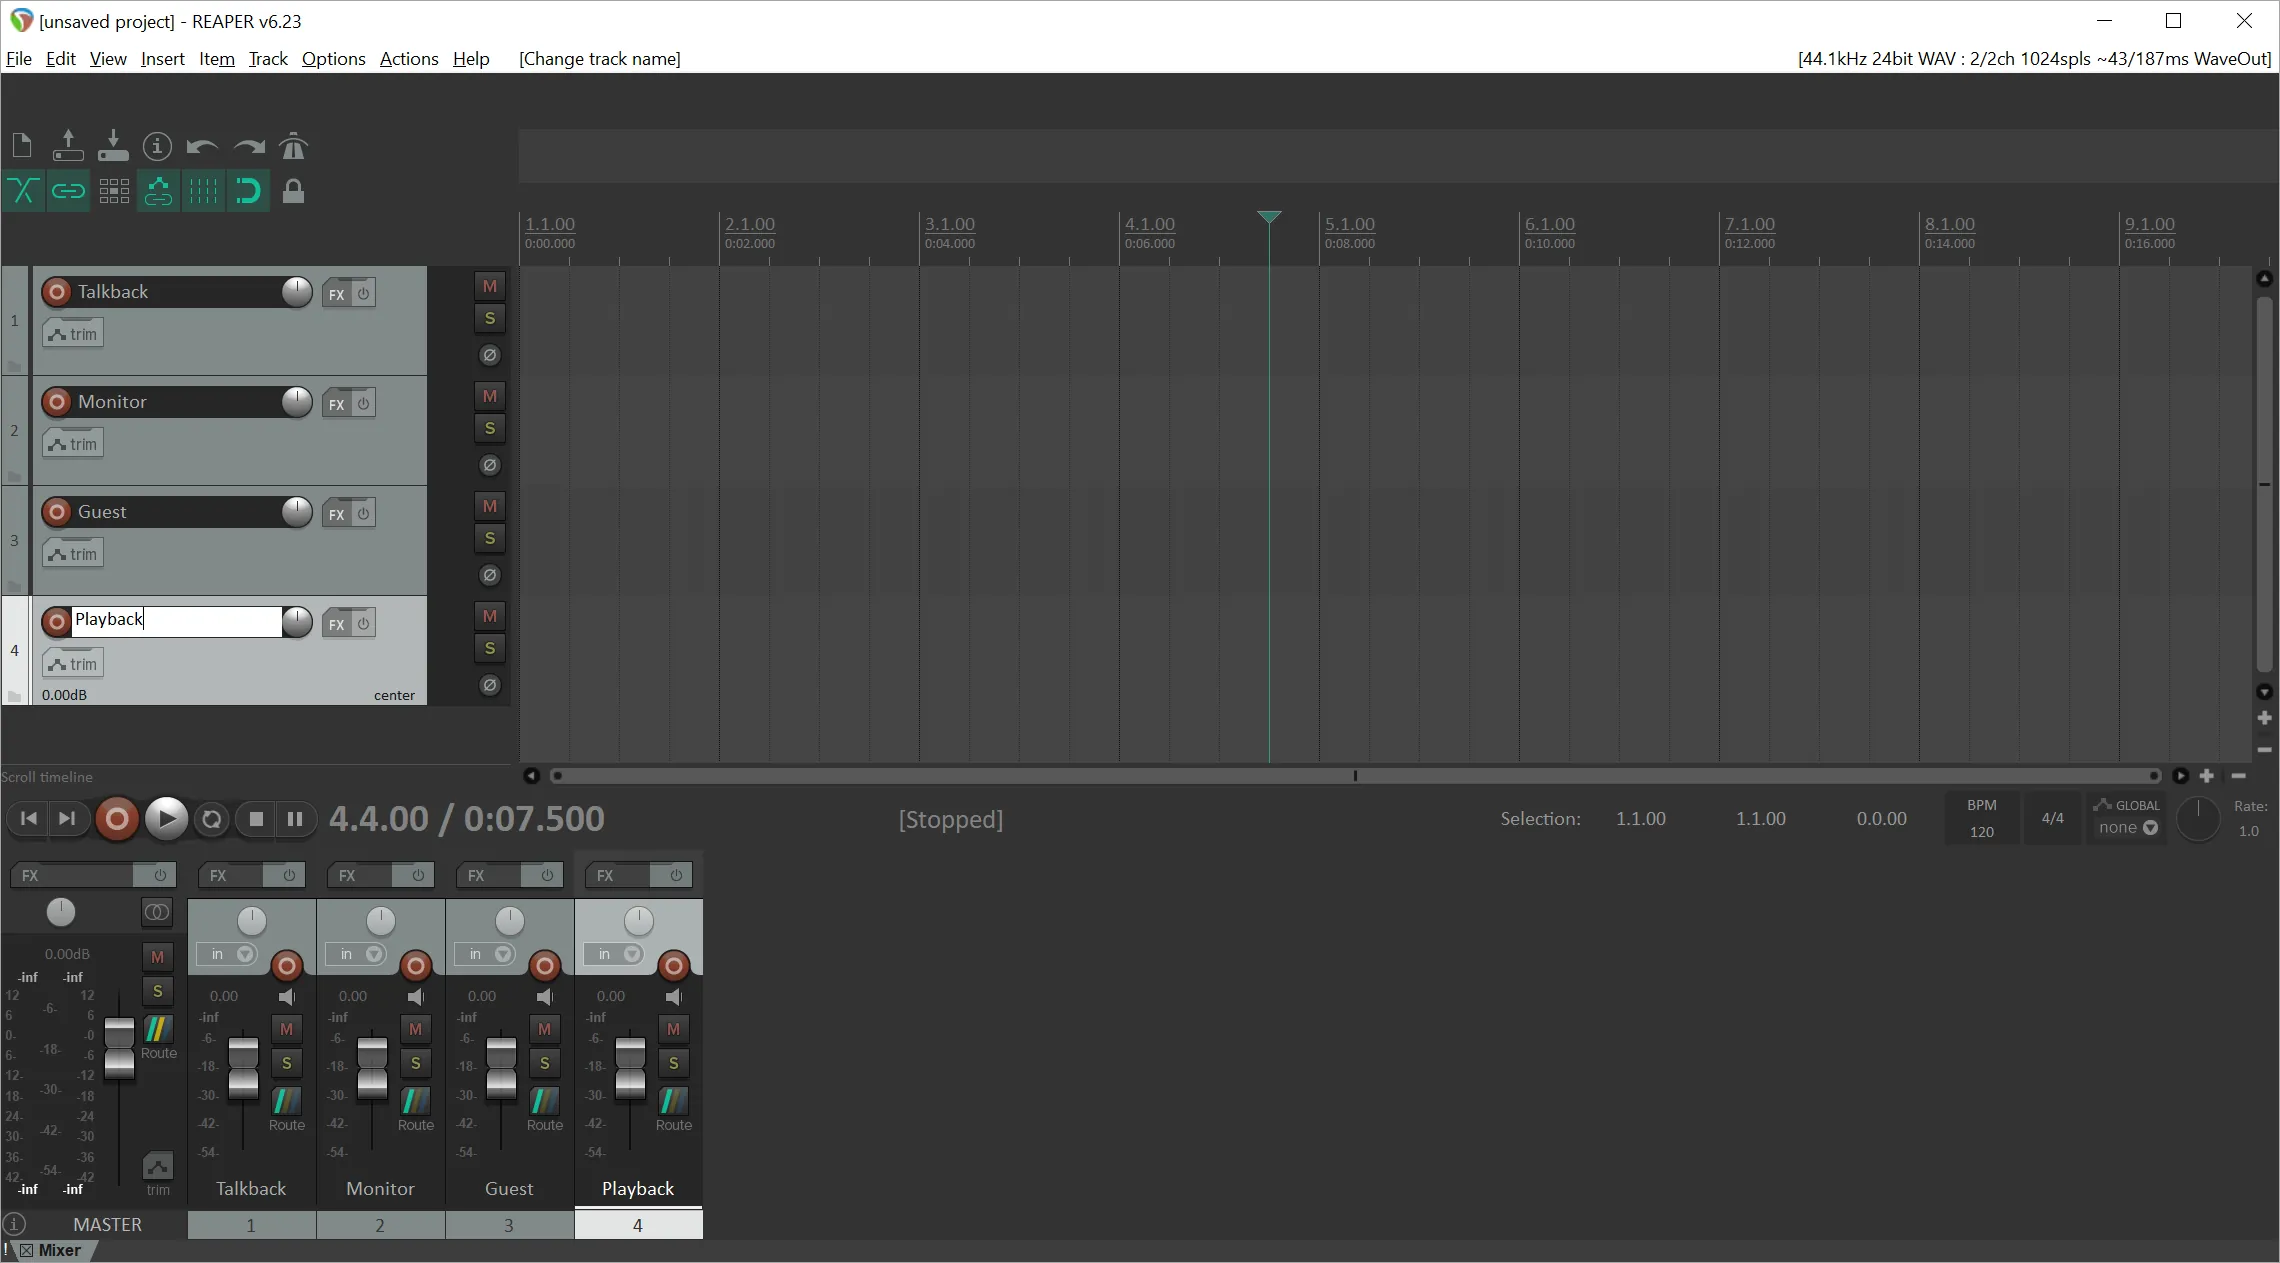
Name the four tracks as "Talkback",
"Monitor", "Guest" and "Playback". In order to rename tracks, just
double-click on the blank space next to the red Record Arm button on each track.
-
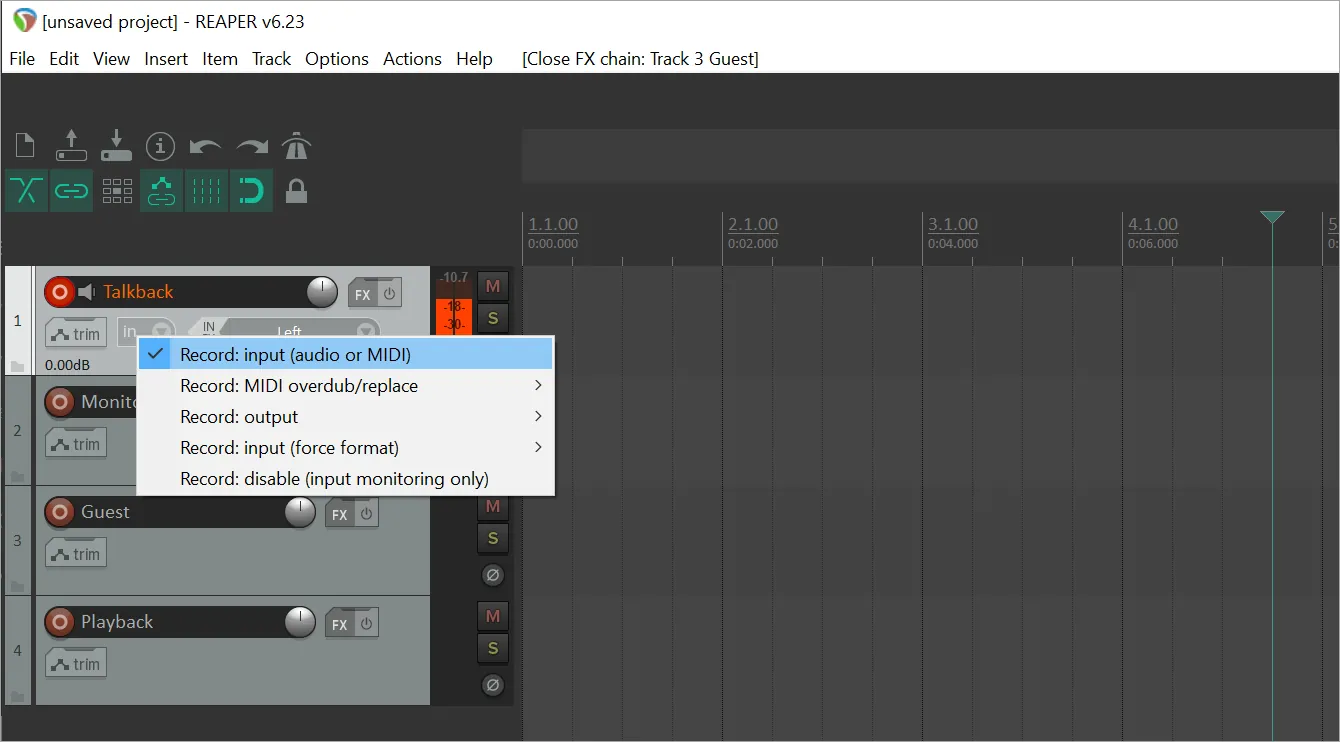
Record Arm track the "Talkback" track and make sure that the input is set to your
microphone.
-
Add the Source-Connect VST Link plugin to the Guest track. You can do
so by clicking the "FX" button on the "Guest track" and selecting VST: Source-Connect Link (Source
Elements) from the list.
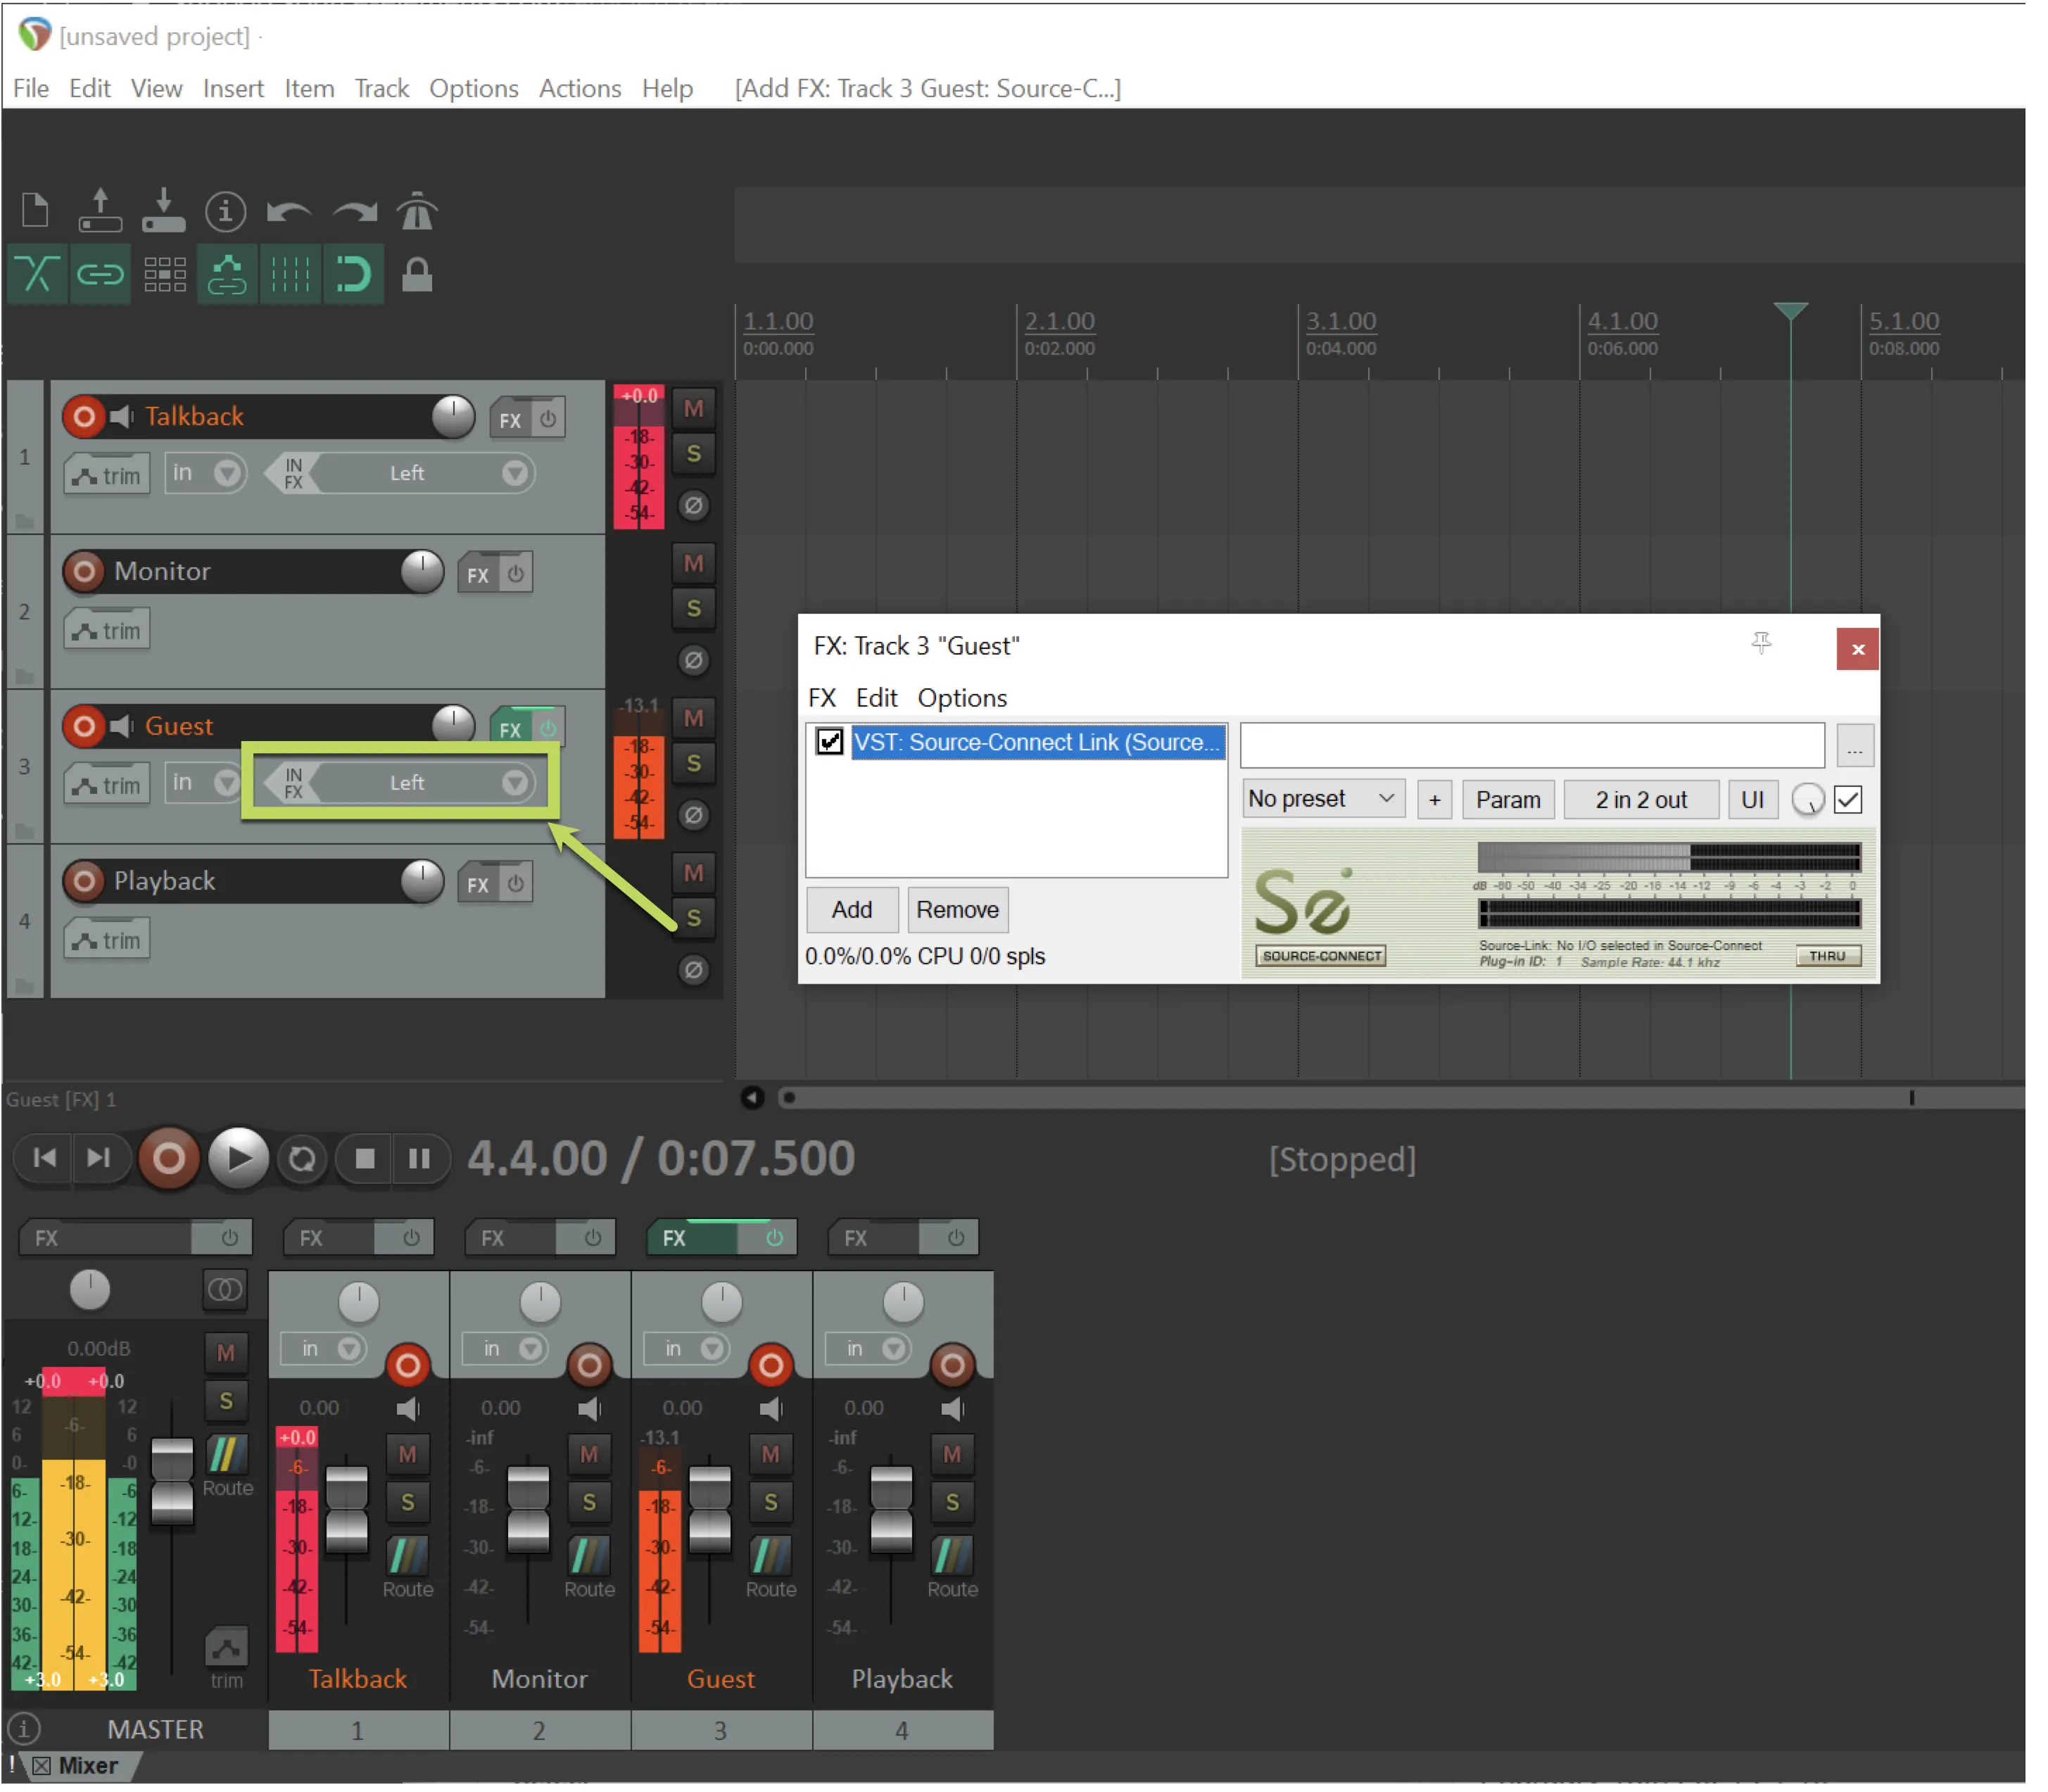
Make sure you are not adding the Source-Connect Link plugin as pre-fx. Check that “IN FX” is grayed out and not green.
-
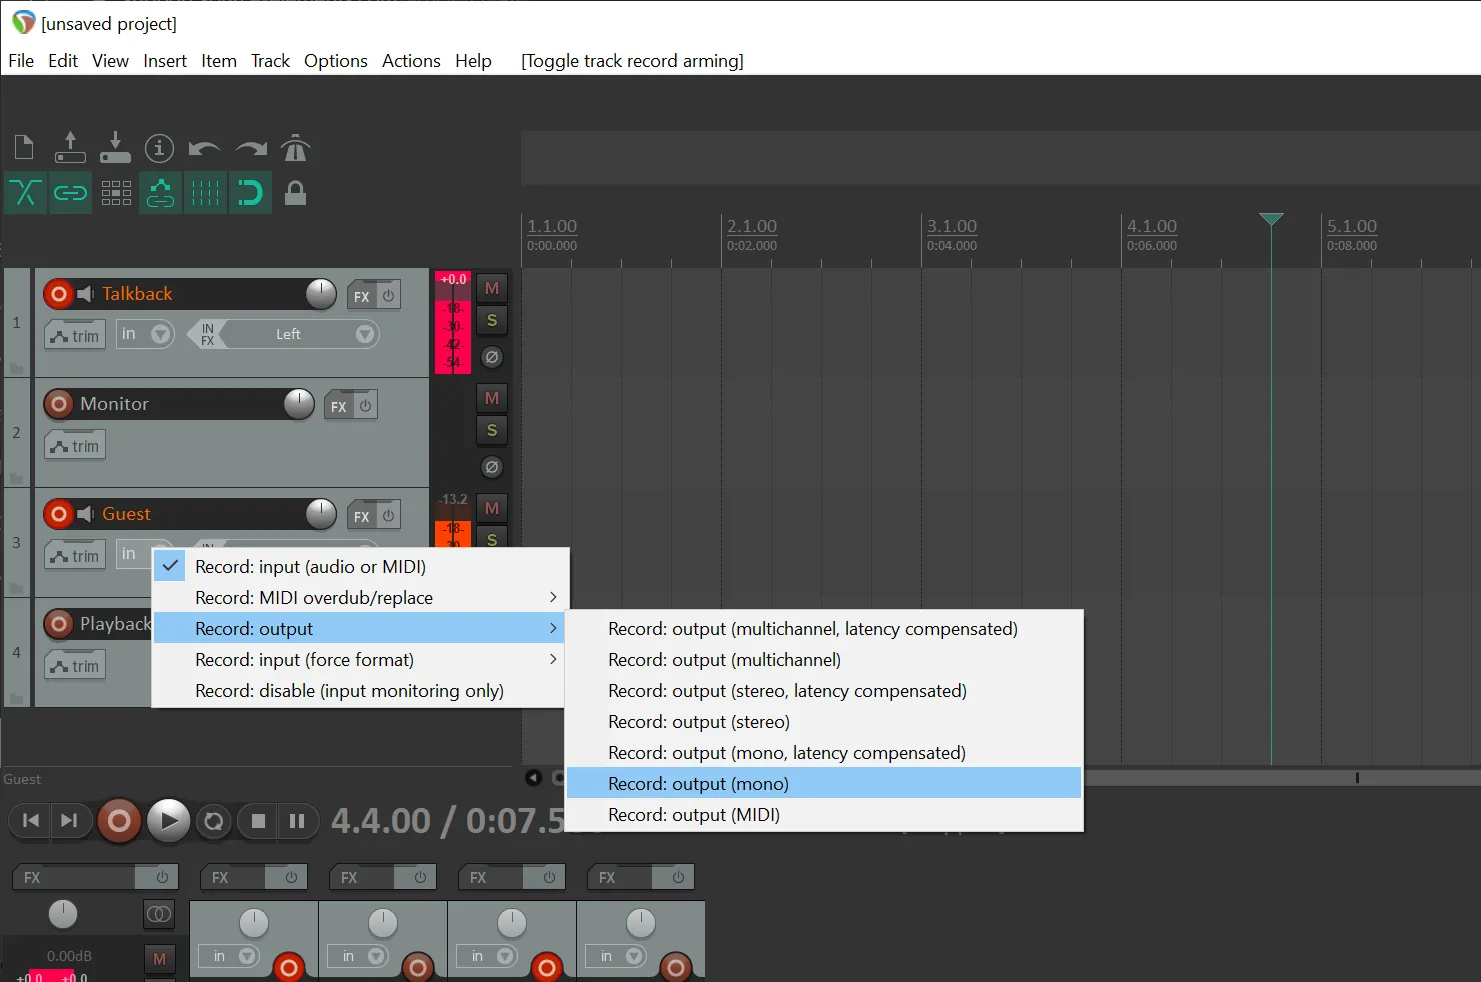
Record Arm the "Guest" track and set the
Record Input to "Record Output: mono".
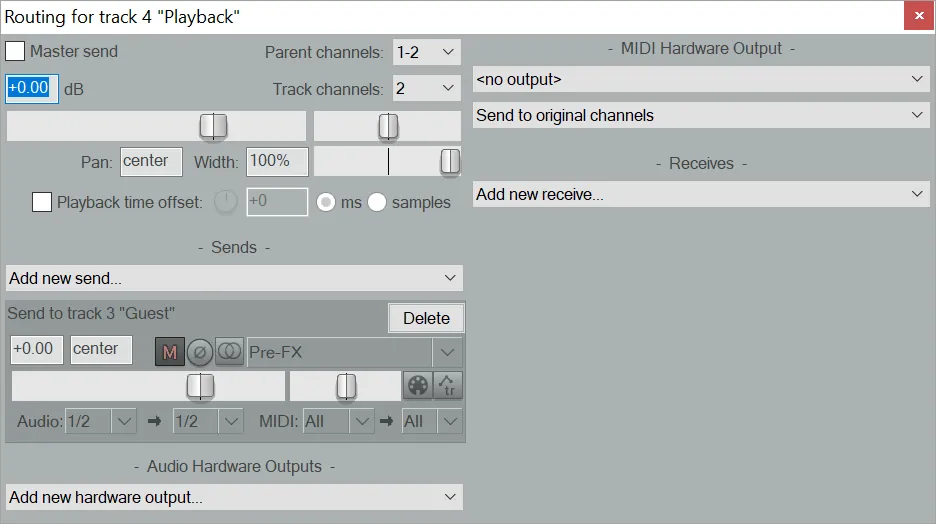
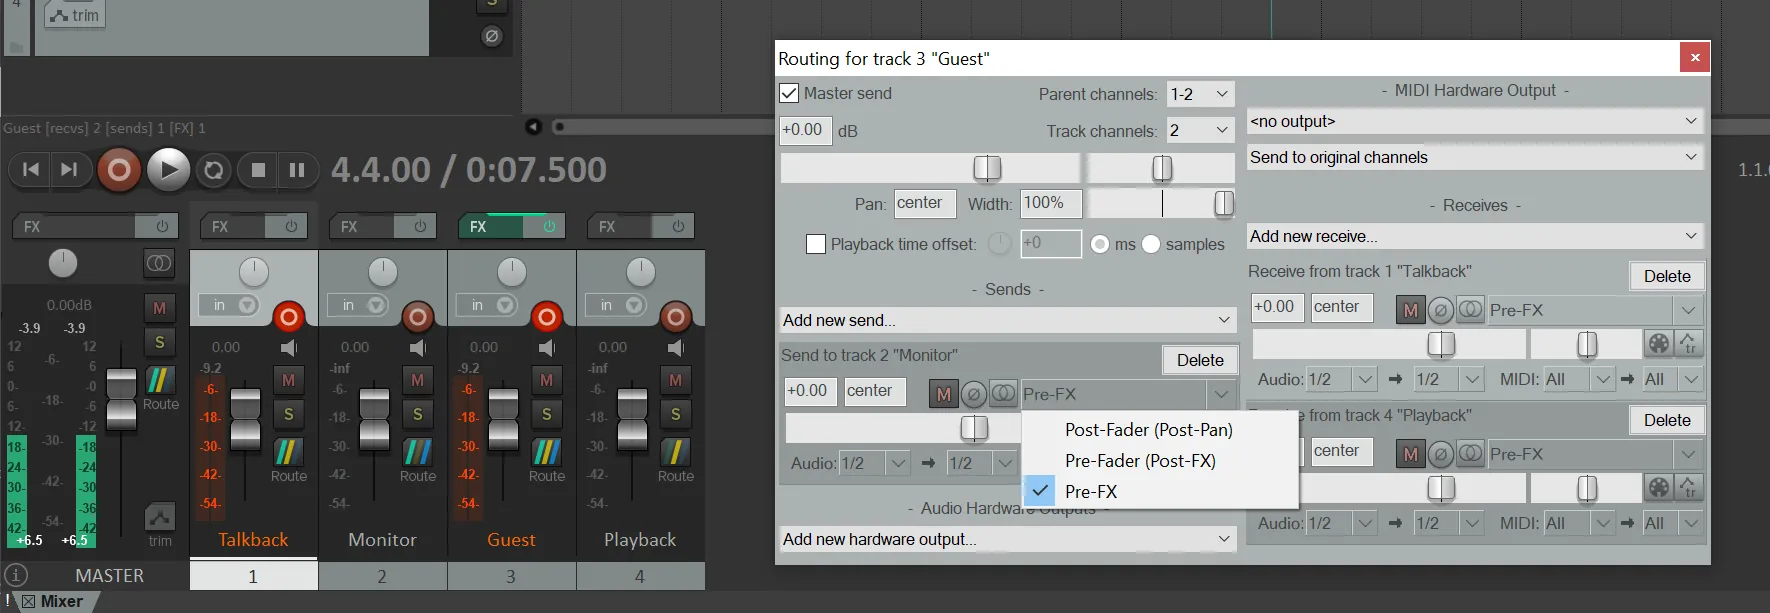
6. Click "Route" on the "Talkback" track and create a send to track 3 ("Guest"). In addition, change the send type to "Pre-FX".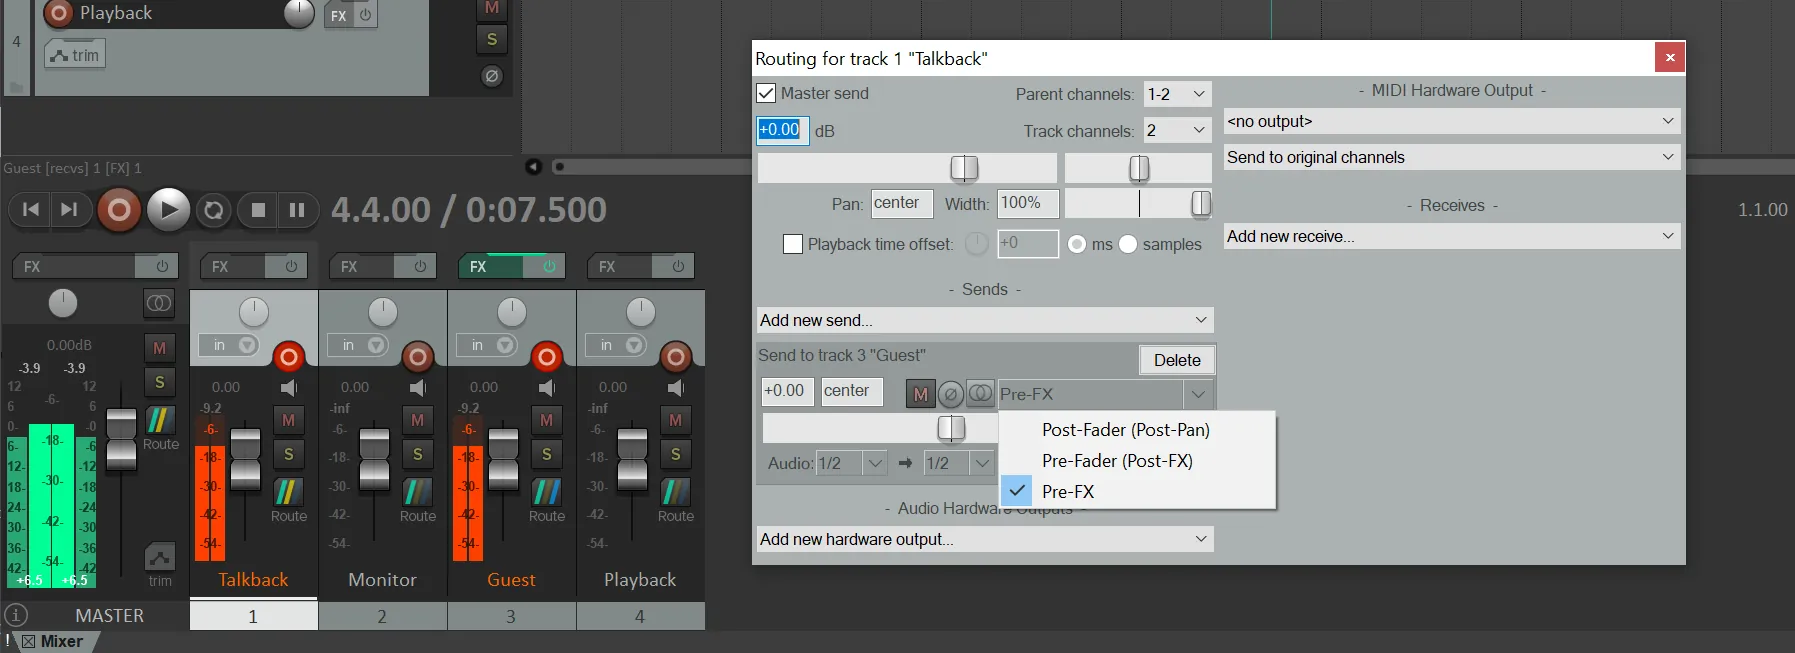 7. Click "Route" on the "Playback" track and
create a send to track 3 ("Guest"). In addition, change
the send type to "Pre-FX".
7. Click "Route" on the "Playback" track and
create a send to track 3 ("Guest"). In addition, change
the send type to "Pre-FX". 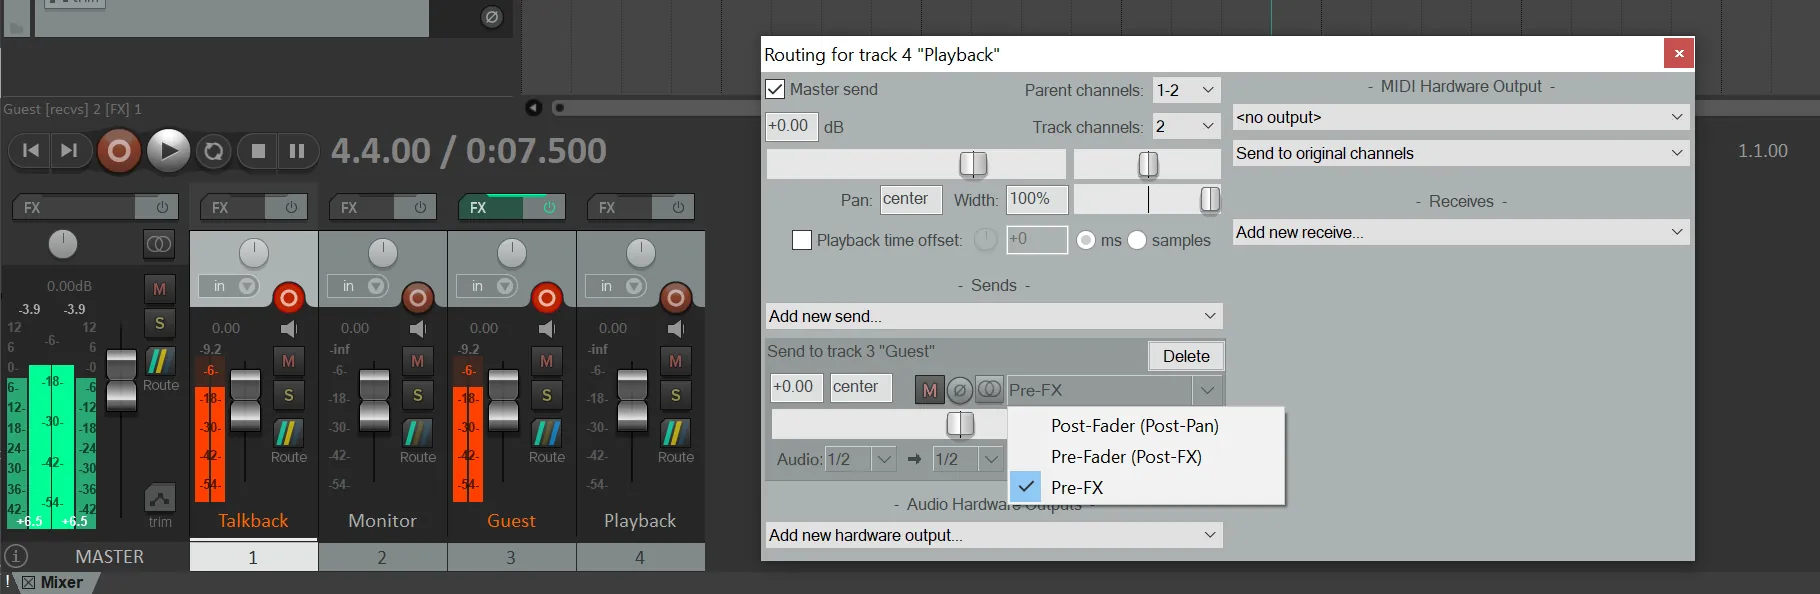
In addition, while also on the Playback track, uncheck the "Master send" at the top left of the "Routing" window.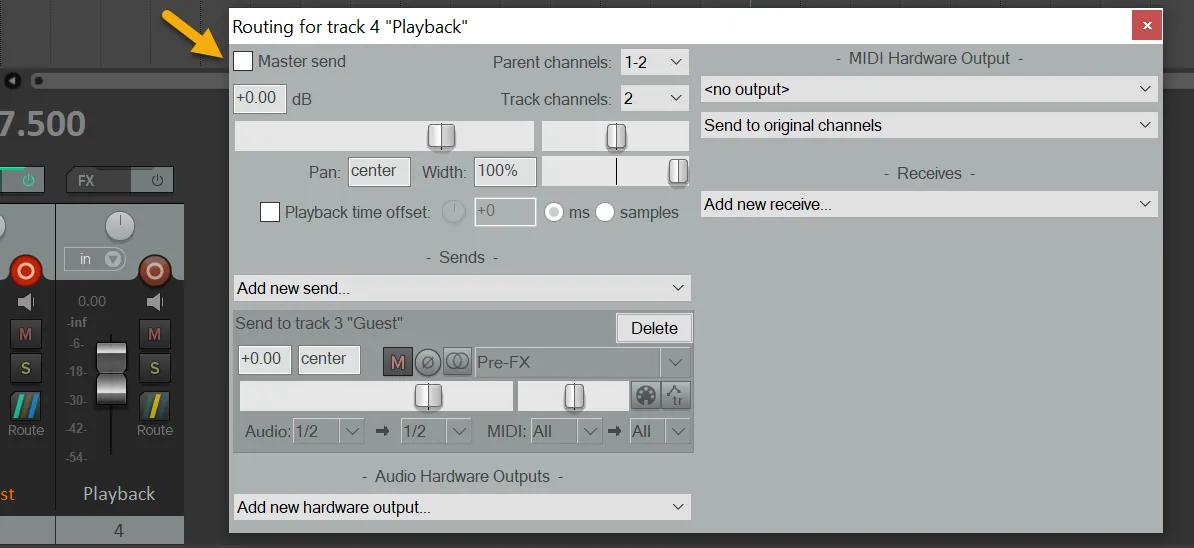 8.
Click "Route" on the "Guest" track and create a
send to the "Monitor" track. Then, change the send type to "Pre-FX".
8.
Click "Route" on the "Guest" track and create a
send to the "Monitor" track. Then, change the send type to "Pre-FX".
 9.
Open Source-Connect and
change inputs and outputs to Source-Connect Link.
9.
Open Source-Connect and
change inputs and outputs to Source-Connect Link. 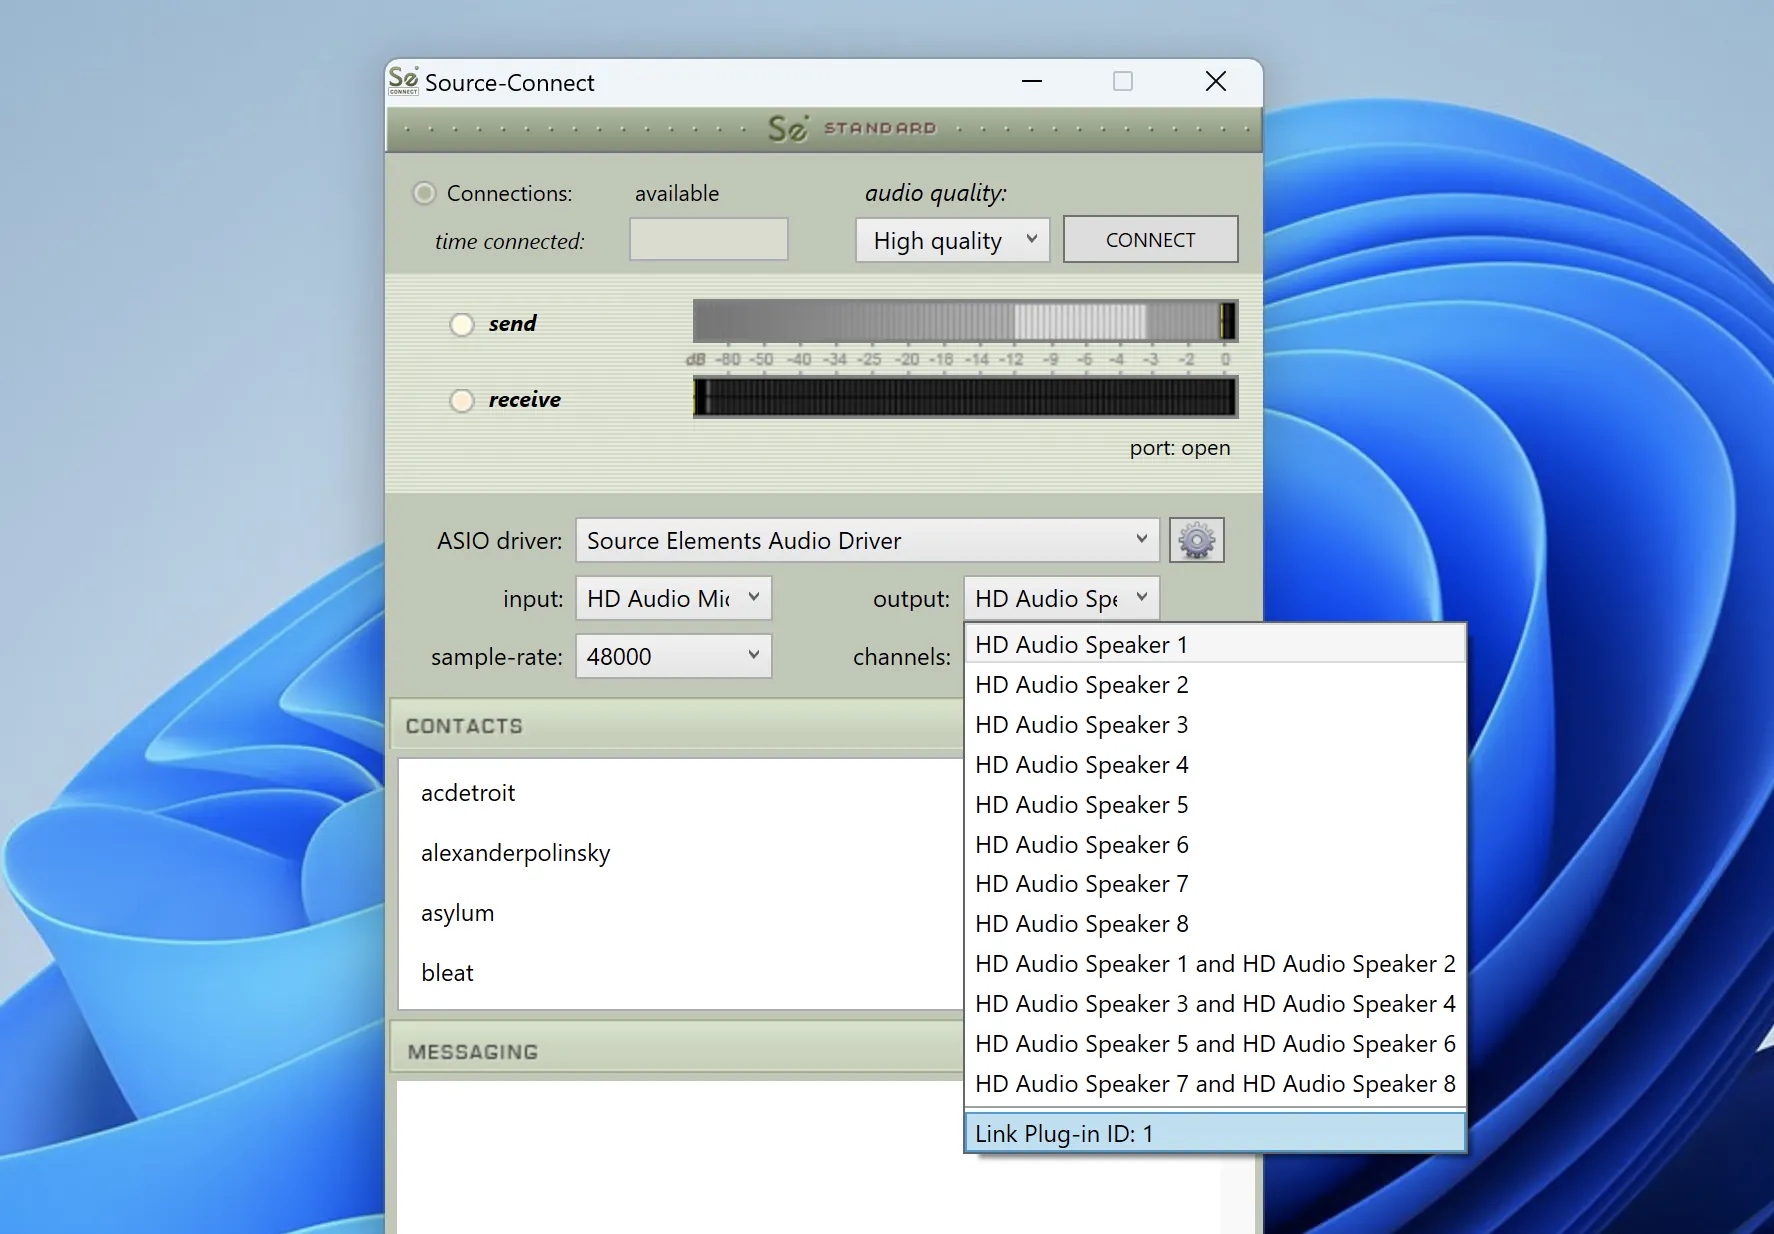
NOTE: only the "Talkback" and the "Guest" tracks should be record-enabled.
If you need to change volumes for the other side at all, you will need to open the Routing panel of the channel and change the volume of the send to Guest.
The end result should look similar to the ones below.
Reaper setup: 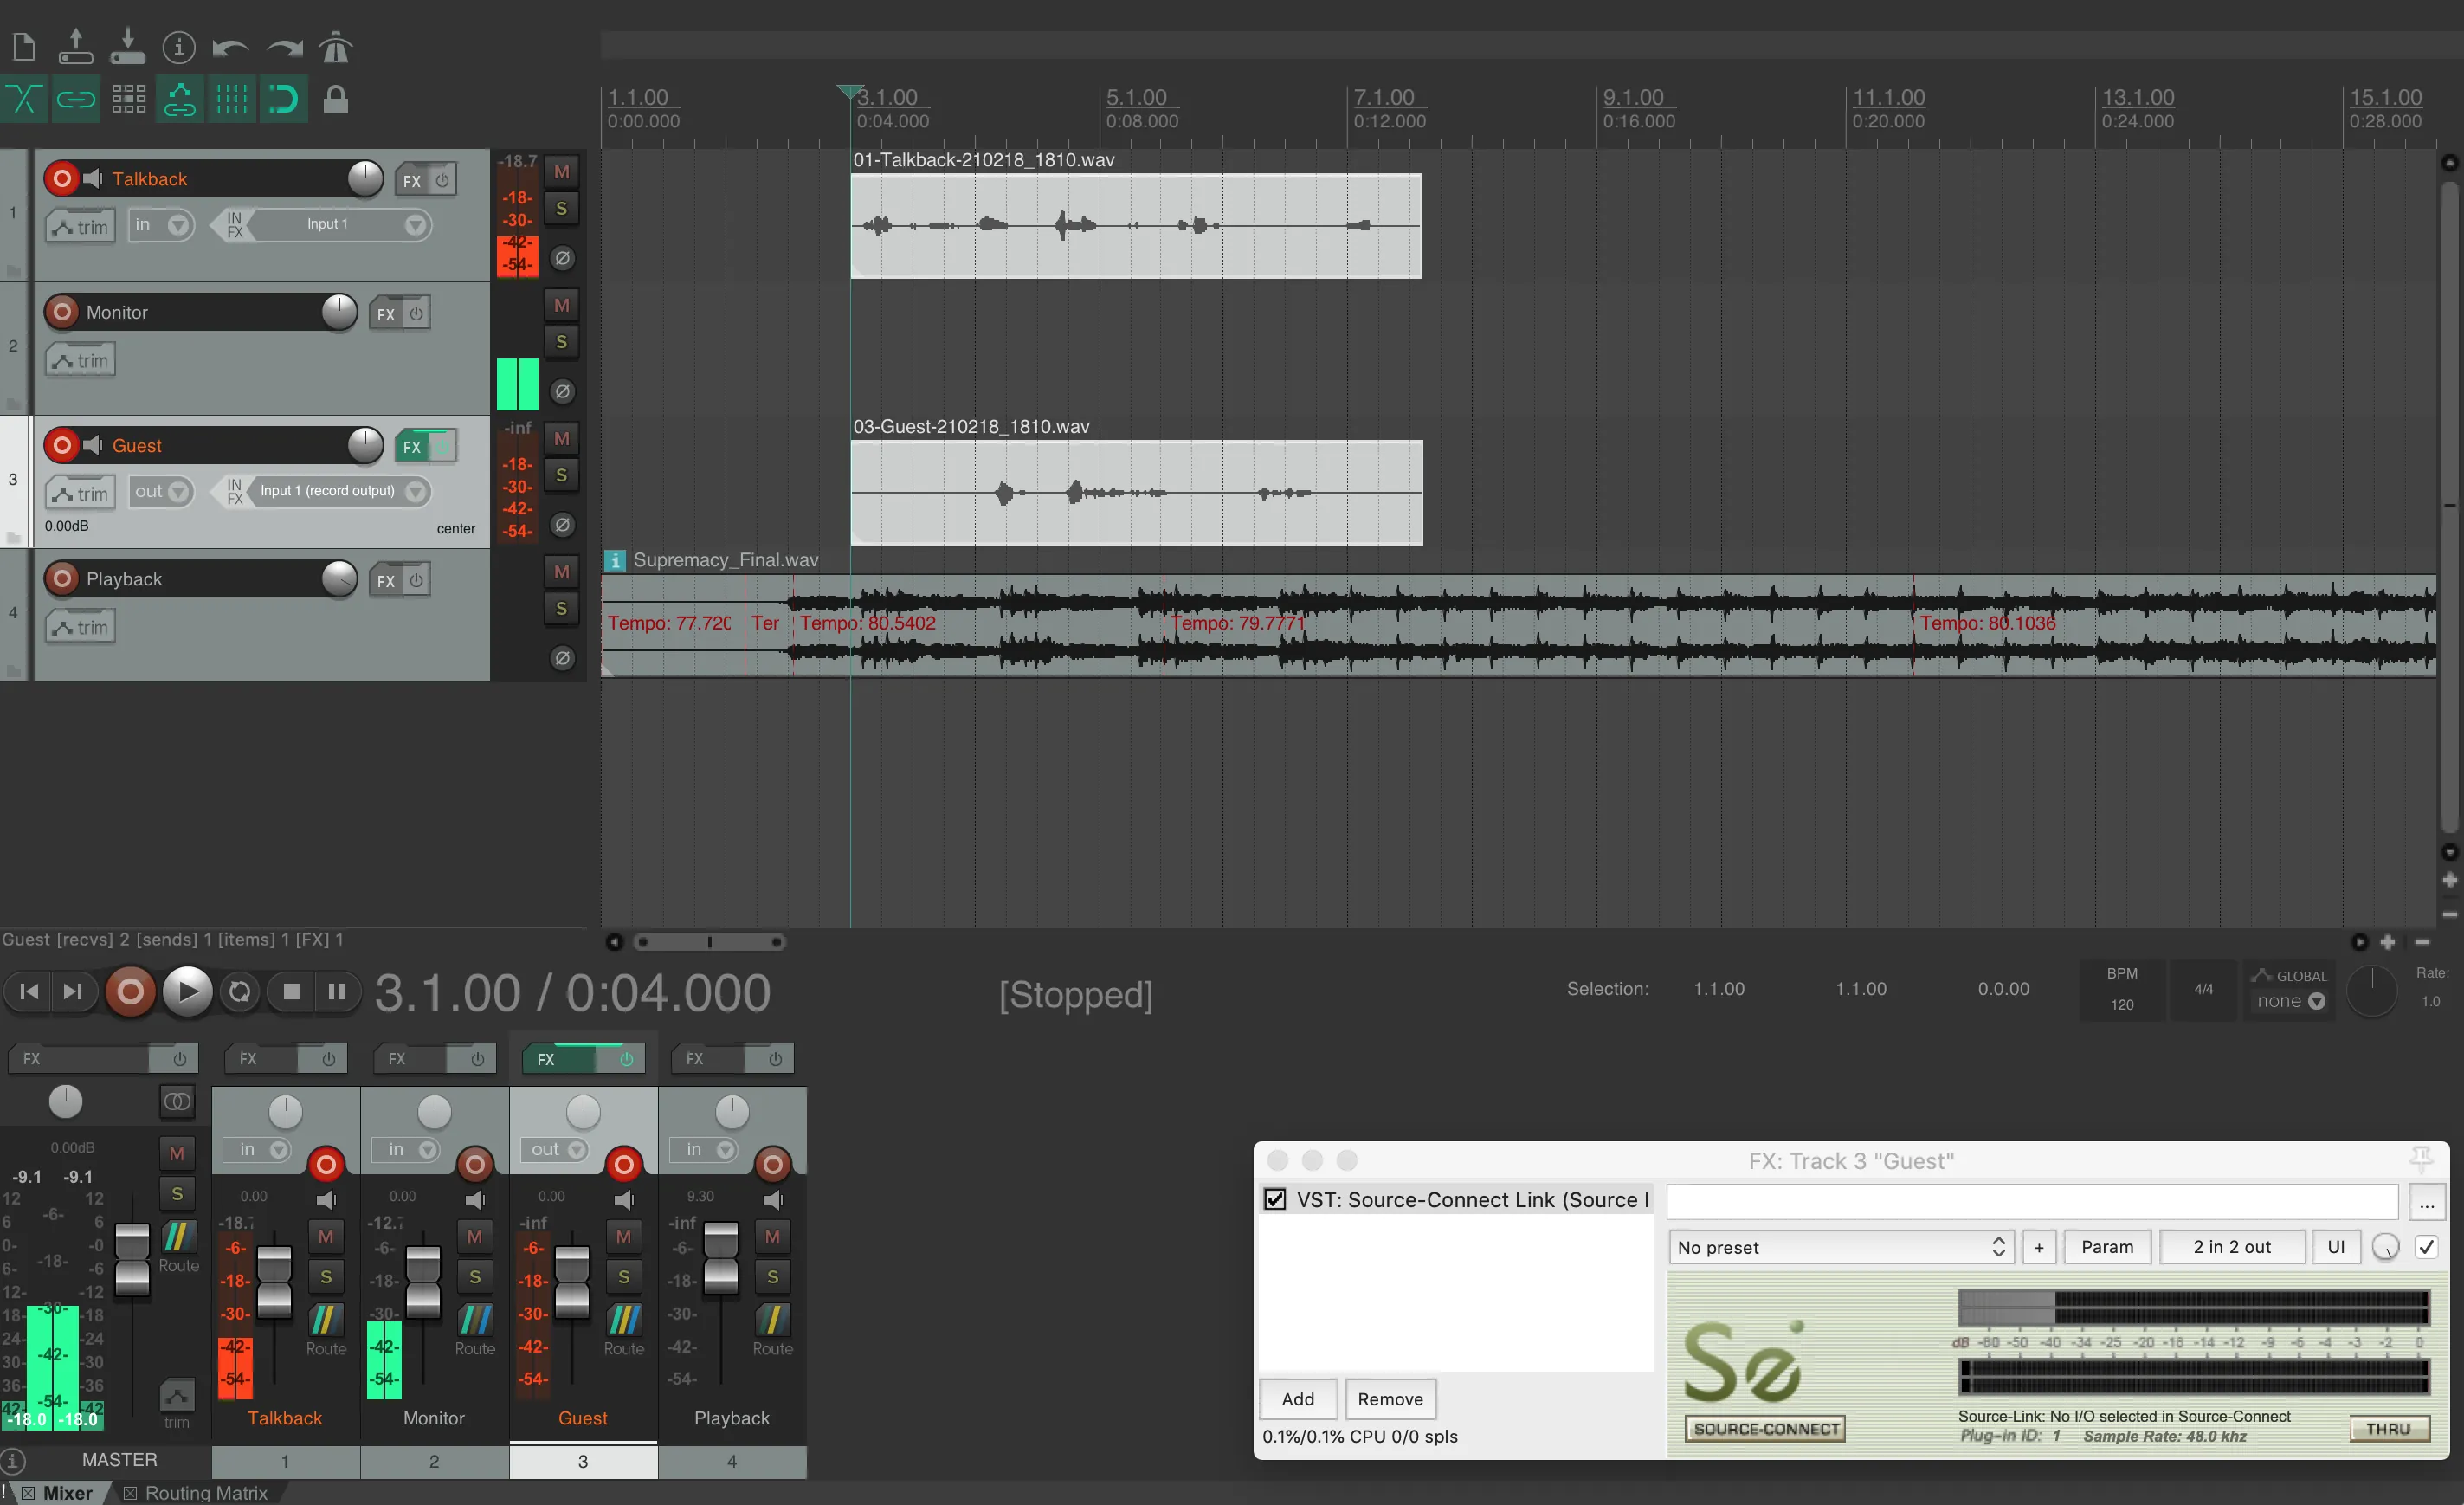
"Talkback" track routing:
"Monitor" track routing:
"Guest" track routing:
"Playback" track routing: