Finding your Source-Nexus Gateway controls as a viewer
This article is part of the Source-Nexus Gateway User GuideYou can find all of your controls in the navigation bar, at the bottom of your browser window. This section will always be visible during your call. You will also find three very important indicators at the top of the screen.
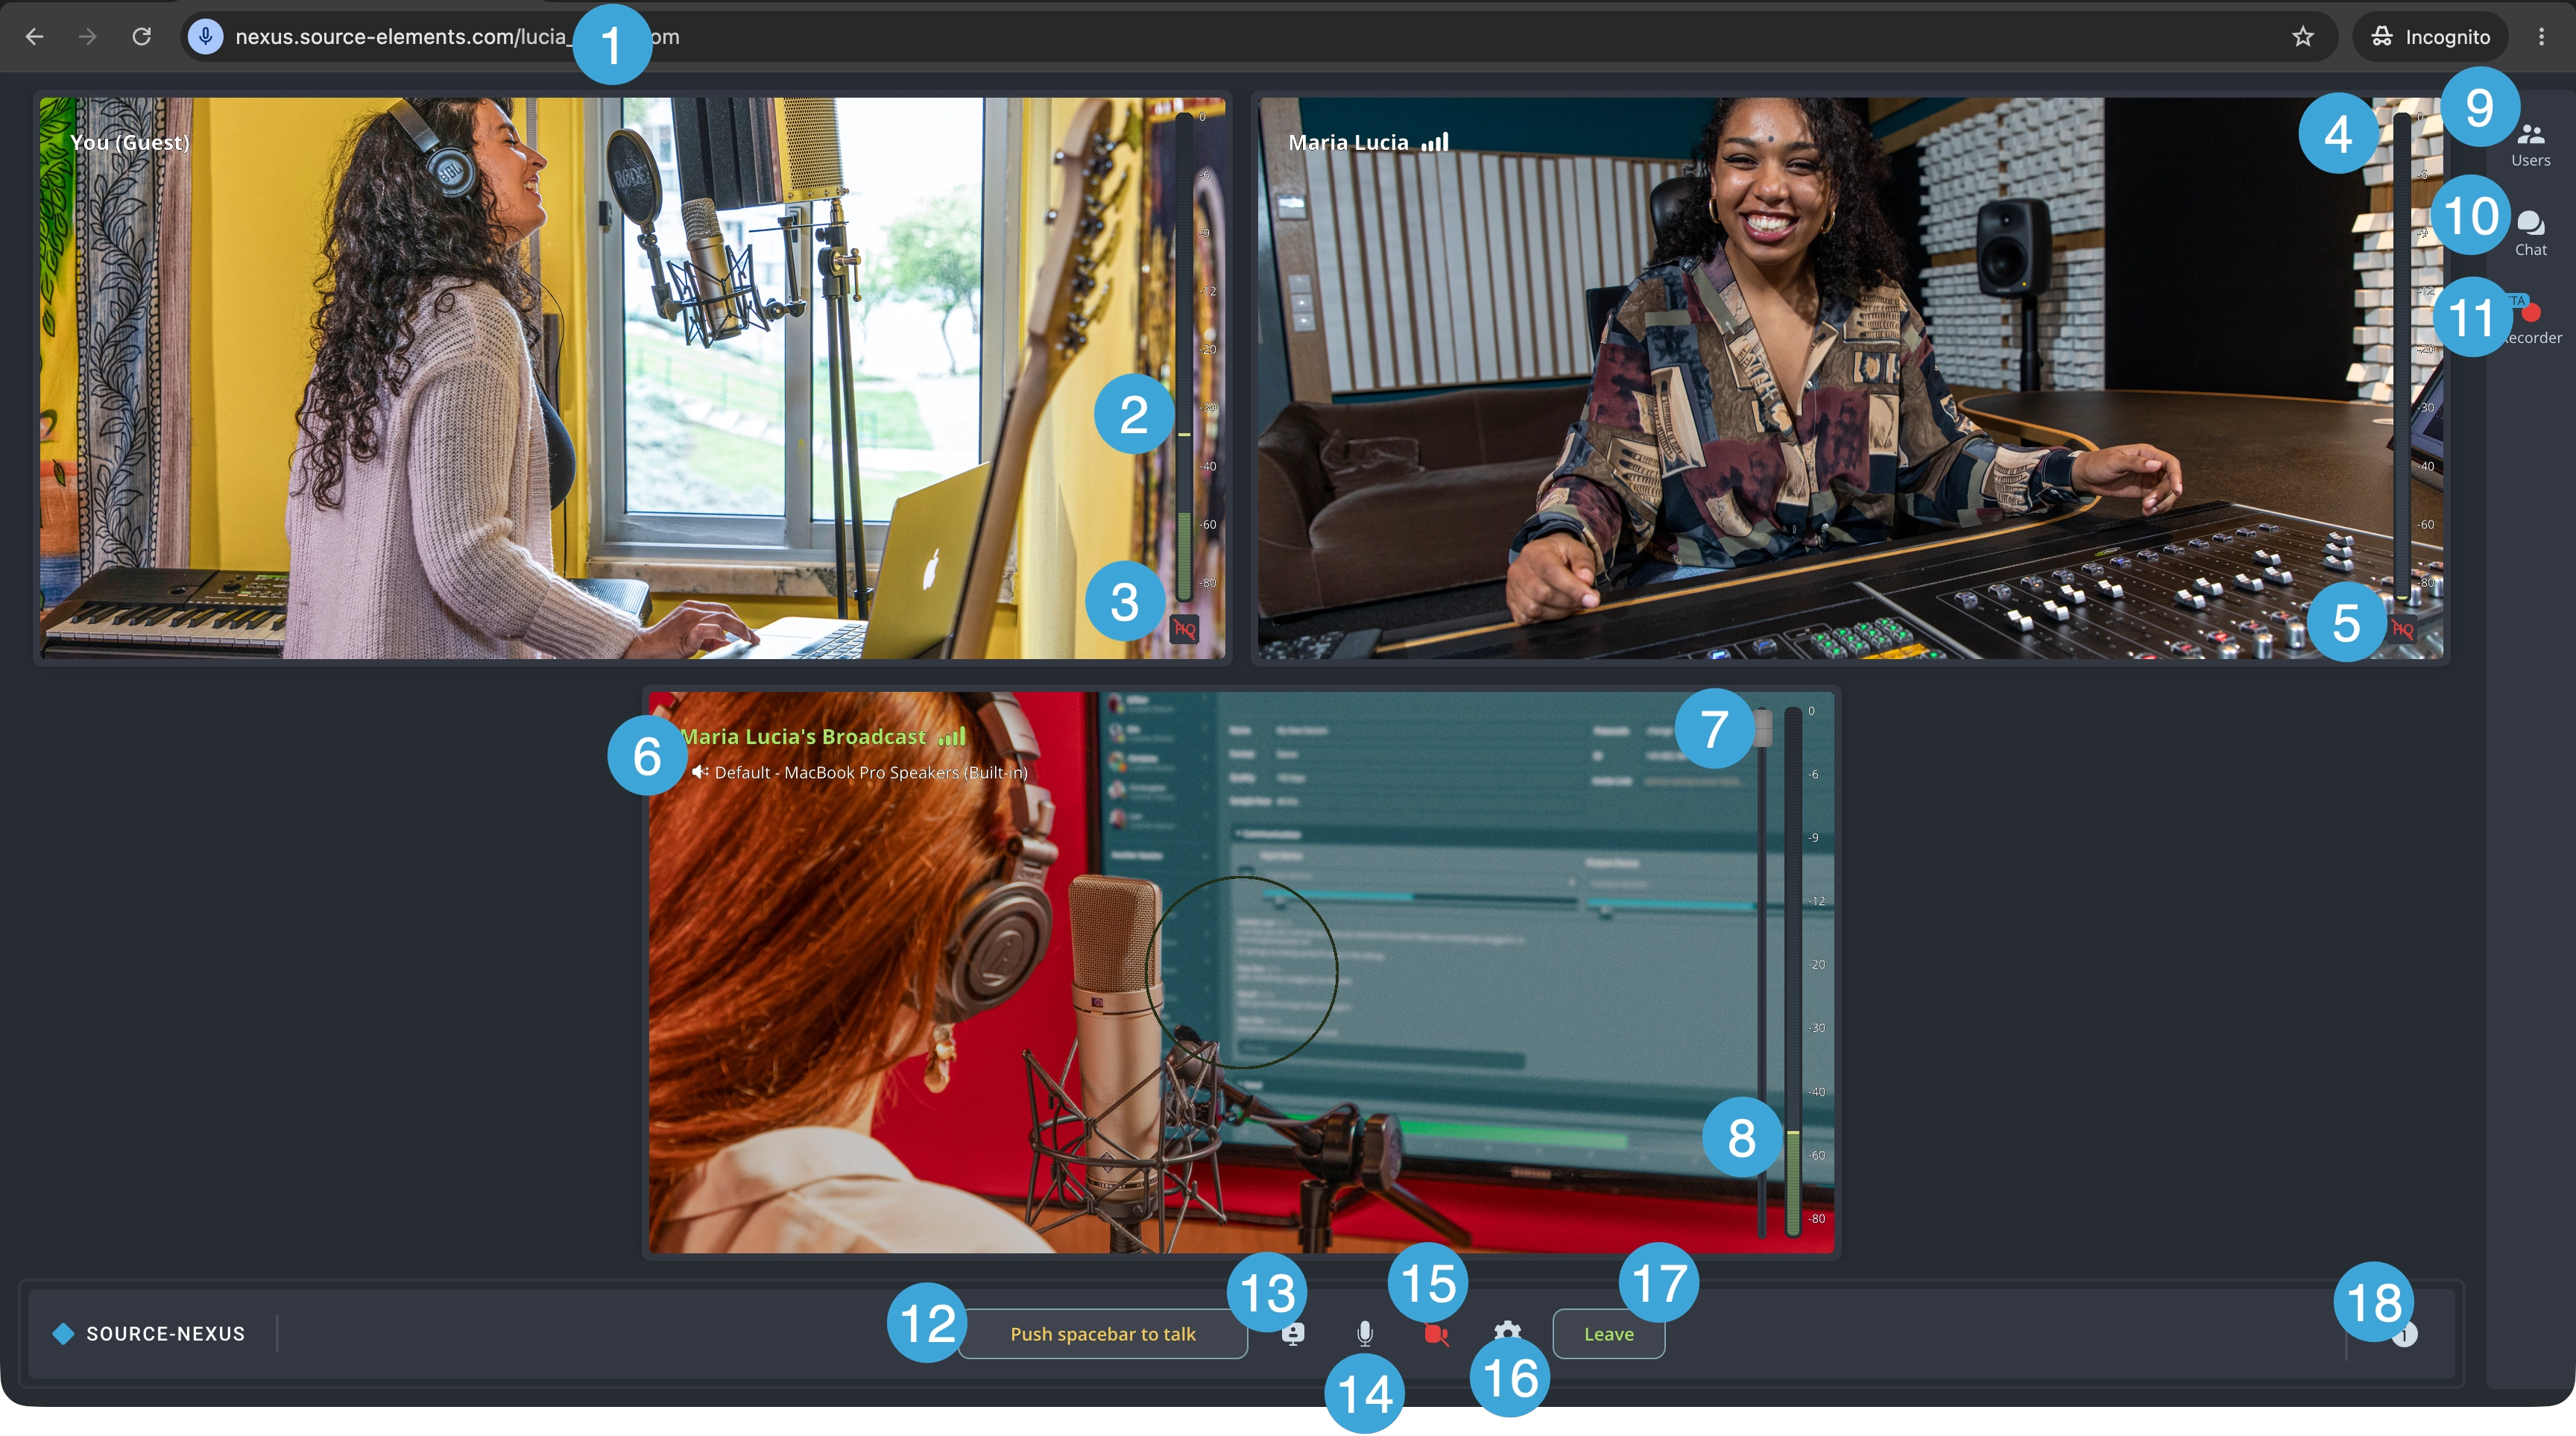
- Room ID. This will be your broadcaster’s Source Elements username. They will send a link via email for you to join.
- Your level meter. This is the audio coming from your own microphone - it is view only.
- Your HQ indicator. If you have turned on 'Use Original Audio (HQ)' > Stereo Audio in the Audio panel of the Chat settings, you will see an HQ indicator on your participant widget. We recommend using original audio for the best quality - you should use headphones to prevent audio feedback.
- Level meter for other participants. This is the audio coming from other participants - it is also view only.
- HQ indicator for other participants. If other users have turned on original audio, you will see the indicator.
- Broadcaster widget. If the room owner is also broadcasting their screen, audio or video, you will see a separate widget in green. You will also be able to choose a separate output for the broadcast if needed by clicking on the device name under the broadcast widget title.
- Broadcaster volume fader. This fader will allow you to control the volume of the audio you are receiveing from the session broadcaster.
- Broadcast level meter. A read-only indicator which, together with the broadcast voume fader, will help you regulate the broadcast volume.
- Users panel. The participants list section will list all participants - including those that do not have their cameras on.
- Chat panel. This section will allow you to send messages to other participants during the call.
- Recorder panel. If the hosts are recording the call, you will see your audio/video recordings displayed on a "Session" list. Once hosts stop recording, you can download your audio/video if needed.
- Push to talk. Pressing the spacebar will allow other participants to hear you, even if you are muted. When your talkback microphone is open, the button will be yellow and read “Release spacebar to mute” instead.
- Sharing panel. When screen sharing is on, the indicator will be green. If no screen is being shared, the indicator will be gray instead.
- Mic on/off. This button will allow you to turn your microphone on/off. This is not a toggle - unlike the push to talk button. You can configure your microphone in the Chat Settings (button 8)
- Camera on/off. This button will allow you to turn your camera on/off for other participants to see you. You can configure your camera in the Chat settings (button 8).
-
Chat settings. The chat settings menu allows you to both enable and change your:
- Microphone (output).
- Camera device.
- Speakers (input) - these cannot be disabled.
- Leave. Clicking this button will remove you from the call.
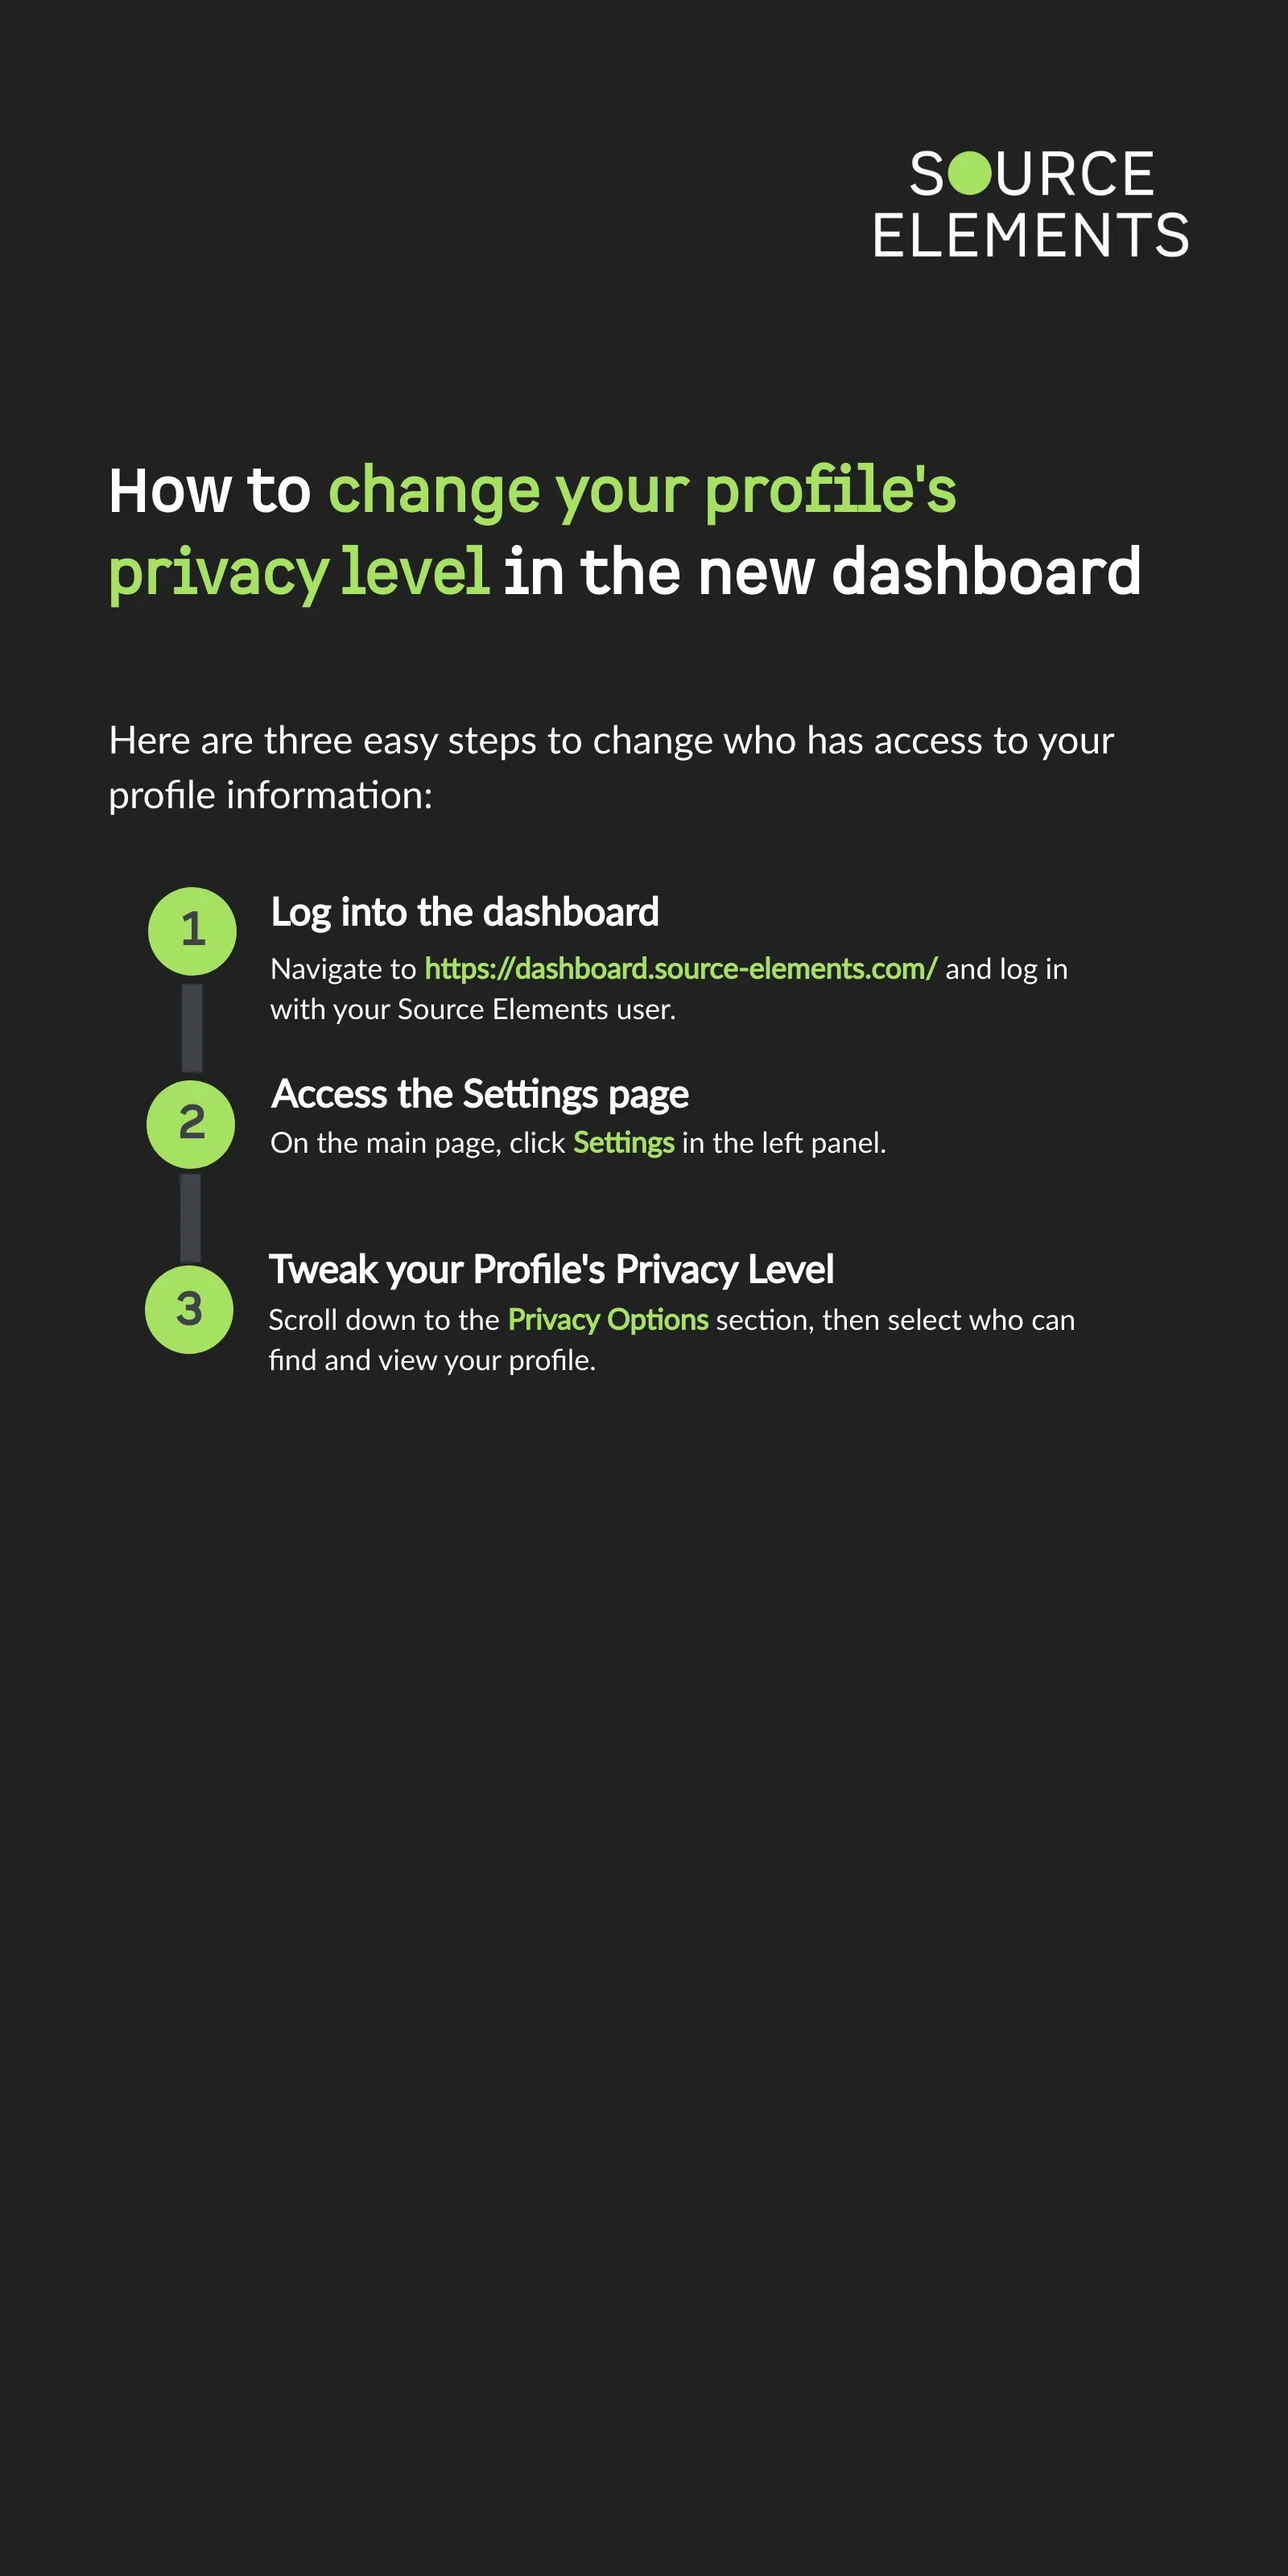
- Host information. Depending on the host's privacy level settings on the user dashboard, you will see their contact information.
Recorder Panel
The existing recorder tool in the Source-Nexus Gateway has been significantly enhanced and optimized to allow hosts capture high-quality audio and video directly within the application. For participants, this means important conversations, performances, interviews, or review sessions can be preserved accurately without relying on separate recording tools. It helps ensure everyone has a clear reference after the call, whether for editing, approvals, documentation, or sharing with team members who could not attend.
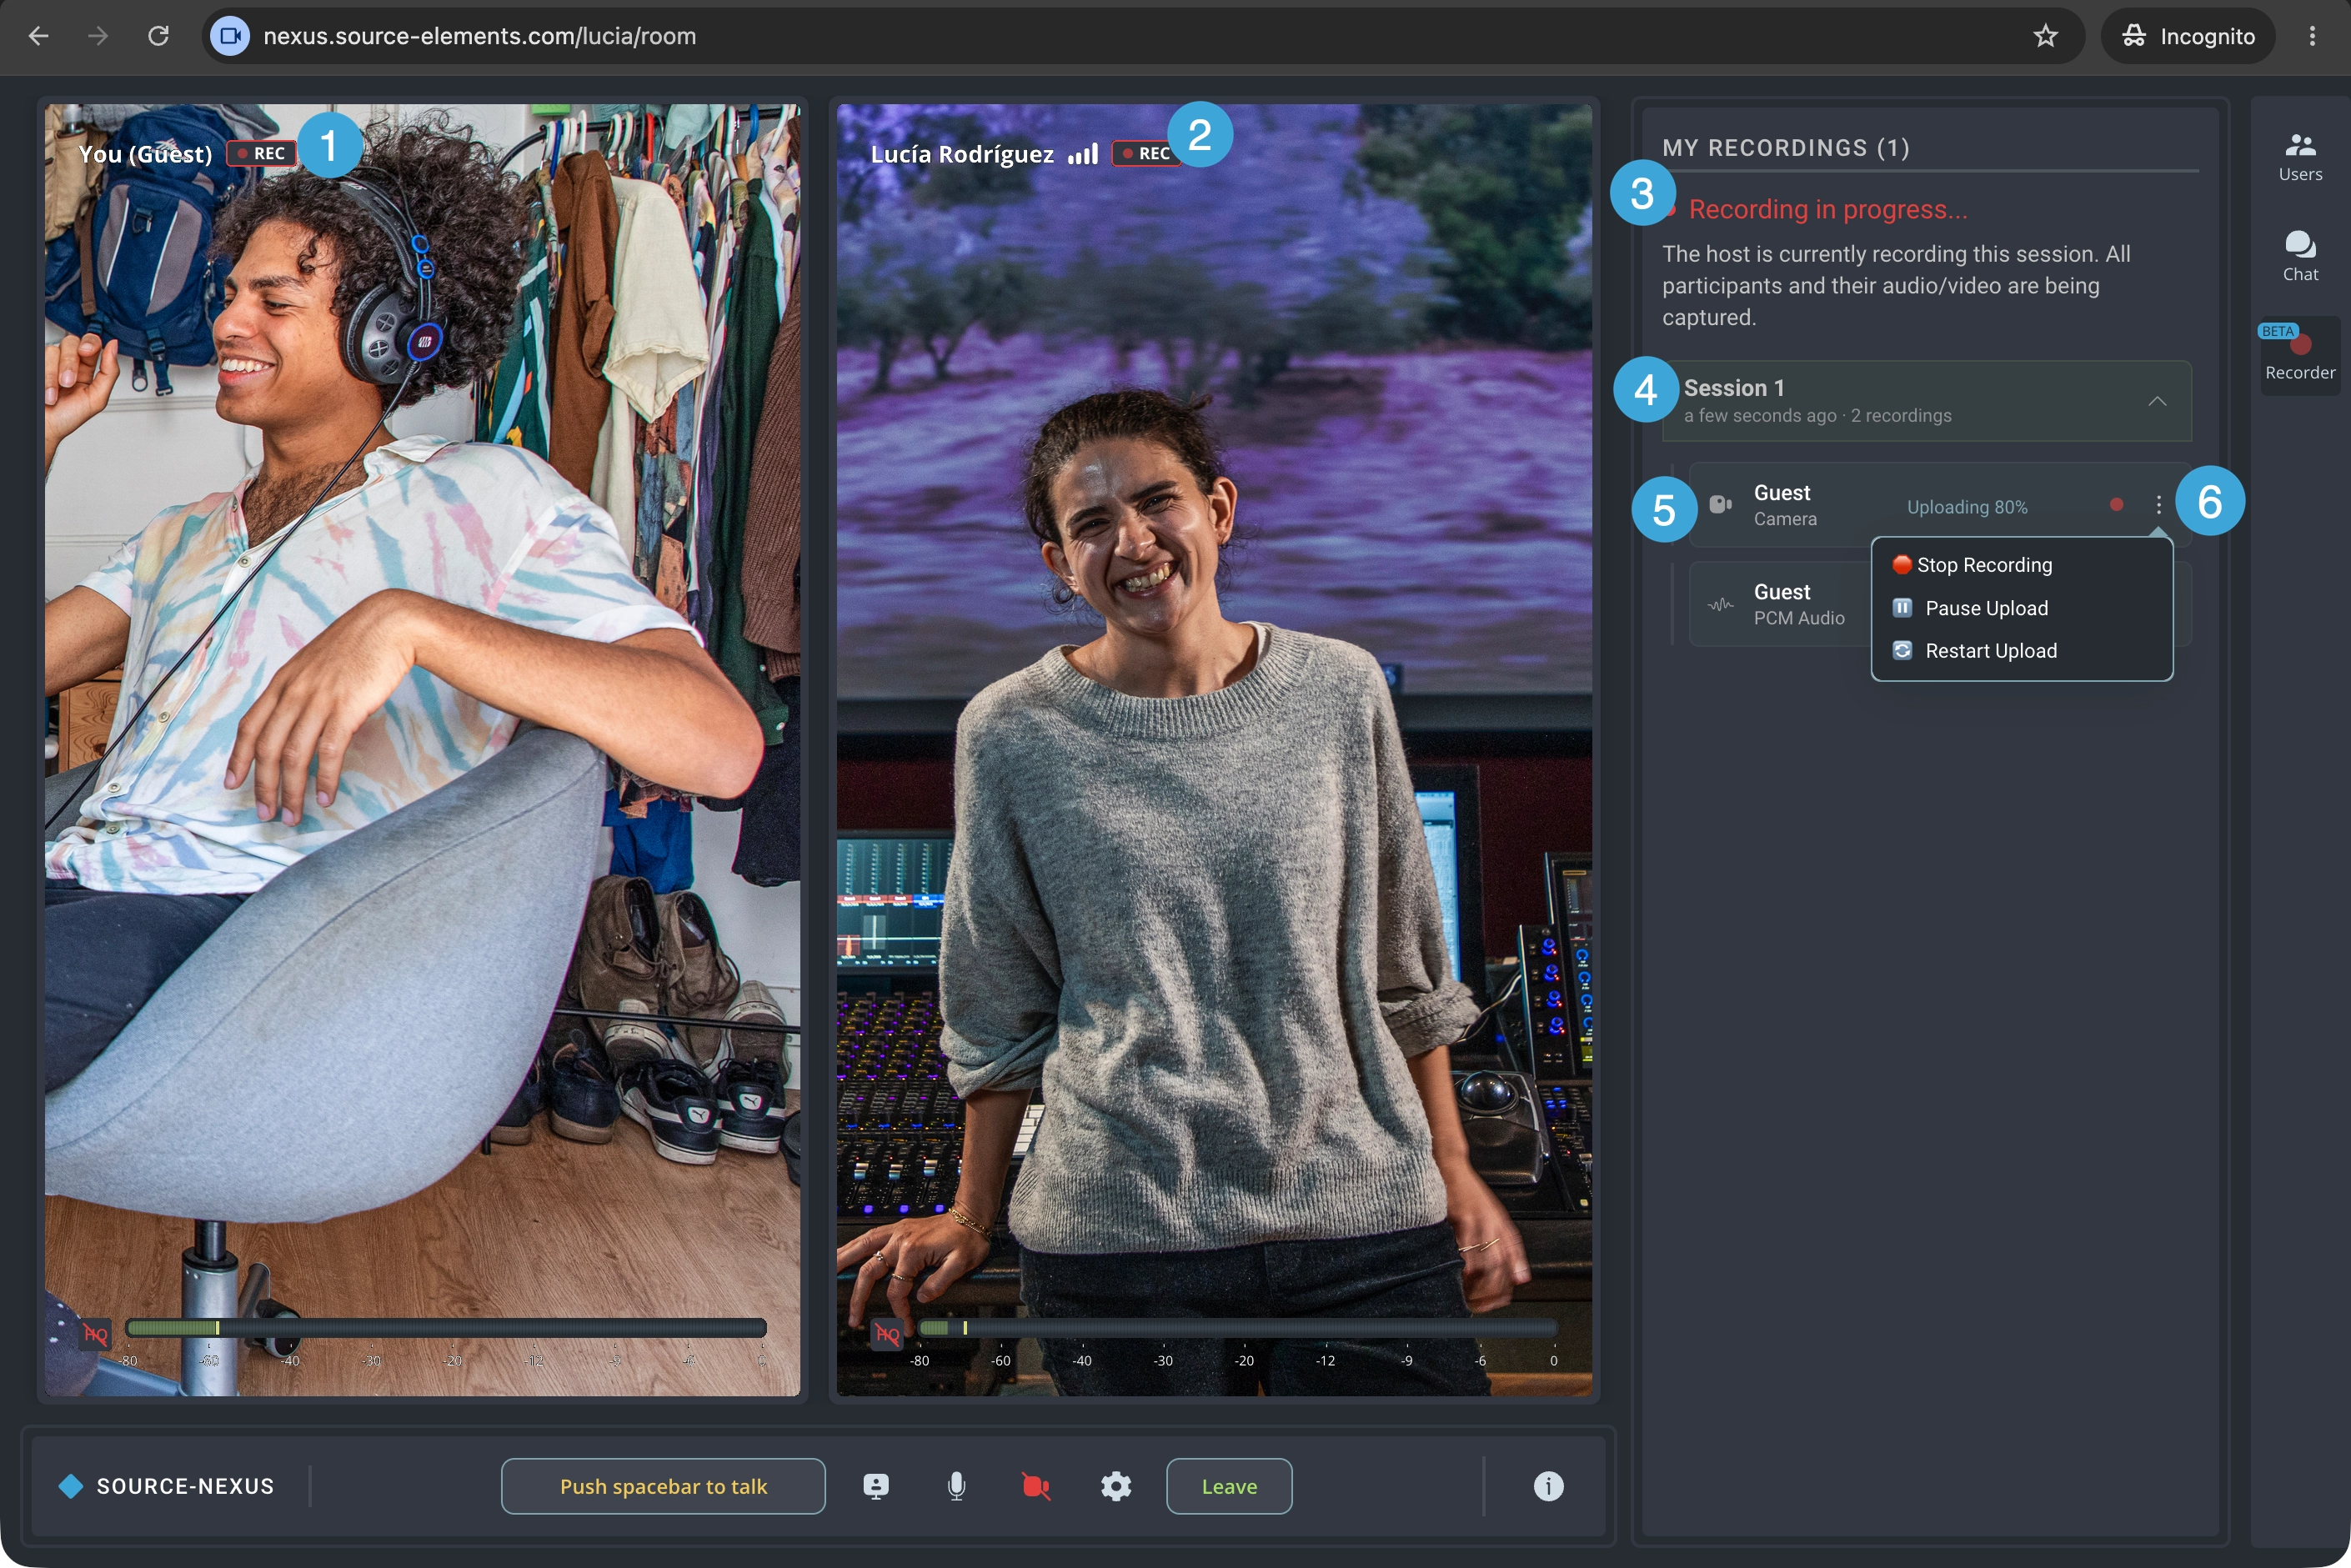
- Recording ON indicator for your own feed. If the broadcaster has opted to record your camera or audio, you will a "REC" indicator next to your name.
- Recording ON indicator for other participants. If the broadcaster has opted to record other participants' audio, camera, or their own, you will see a recording indicator.
- Recording status. If the broadcaster has started recording audio/camera/screens for any participants in the call, you will see a "Recording in progress..." text at the top of the panel. When the recording is done, you will see "Recordings available", if applicable. Otherwise, the panel will be empty.
- Session folders and files. In this area, you will see your audio/camera/screen recordings if the broadcaster has chosen to record the session. It will include as many recordings as they have started.
- Recording type. There will be an icon next to each recording item indicating the type of recording it is (PCM audio, regular audio, camera or screen recordings).
- Available actions for each recorded item.
- Stop recording: this option will completely stop recording your own feed for the duration of the broadcasting session. You cannot resume recording.
- Pause upload: this option will momentarily pause a recording being uploaded. You might want to select it if you notice any network issues or you know your bandwidth might not be enough for all recordings.
- Restart upload: you can restart the upload if you notice the recording might not be getting uploaded and you want the upload to start from scratch again.
Table of Contents