Restore/Replace Sample Setup - Step-by-Step Checklist
This tutorial will use Pro Tools as an example, but the logic behind the DAW part of it can be applied to any other DAW (Reaper, Nuendo, Logic, etc).
What is required to record with Restore/Replace
- Source-Connect and the Source-Connect I/O installed on your computer.
- Any DAW installed.
Steps on your DAW
- Go to Setup > I/O > Bus, and create two mono buses:
- To-SC.
- From-SC
- Create three tracks:
- Audio Track 1, mono.
- Audio Track 2, mono.
- Aux Track 3, mono.
- For Audio Track 1:
- Add a send “To-SC”.
- Set the input as desired.
- Turn on Input Monitoring.
- For Audio Track 2:
- Set the input to “From-SC”.
- Track record enable.
- For Aux Track 3:
- Add an insert for Source-Connect (mono).
- Set the input to “To-SC”.
- Set the output to “From-SC”.
Steps on Source-Connect 4
- Open Source-Connect.
- Set the input to your microphone.
- Set the output to the Source-Connect I/O.
- Make sure Restore & Replace are toggled ON for the user you are calling.
- On the RESTORE/REPLACE tab, make sure the “Watch folder path” is the correct folder. It should be configured to the audio folder of the DAW session (where the audio files from the session are stored).
During the session - on Source-Connect
- Connect to your partner.
During the session - on Pro Tools
When you are ready to record:
- Click the red “Record Enable” button at the top first.
- Click the green “Play” button.
The audio will then be recorded into the “Audio 2” track.
Stop recording in Pro Tools or your DAW when needed. It is recommended that a “take” should not be longer than ONE hour.
After the session - on Source-Connect 4
On Source-Connect:
- Stop the session.
- Go to the RESTORE/REPLACE tab.
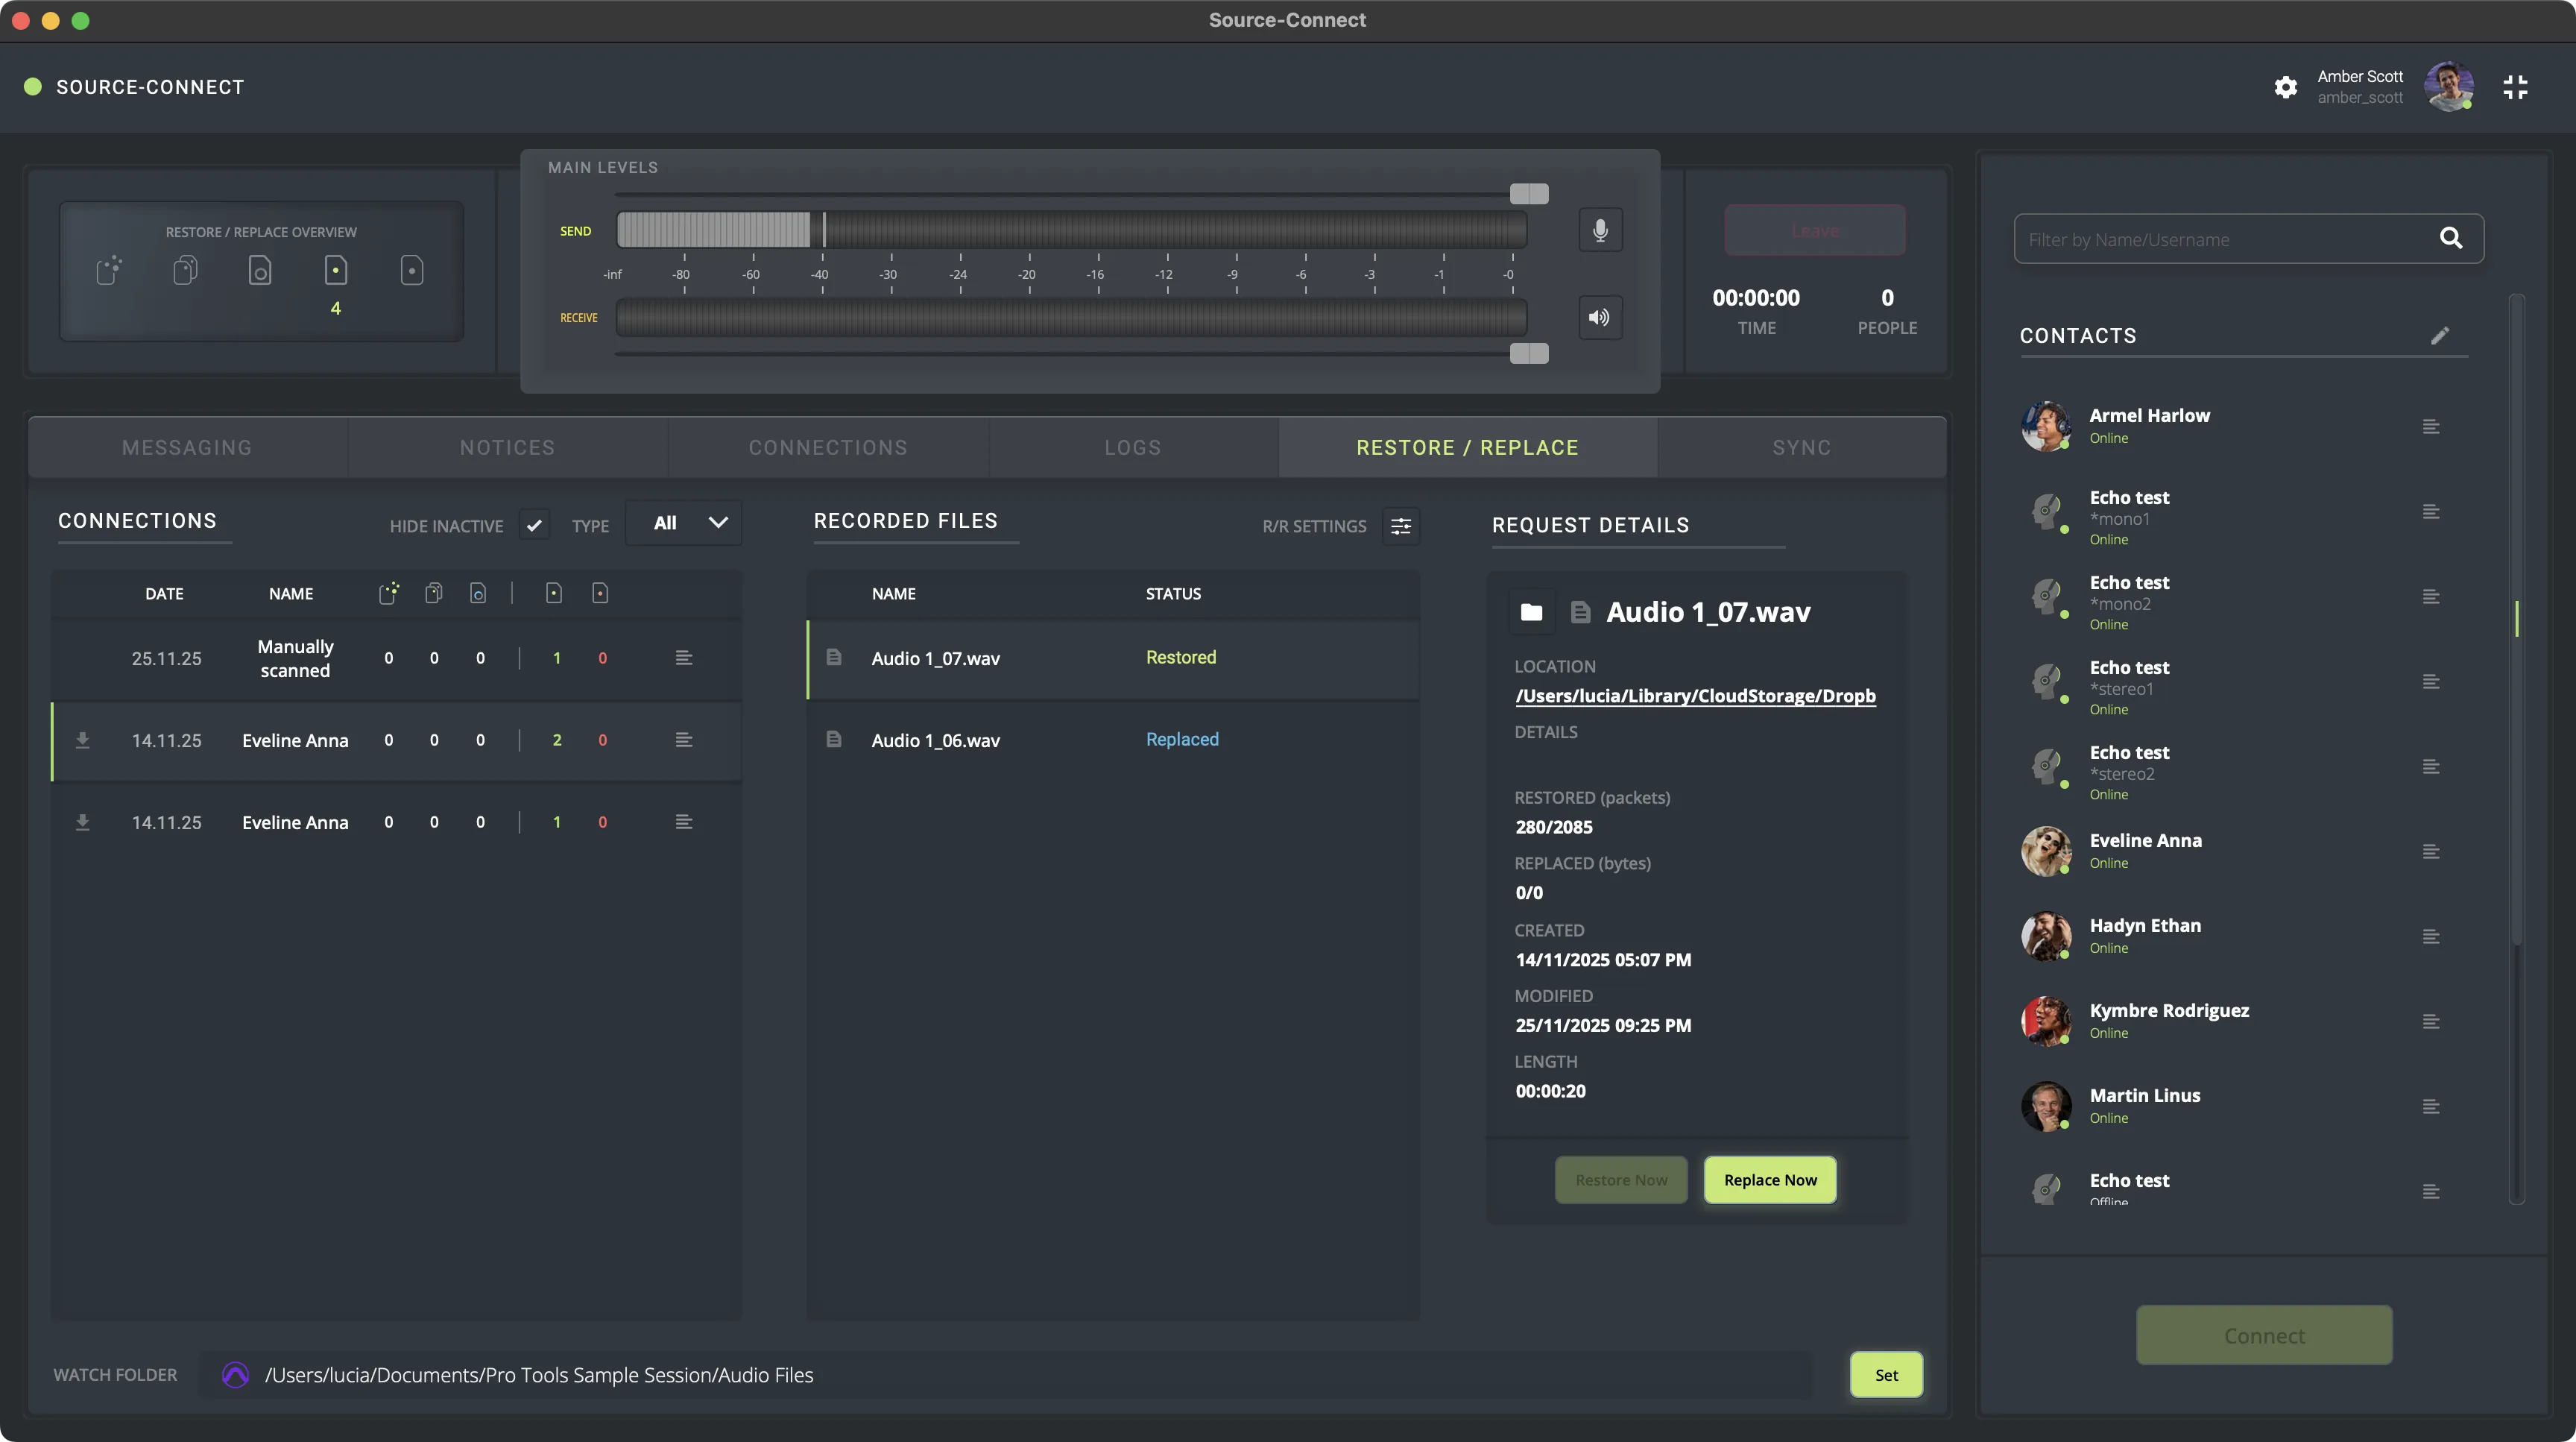
- If all was configured correctly, you will see a new record show up for the session under “Connections” similar to the one below.
- Click the new record that appeared in “Connections”.
- In “RECORDED FILES”, you will see whether or not a restore is required.
Related Links
- The Restore/Replace process in Source-Connect 4
- What is the difference between the Restore and Replace functions?
- How does Restore/Replace work in Source-Connect for Talent?
- Quick Start Guide for Restore / Replace in Source-Connect Studio/Facility
- Quick Start Guide for Restore / Replace in Source-Connect Talent
- The lifecycle of a recording in Source-Connect with Restore & Replace in Source-Connect 4
- The Restore/Replace Panel in Source-Connect Talent: General Overview
- An overview of Restore/Replace in Source-Connect Studio/Facility
- The Restore/Replace Panel: General Overview in Source-Connect Studio/Facility
- Restore/Replace Panel: Recorded Files in Source-Connect Studio/Facility
- Restore/Replace Panel in Source-Connect 4: File Process Status in Source-Connect Talent
- Restore/Replace Panel in Source-Connect 4: File Process Status in Source-Connect Studio/Facility
- Restore/Replace Panel in Source-Connect Talent: Upload Details in Source-Connect Talent
- Restore/Replace Panel: Request Details in Source-Connect Studio/Facility
- Restore/Replace Panel in Source-Connect Talent: Connections Panel Actions in Source-Connect Talent
- Restore/Replace Panel: Connections Panel Actions in Source-Connect Studio/Facility
- Restore/Replace Panel: selecting your Recording Location in Source-Connect Studio/Facility
- Restore/Replace Panel in Source-Connect 4: Deleting all your Cached Audio Data
- How to configure Cubase/Nuendo and Source-Connect 4 Studio/Facility to record incoming audio signal
- How to configure Logic Pro and Source-Connect 4 Studio/Facility to record incoming audio signal
- How to configure Pro Tools and Source-Connect 4 Studio/Facility to record incoming audio signal
- How to configure Reaper and Source-Connect 4 Studio/Facility to record incoming audio signal